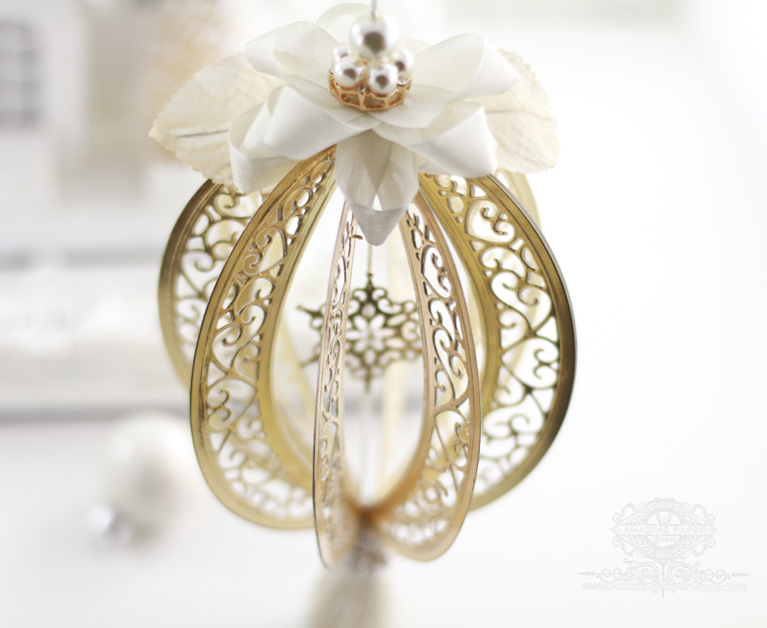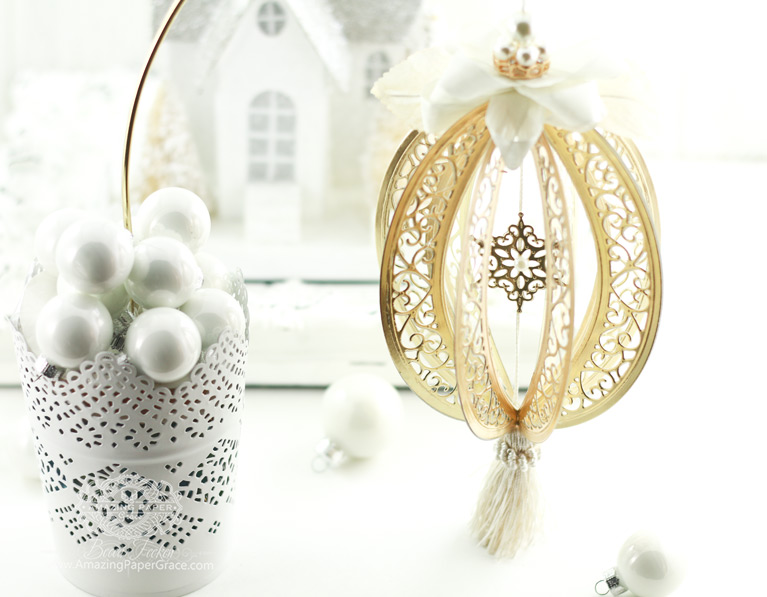
Good morning sweet friends! Just in case you didn’t see this before, today I’m sharing the tutorial for the Bella Rose Die Cut Ornament on my blog – it was the first in the Die Cut Ornament series. (I also have more Creative Team Inspiration with more cards made with the Chantilly Lace Collection.) I posted this picture on Instagram and several of you have made similar ornaments – that simply makes my heart sing! It’s an easy make with eight cuts of the Bella Rose Lattice Layering Frame – except this time I use the inner oval portion along with inserts from the Lunette Arched Borders set. It certainly makes for a signature look ornament that people will notice. One reader even said to hang it over the door with mistletoe for a kissing ball. I love all the ideas that flooded in and I hope you’ll snag the info for a try next year or even this year as the icing on the cake.
Here are links to the other two Die Cut Ornaments I made this season: Multiloop Tiered Bow Die Cut Ornament and Swirl Bliss Pocket Die, Die Cut Ornament.
How to Assemble Your Bella Rose Die Cut Ornament:

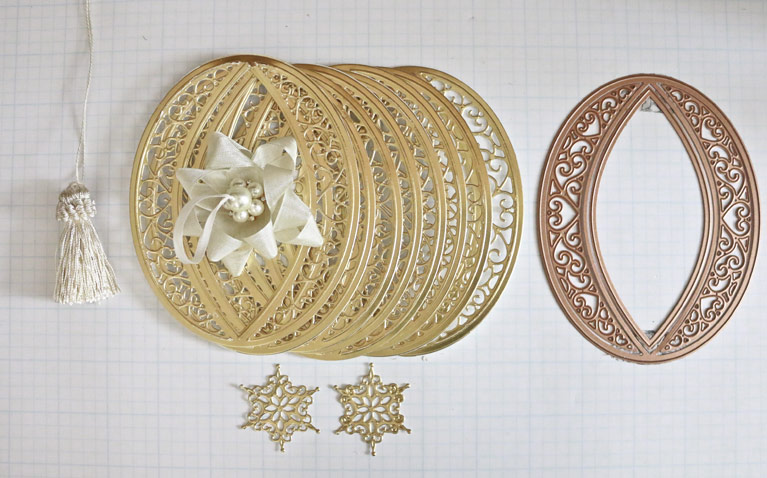
Gather a tassel, bow and embroidery thread. Cut eight ovals with inserts from S6-129 Bella Rose Lattice Layering Frame. I used the heart motifs from S5-330 Lunette Arched Borders for the insert on mine. I also cut two small snowflakes from S3-302 Die D-Lite Snowflakes.

Using Glossy Accents, glue all eight folded elements together. Do this by placing one folded element on table, glue exposed top and stack another element on top of glue. Repeat until all eight pieces are finished. 
Glue snowflakes back to back on thread with tassel and glue thread to edge of stack.

To finish, close the circle by putting glue on the last piece on top and gluing it to the first piece on the bottom of the stack. Embellish by putting a button and bow on top. Your ornament will lay flat for storage, as shown below. If you want your ornament to retain a consistent shape, simply arrange the gores so that they are even and add a dollop of hot glue at top of ornament.

Stamps: None
Paper: Gold Poster Board – Fine Touch – Hobby Lobby
Ink: None
Accessories: Amazing Paper Grace Dies, S6-129 Bella Rose Lattice Layering Frame, S5-330 Lunette Arched Borders, S3-302 Die D-Lite Snowflakes, May Arts Silk Ribbon, Pearl Button, PL-001 Platinum™ Die Cutting And Embossing Machine with 8.5″ Platform, T-001 Tool ‘N One™
Here is some sweet inspiration from the Creative Team to peruse as you sip your holiday hot chocolate or coffee :-)


Another beautiful idea
Good morning Becca, absolutely stunning. I love it.
Love the girls cards too!!!
Have a good one!!!
Loopy Lyndaxxx
Such a beautiful ornament! And the inspiration from your team is absolutely stunning!
Another beautiful creation Becca. So very pretty.. wishing you a very merry Christmas. Sending love and best wishes to you all xx
how lovely they all are.
Your creations are wonderful!
What a beautiful ornament, Becca. I sure have enjoyed your series of pretty ornaments for this season. And thank you to your Team who also have contributed some lovely work to your post today!
GORGEOUS, BECCA!!!! I LOVE the little gold snowflake in the center too!!! This is SUCH A FABULOUS DIE SET that you’ve used!!! ;) Course, ALL of your dies are FABULOUS!!!!!!!!!!! LOL MERRY CHRISTMAS!!!!!!!!!!!!!!!!!! ;)
Beautiful, charming, and joyful!! I need to make these cards! Thank you!
Beautiful cards. Such talent, I’m jealous, it’s so refreshing and relaxing to visit your blog Becca and see all the beauty, thanks for all the hard work ladies?
Hello Becca I have not had time to make one of these
ornaments but I am going to do some after Christmas I
might then have them finished in time for next Christmas lol
Merry Christmas to everyone Hugs PamXXX
Stunning ornament Becca and all the team projects are beautiful too.
Happy Christmas everyone and a happy and healthy 2018
Doreen R
Love all the cards and the ornament is truly amazing!!! I guess I know what I am going to start in July since they say Christmas in July!!!
Merry Christmas and a Happy New Year!! May God bless you!