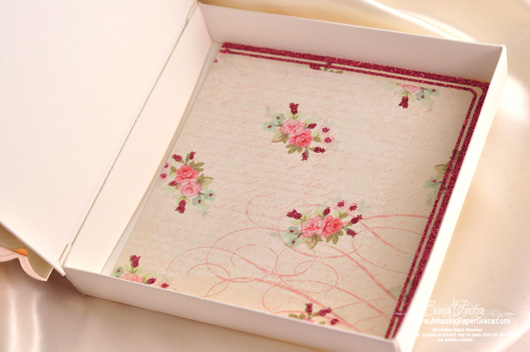
Hi there blog friends. So far so good, right? If you are just joining, I’m sharing a tutorial of a Birdcage Popup Card and Giftbox and yesterday’s tutorial will help you make the card portion. For today, we’re going to put together the box portion of the project and I’m sharing the supplies list again. Hang in there with me – today may seem fairly simple by by breaking things up it leaves me ample room to expand the final tutorial for tomorrow. Instructions are © Becca Feeken – 2011 and cannot be repackaged, reposted on another blog or website, sold on their own or as a class. As always, I ask you to honor the time I have invested in bringing you a unique tutorial by acknowledging credit with a link back to this post. So, let’s get started.
| S5-033 Spellbinders Bird Sanctuary | Lace |
| S4-329 Spellbinders Butterfly Circles | Seam Binding (Hug Snug) |
| LF-127 Spellbinders Grand Scalloped Square | Felt – Green and Burgundy |
| S4-328 Spellbinders Foliage | Pearls – Recollections (Michaels) |
| S4-114 Spellbinders Standard Circles LG | Pearl Stick Pin – (Joann’s) |
| My Minds Eye – Adore Fly Away Paper (HL) | Prima Lace |
| My Minds Eye – Lovely Shabby Chic Paper (HL) | Scor- Pal |
| Antique Linen Distress Ink | Scor-Tape – 1/8″, 1/4″, Sheet Tape |
| Vintage Photo Distress Ink | Velcro Dot |
| Coredinations Tan Pearl | Colorbok Metallic Paper – Gold Foil |
| Coredinations Lavender Pearl | Strathmore Linen Canvas |
| Coredinations Scarlet Pearl | Sewing Machine |
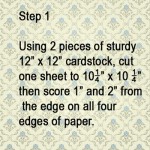
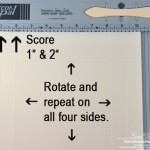
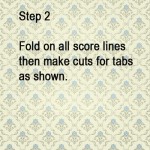
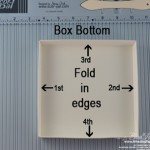
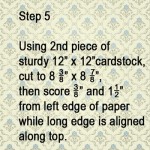
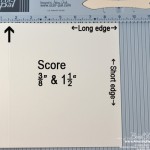
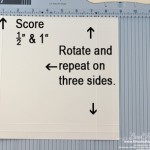
(Click images to enlarge)
Thanks so much for joining me for part two of the bird cage tutorial. Between instructions yesterday and today, we’ve managed to construct the shell that will house the pop up cage – a card and box. All that’s left is the bird cage and securing it. I hope you’ll join me tomorrow as we walk though it.


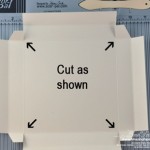
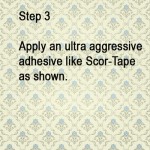
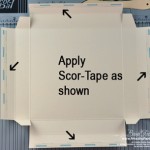
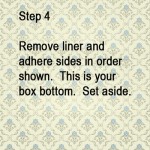



Thank you so much for all the hard work you have put in to making this turorial. It looks fantastic!!!
Thank you for the “everyday” adventures in cardmaking. The new format for instructions is so easy to follow. Can’t wait to finish this! Your project is awesome as usual!!! Hugs.
Many thanks Becca for part 2 of this stunning creation and you make it look so easy. God bless and have a good weekend.
Love Sheila xx
BEAUTIFUL Becca!!!!!!!!!!!! :) Can’t wait to see tomorrows’ tutorial!!!!!! Thank you for ALL THE WORK you do on these tutorials!!!!!!!!!!!
Thanks for part 2. Many of my cards are too high for an envelope so now I can make a box for them to go in.
Just want to thank you again for taking time to show how you made the beautiful bird cage box.
Thank you so much for all the hard work you have put in to making this turorial. This is wonderful and would make a lovely gift box just as it is.
Have a wonderful weekend.
Blessings Bernie
Loving this project so far.. can’t wait for tomorrows tutorial.
Thanks for the step outs, I know how time consuming it is to do. Again I love the finished box. As always Becca, TFS!!! :-D
Thank you for the humungous amount of work you put into this tutorial. You’re a natural teacher, quite aside from the outstanding crafts. It’s appreciated.
Becca, Thanks so much for all the time and effort for this as well as all the other posts that you do. I am looking forward to the last part of this spectacular project.
Becca, Thank you so much for sharing all your projects. I am so looking forward to the 3rd installment.
So far so good! Thanks for sharing this… I know that it takes time and effort to put something like this together. Just want you to know that it’s appreciated! Looking forward to #3.
R/
Thank you for all you do Becca. I’ve learned so much from you and you are so creative. Please don’t give up on us. I just started paper crafting again in Feb and bought my die cutting machine in March and slowly buying my supplies, so I have a lot to do to catch up to your newest designs, keep them coming. I have a lot on my “to do list”. Thanks again