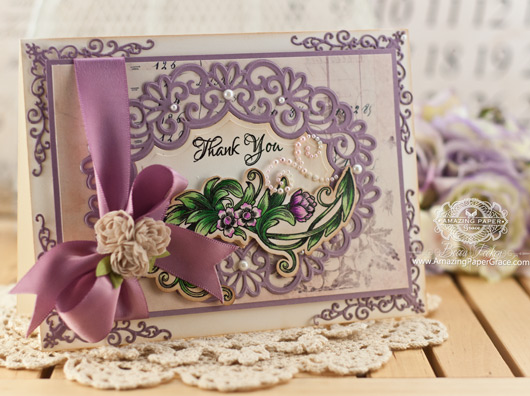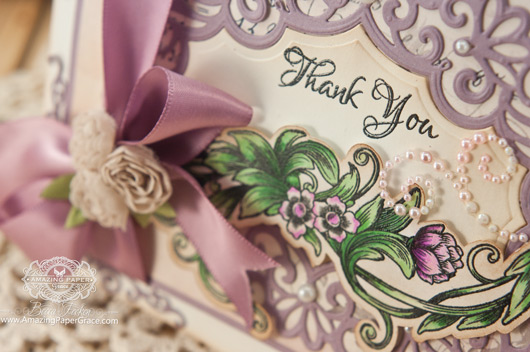 
Good morning blog friends! First things first, I will be doing a tutorial on how I attached the border on the card from Monday HERE. :-) I’m tied up right now and have a release to get through, but I promise I will do it and you are gonna love how to do this!! Just promise you will watch this space. Squeal, you all were so nice about my card that I’m going to be giving away that card – all the more reason to just keep peeking. So on to todays card, isn’t this new Spellbinders Heirloom Oval a piece of gorgeousness? I knew it would be perfect to highlight the new Sentimental Flowers set by JustRite Papercraft. It’s perfect for those who like to fussycut and there are SVG files HERE for those who need it cut quickly.
 
For added victorian accent I used Spellbinders Victorian Corners to draw your eyes to the out corners of the card. My flowers are colored with Spectrum Noir Markers and the background paper is one of my favorites from DigitalbyJanet (I’ve used it several times).
The JustRite Designers had a chance to play with these delightful sets – be sure to stop by and see what they dreamed up.
 
Question Parking Lot
 
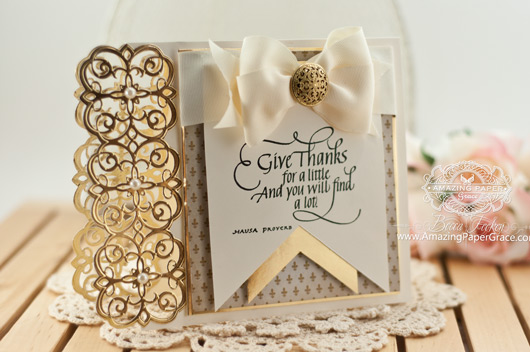
Good morning blog friends, I have a sweet new sentiment by Quietfire Design called Give Thanks and you guessed it, I’m using it for a Thanksgiving Card. Normally I’m off to dinners at a friends house over the holiday, so over the course of the season I make a couple of elegant cards to bring along for the occasion. This card has been languishing on my work table for a couple of weeks while I second guessed if the border could live on the left hand side or not. Lol, I’m being brave today! I’m always looking for some way *not* to make the same cards over in any case, I absolutely love the Spellbinders Mary Border Strip this is my first time to use it!
 
The pennants on the card were simply cut with scissors. To get the border in place I simply cut four border strips then used the border to cut the left edge of the card. I glued the gold edging on top of the cream on the inside and outside of the card. :-) Can’t wait to try this out on the bottom of a card too!
| CRAFT SUPPLIES I USED |
Rubber Stamps: Quietfire Design – Give Thanks
Craft Paper: Neenah Classic Crest Solar White – 80 lb smooth, Gold Cardstock
Ink: Versafine Onyx Black and clear embossing powder
Accessories: Spellbinders Mary Border Strip, Cream Grosgrain Ribbon, Paper Studio Button, Paper Studio Pearls |
Be blessed friends, thanks so much for stopping by!

 
Good morning friends! Today is release day for Waltzingmouse Stamps and three new sets and two dies are now available – Flurries, Jolly Old Elf and Elf Made as well as a series of two label dies – Pretty Panels #1 and Pretty Panels #2. You can see them in full HERE. For the blog hop today please know you can always get your bearings by popping over to the Waltzingmouse Blog, otherwise if you’ve just come from Tosha’s blog, you’re in the right place and I am at the end of the line today. Be sure to visit the Waltzingmouse Blog for the details on a Pin-it to Win it Contest.
 
For my 5-3/4″ square card today the inspiration came from the matting layer of Pretty Panels #1. This was pushed around on my desktop all week and in the end I decided that I would build it into a dainty border in which I could showcase Snowflake 1 Die and a pretty stamped snowflake from Flurries. Do you see it? I simply took the matting layer and laid one across the other like a ‘+’, I thought that was pretty spiffy. Never one to exercise restraint, I did it again, so my bordering layer consists of 4 matting layer outlines all crisscrossed like an “*” asterisk you can see the progression below.
 
I used the Stitched Tags Die Set for my sentiment and cut a notch out of the end. The gorgeous round die is a new die from Spellbinders called Spellbinders Royal Circle.
This adorable little elf was too cute not to make up a quick box and stamp him on a tag. He’s from the Elf Made set and there are a bunch of stamps that will work for your little ones and big little ones – if you know what I mean. I stamped and embossed the snowflake from Flurries onto a gable box and stamped the elf on the largest tag from the Stitched Tags Die Set. All in all, ready to go in less than 10 :-)
 
If you joined in to the hop midstream, you can start at the beginning by visiting Julia Aston. In the meantime, thanks so much for stopping by and I’ll see you soon!!
 
|


those dies are a gorgeous compliment to the pretty flowers!!
GORGEOUS!!!!!!!!!!!!
An absolut stunning card here Becca. I love the beautiful flowers and the gorgeous die cuts really makes them pop out.
LOVE, LOVE, LOVE it, your work is absolutely BEAUTIFUL!!!! And purple just happens to be my favorite color.
God Bless you sweet sister! :)
Hello Becca!
Just been through the blog list, and I’m amazed that I have some of these Dies.
They just sit in their boxes because I have not bothered to stretch myself!
I just love all the cards, and the colours you have used are beautiful!
Looking forward to the Tutorial!
Take care
Love Marg
I try hard to always comment on your blog as I look so forward to seeing what you have come up with. Of course you never cease to amaze me and there are times like this that literally leave me speechless. This is absolutely beautiful. Thanks for sharing.
Hugs
Mstgane
Ann
Happy to see a colored image. Very pretty.
What a gorgeous card! The new oval die is stunning and way you have used it with the stamping and other corner dies, makes for one exquisite card. Love Helen R
Wow! The colors in this card are just perfect, and the design is, well, your usual phenomenonal self. Love the new die!
Love this – it might be an odd thing to say, but If this card had a scent I think it would smell of parma violet sweets (do you have those in the US? I dont care for them much to eat mind! ) Lovn the oval and fab news re the video as I want to have a go at that one. It’s cold and wet here today – autumn has arrived.
Oh, what a luscious beautiful card! I love everything about it! It just couldn’t be prettier. The color, the lacy-ness, the bow, everything!!! Gorgeous!!!
Becca, this is a wonderful card! Wow!
Love your card. Colors are wonderful and design is flawless.
Simply gorgeous Becca. And in my favourite colours too. The Victorian corners are a delight. Hugs Christine xx
Becca,
Thank you, thank you, thank you…can’t wait to see the video…maybe win the card. ;-) Amazing card…love the color and the dies you used…just gorgeous. You and the rest of the ladies did an amazing job with the new stamp set.
wow, this is stunning Becca. Love the dies and love the colors.
Another stunner!
Hugs
Anne (UK) x
Good evening Becca.
This is such a beautiful card and, I can’t believe it, I have the dies!!
Craft room here I come.
xx
WOW!! Stunning. My most favourite card so far and my favourite colour purple. This is beautiful Becca.
Absolutely stunning Becca, such a stunning die this new Oval, definitely on my wish list lol! Love the whole design of the card, fabulous.
Great news on the video tutorial for the boarder, will look forward to that and I would LOVE the chance to win one of your cards.
Love & Hugs
Jacquie J xxx
Absolutely gorgeous. Whoever get this one will want to frame it and put on the wall. Reminds us to be thankful for all things.
Gorgeous!!!!
Lovely Card! I love how the colors are so soft and everything is well balanced! Typical Becca gorgeousness :-)
Becca,
This card is just beautiful. I will have to get these dies so I can make it.
Thank your for your inspiration.
Charlotte
Wow……I love every tiny little thing about this gorgeous card!!
Absolutely stunning Becca. I love the Heirloom oval die it is so pretty. It is due out in the UK soon so I am going to put it to the top of my wish list. Thank you for the continuing inspiration.
OH MY GOODNESS, BECCA!!!! This is SOOOO LOVELY! (swooning here!) I LOOOOOVE this lavender & what you have done with the dies! It is SOOOOOOOOO VICTORIAN & FEMININE! JUST GR\ORGEOUS!!!!!!!! :D (Sprinkled with Lavender water is a MUST!) LOL :D
wow becca, this is awesome. love it!
This is such a majestically beautiful card. I love the Victorian corners, much more the heirloom oval, as well as the color of the ribbon and how you tied it up.
Becca,Sorry I have not said anything lately. Love all your cards.
We are working with an inner-city ministry & it is taking up a lot of time.
But I still take tome to look at all your posts.
You have the most gorgeous dies! This one is a stunner and it is the perfect backdrop for those lovely flowers. You did achieve a very Victorian look and I love it!
Beautiful card! Love the colors, the design and love, love the oval die cut! Can’t wait to get my hands on these!
Hi Becca,
What a lovely card, thank you for sharing. You never cease to inspire.
Have a great day
Hugs, Rose
Oh my , how beautiful and gentle is your card ,i love it Becca.
God Bless .
Elaine H X
The card is beautiful. I love the die. It is so delicate looking.
gorgeous gorgeous gorgeous….
Love these frilly dies. I have been busy working all summer and fall so been missing doing any cards since winter. Hate the snow, but my business slows down and I can be creative. Love these new dies
bonjour becca tes cartes sont toujours aussi sublimes mais je ne viens plus beaucoup depuis que je ne reçois plus par email tes newletter merci pour nos yeux
Good morning Becca,
oh how i really love this card and its beautiful colours and die work.Because of the colours you have chosen and the design of the die, it has gave your work that vintage look and it is just so pretty. Thank you Becca for another beautiful inspiration,
Love and crafty hugs
Norah (Glenochil Village. Scotland)
This is really gorgeous all aspects are perfect. Love the paper too.
Hugs
Kay
this is just over the top gorjuss!! Love the beautiful color combo you used as well. I cased your layout but didn’t have any of the dies you used. I just used what I had in my collection.
I am not getting your newsletters since 2 wks. ago. Will you check if you are using the above email addy? thank you.
Give it to me, give it to me …er….I mean … What an exquisite card. How lucky the recipient will be to receive this card … No, give it to me, LOL.