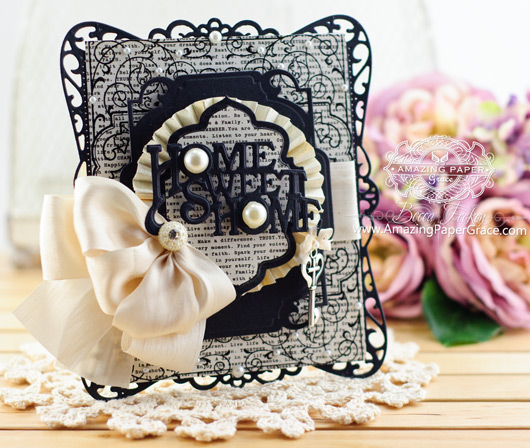 
Good morning sweet friends, popping in to share a card I made at the beginning of the month, it was simply waiting for a bow. Even though it got all bowed up, it’s a masculine card that’s going off to my sweet son who just moved into a new abode. I had new stamps and new dies on hand so this came together quite easily. I was playing around with a gorgeous new JustRite Background called Ironworks Vintage Labels Eight and thought it would be the perfect backdrop for a fairly new Die D’Lite by Spellbinders called Home Sweet Home.
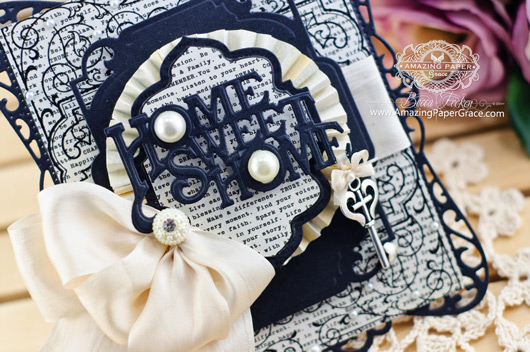 
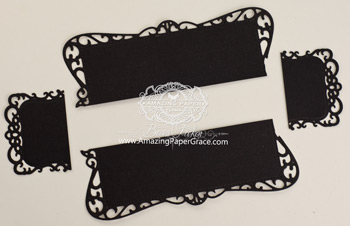
I created the focal panel using Spellbinders Timeless Rectangles and Spellbinders Decorative Labels Eight and my stamped background. On top of that I added Vintage Labels Eight followed by a rosette then another layer of Vintage Labels Eight and finished off with the cut and embossed Home Sweet Home words. So easy. To finish, I glued the focal panel onto a card base that was 11″ by 4-1/4″ scored at 5-3/8″. Below you can see how I assembled the back before putting my stamped panel on top. Pearls were added to the “O” in home so that I would have some way to pop it up using foam tape. Lastly, I had a darling silver key that I hung off of the ‘E”.

That’s all for me today friends, lots of behind the scenes happenings at Amazing Paper Grace as we prepare for annual blog maintenance. I hope to be back tomorrow with another card done earlier in the month. Don’t forget, if you have questions on the posted card, leave a comment and I’ll answer in the Question Parking Lot at the end of each post.
Question Parking Lot:
So sorry friends, it wasn’t until Frances on comment #30 asked me which paper I used that I discovered my product list was missing. It was in my draft but deleted somewhere in the process – I have restored it! The paper pad used was Teresa Collins – Vintage Finds :-)
 
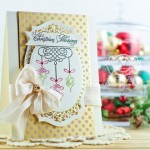
Good morning beautiful friends, today I’m sharing a lovely sentiment by Quietfire Design for a ‘sweet friend’ card called We are Never so Lost. I love that it’s a tall, skinny sentiment and I thought it would fit perfectly on the long oval from Spellbinders Radiant Rectangles. It did fit perfectly and I backed it with the scalloped oval from Spellbinders 5 x 7 Mystical Embrace. Lol, that’s when everything I originally planned for the card went haywire. I love the grid background from Spellbinders Basic Lattice. I’ve been playing around with weaving paper strips from a floral paper through the die cut background but once it was done, I felt that the texture I was looking for was gone – you actually had to look close to see the weaving. So, I decided to pull some of the strips out randomly but then I didn’t care for the pink showing through so I dumped the pink and put the same design paper behind the weaving. Oh the trials, but it works out that way some times.
 
The pink layer and the underlying die cut layer behind the weaving were cut using Spellbinders 5 x 7 Matting Basics A. I finished off with pearls around and a fluffy silk bow. I know you’re thinking the weaving could be tedious? Not so, I cut 7 strips of paper and it took about five minutes. My tweezers were definitely the hero.
Here’s how I made it – step by step:
- Create a card base with pink cardstock that measures 5-1/2″ x 7-1/2″. (Card bases are made with two pieces of 5-1/2″ x 8-1/2″ paper scored and glued as in this Hinge Video.
- With design paper, cut a panel 5-3/8″ x 7-3/8″. Adhere directly to card base.
- Cut/emboss Matting Basics A #7 with pink paper then cut/emboss Matting Basics A #6 with design paper adhere together with smaller on top.
- Cut/emboss Basic Lattice from design paper.
- From same design paper paper cut about 7 strips just shy of 1/4″ wide.
- Weave up and down through randomly picked rows. Place two 1/4″ vertical bands of ribbon on right side of card, tape on back. Adhere to Matting Basics pairing with double foam tape.
- Then, attach focal panel to card base using foam tape.
- Cut/emboss elongated scalloped piece from 5 x 7 Mystical Embrace – attach with double foam tape.
- Cut/emboss long oval from Radiant Rectangles, stamp We Never Are So Lost sentiment then adhere to card base with foam tape.
- Embellish Basic Lattice with pearls.
- Attach loopy bow and mulberry flowers to bottom of oval.
- Add pearls to several of the bow tails.
Thanks so very much for stopping by today. Working on more crafty goodness, so I hope to see you soon!
 
Question Parking Lot:
Posted in >Best of 2014, *Basic Lattice, *Heirloom Legacy - 5 x 7, *Matting Basics A - 5 x 7, *Mystical Embrace - 5 x 7, *Radiant Rectangles, -For A Friend, :Pink, :Yellow, Digital Paper, Quietfire Design, Stamping, |Elegant, |Many Layers
  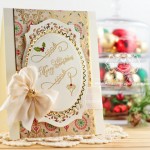  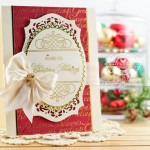 
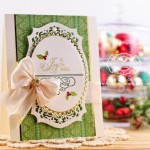  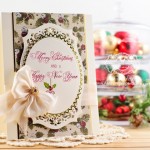   
Well, it had to happen…I made a big goof and because so many people asked me about this card, I thought I would make the correction in its own post. Yes, it draws attention to my silly goof but I want to catch you before you get to a dead end, like Katherine. (By the way, if you left a question in the question parking lot on the post where I share these cards, the answer should be there for you).
Here’s what Katherine said:
Hi Becca,
Love all your cards….You always give great inspiration. I have a question that pertains to the Christmas cards you recently made using the Adorning Labels 25 and Labels 25 however you said you also used Classic Ovals Large. . . I found this to be much too small to fit the sentiments on them . . . could you have possibly used the Grand Ovals LF-110? I hope to hear back from you because I am stuck.
Thanks Becca for your help…
Katherine Hill
Here’s what I said:
gulp….
Well, it seems that when I wasn’t looking my Grand Oval #1 sneaked out and took up residence in the Classic Ovals LG Case and was posing as Classic Ovals LG #6. Had I been on my toes, I would have spotted the imposter immediately because there is no such thing as Classic Ovals LG #6. Even I had to click on the links to prove it to myself! (Dramatic music here) Say it isn’t so . . . Well the nerve of that poser!! I’ve ordered everyone back in their cases where they belong and I feel horrible! I’ve edited my post —–>https://www.amazingpapergrace.com/introducing-amazing-paper-grace-elegant-christmas-swirls/ so that you can see the changes and make a note of them.
Here’s the bottom line:
Instead of Spellbinders Classic Ovals LG, you will need Spellbinders Grand Ovals. Don’t have it? An alternative pairing is the oval from Spellbinders 5 x 7 Heirloom Legacy with Spellbinders Floral Ovals. So sorry for the goof :-)
Happy Friday sweet friends, you bless me so and I hope you have a glorious weekend!
 
|


Exquisite card!
Absolutely beautiful card!
Becca, this is such a lovely card! I love the background stamp so much I immediately without thinking wend and bought it! It is so delicate and wistful and well it will be a delight to use on many of my cards!!! Thank you for sharing your lovely creations here so that we might try and be somewhat as creative as you!!!
Becca,
Gorgeous, oh, sorry, handsome card. I’m sure your son will love it. Would it be possible for you to make a video on this type of, cut up, card? I am more of a visual person.
Adorable, love the black and white. I really like the way you popped up the sentiment. Gorgeous as always
Oh the Timeless Rectangles set is so versatile! Your card reminds me of the countryside, don’t know why for sure! So pretty and elegant.
Love the black with the pearls,even for a guy! I see you use Timeless Rectangles quite a bit so guess that is a frequent go-to die, right?
Your son is gonna love it, Becca!
Hugs,
Mstgane
Ann
Another stunning card. So elegant!
wow Becca, I love the black, so stunningly.
This card speaks to me because my husband is in the hospital. His favorite color is BLUE.
Thanks so much for sharing your talents with us readers. God bless and enjoy your weekend.
FABULOUS as always Becca! Your kids are SO BLESSED to have a mom that sends them these GORGEOUS CREATIONS! :D BLESSINGS!!! :)
Stunning card yet again, Becca. Can I ask what width of ribbon you have used and what widths to prefer? Thank you.
A beautiful card Becca! Is there any chance of a video showing how you put it all together please?
Becca, this is stunning and I just may have to come up with something like this for my son and his other for now. They have moved into their new house also. Thanks for the idea.
Hugs
Hello Becca
A lovely card ,and the key is such a sweet touch..I love the Font on this Die!
Take care
Love Marg
Great card Becca, I’m sure your son will love it. The black is really striking and I never think of cutting up my dies like this. Must give it a go sometime.
This is one of my all-time FAVS Becca!
Thank you for showing this Becca, it looks beautiful when all made up ,i lve it
Take Care
God Bless.
Elaine H X
Hi Becca. Gorgeous card for your Son, I’m sure he will treasure it. Love the background stamp and beautiful dies :-) xx
I’m sure your son is going to love this card. I like how you masculined it up by using black.
Hi Becca,
Such a lovely card, love the design and backing stamp.
Love all your creations.
Love & Hugs
Jacquie J xxx
Beautiful card Becca. Your son will love it. Would love to see a video on how you made it.
Good evening Becca,
It’s 9.39 p.m. in the UK and I have to say that this card is so beautiful. The way to prop up the “Home Sweet Home” was a stroke of genius and a lesson I’ll remember for other awkward die cuts. I’m sure your son will love it, and if he doesn’t – send it to me !!!! xxx
Oh Becca, this is so gorgeous. Absolutely love the key with cross inside a (kind of) heart.
Do hope your son soon settles into his new home.
Hugs
Anne (UK) x
This is beautiful! I love it!
Hi Becca
Just had to leave a comment about your card
It is truly stunning Becca
Thank you for sharing your inspiration
Blessings on you and yours
Theresa xx
Such a beautiful card. I love how you think outside the circle with the dies by cutting them up and layering different sets of dies to get your finished product. It is a great way of getting the most out of your dies!! Thanks for sharing with us all.
Gorgeous!
Love, love, LOVE this card, Becca! It is perfect for your son’s new home with that key – every detail is perfect! Thanks for showing us how you did that neat trick with your dies. I’ve got to remember that one.
Another beautiful card! You inspire me so! I was wondering what text background (stamp or paper?) was under the ironworks background stamp.
Such a cleverly constructed card with the Timeless Rectangles adaption and the way you adhered the sentiment – I am sure your son will love it.
Hi Becca. Your son will love this beautiful card : ) Take care.
This is so beautiful!
How did you get the upper layer of vintage labels eight, the one just on top of the rosette, to cut the text paper and the black rim around it? I can’t make that die cut a border and the center piece? Help!!!