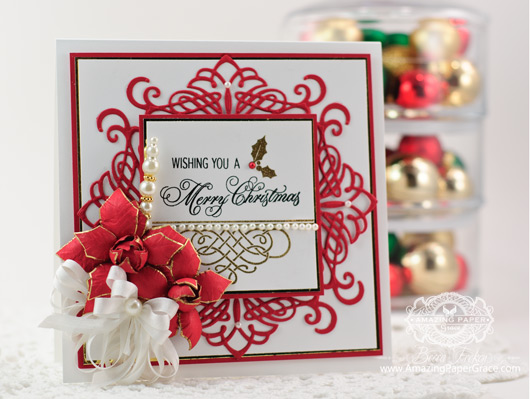
Christmas Card Making Ideas by Becca Feeken using JustRite Heirloom Flourish Two and  Elegant Christmas Swirls

Good morning sweet friends!  Welcome to Day Four of JustRite Papercraft June 2014 Releases.  Lots of goodies today – I have a second new die to share – it’s JustRite Heirloom Flourish Two Die.  Heirloom Flourish One was quite popular so by request comes number two – it’s a sweet little embellishment for a card or can be used to construct borders.  Wait until you see how the other ladies have used it.  I have two cards to share today, the first with the largest side of the die turned outward to make a border on all four sides for a filigree feel.  For the sentiment I used JustRite Elegant Christmas Swirls.
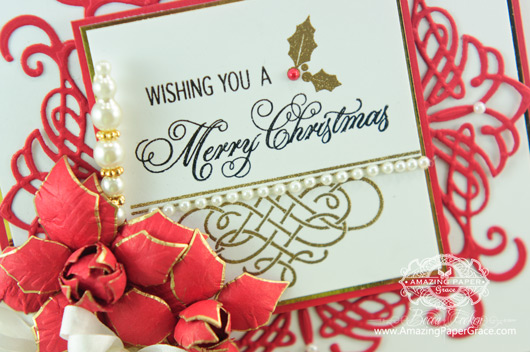
Christmas Card Making Ideas by Becca Feeken using JustRite Heirloom Flourish Two and  Elegant Christmas Swirls (closeup)

One of my all time favorites is Spellbinders Layered Poinsettia . . . to change it up a little bit the leaves are edged with a Krylon gold pen.
CRAFT SUPPLIES I USED 
Rubber Stamps: JustRite Papercraft – JustRite Elegant Christmas Swirls 
Craft Paper: Neenah Classic Crest – Natural White 80 lb, PTI Real Red
Ink:  Versafine Onyx Black, Versamark
Accessories:  JustRite Heirloom Flourish Two DieSpellbinders Classic Squares SM, Spellbinders Layered PoinsettiaThe Paper Studio Pearls, May Arts Silk Ribbon, Krylon Gold Pen, Maya Roads Trinket Pin, Grand Calibur Die Cut Machine

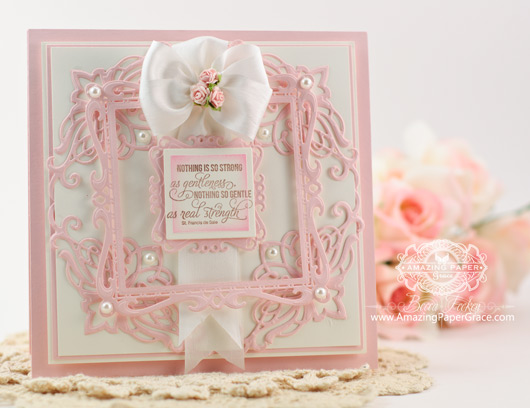
Card making ideas by Becca Feeken using JustRite Heirloom Flourish 2 and Ribbon and Swags Vintage Labels Seven

For the second card I turned JustRite Heirloom Two Flourish Die so the largest side is on the inside and set the dies on each corner to create another filigree border.  It is topped with Spellbinders Captivating Squares and Spellbinders Classic Squares SM with the sentiment coming from JustRite Ribbon and Swags Vintage Labels Seven

WRBF-4317-2014

The card is finished with a bow attached to tails threaded through the frame.  Oh, couldn’t forget the pearls! :-)

CRAFT SUPPLIES I USED 
Rubber Stamps: JustRite Papercraft – JustRite Ribbon and Swags Vintage Labels Seven 
Craft Paper: Neenah Classic Crest – Natural White 80 lb, PTI Sweet Blush
Ink:  Amuse Studio – French Roast,
Accessories:  JustRite Heirloom Two Flourish Die, Spellbinders Classic Squares SM, Spellbinders Captivating SquaresThe Paper Studio Pearls, May Arts Silk Ribbon, Prima Roses, Grand Calibur Die Cut Machine

Be sure to peek in on the other  JustRite Designers – they have some sweet things to share today.

Thanks so much for your sweet words and for stopping by.  I’ll see you soon!


pinTHIS SHAREthis TWEETTHIS EMAILthis
  • Norah McPheeJune 5, 2014 - 9:07 am

    Good afternoon Becca,
    It is a beautiful card you have made with your new flourish buttttt CHRISTMAS. I will keep in store for next month when i start getting organised again for that time of the year. Thank you for putting up a beautiful card though,
    Love and crafty hugs
    Norah (Glenochil, Scotland)ReplyCancel

  • Norah McPheeJune 5, 2014 - 9:11 am

    OOOhhhh i missed the 2nd one. Oh it is beautiful Becca, this one that i really need to get your new dies now as the pink card is stunning Thank you for the inspiration that you send us as each time i see one of your cards it is like no other crafter. I wonder how many of us can guess a Becca card at 100 yds?
    Thank you flower,
    Love Norah again.ReplyCancel

  • Clare WJune 5, 2014 - 9:25 am

    Love both of these – this die is another must get.ReplyCancel

  • Joanna DicksonJune 5, 2014 - 9:31 am

    So beautiful Becca. OMG Christmas. Well, I suppose the time has come for craters to start thinking about it.
    Lots of crafty love
    Jo xxReplyCancel

  • RaquelJune 5, 2014 - 9:31 am

    Happy Morning to you Becca-these cards are so beautiful-the poinsettia looks so real. Will you be showing how to make the poinsettia? Thank you for all you share. May you have a blessed and happy day.ReplyCancel

  • Ann RobbinsJune 5, 2014 - 9:32 am

    Will be ordering as soon as I am done here. Breathtaking to say least. Love what u did with the poi tesserae. And of course pink is always a fve of mine
    Hugs and congrats on your (our) new die
    Mstgane
    AnnReplyCancel

  • MaryannJune 5, 2014 - 9:40 am

    Oh boy these 2 are soo beautiful too, and especially the pink one just jumped right into my heart here, soooo gorgeous Becca, you just never disappoint us.ReplyCancel

  • ElaineJune 5, 2014 - 9:42 am

    Just beautiful as always ,xReplyCancel

  • Becky GreenJune 5, 2014 - 9:47 am

    Oh my Becca! What ELEGANCE! I would do the same thing to those poinsettia leaves! Pure elegance! I am loving that new die of yours! :DReplyCancel

  • Christine Harrop, Oxfordshire, UKJune 5, 2014 - 9:51 am

    Two fabulous cards! Love the way you have used the flourish die on the pink card!! Hugs Christine xxReplyCancel

  • ChelseaJune 5, 2014 - 10:12 am

    Mercy! Gorgeous!!! Must have new dies!! These cards are fabulous!!! You really are a paper genius, Becca. I think you should change your blog name to Paper Genius At Play or something like that….
    Thank you for the inspiration and beauty you add to my day!ReplyCancel

  • margaret driscoll UKJune 5, 2014 - 10:15 am

    Hello Becca
    I’m looking forward to the Heirloom 2 Die……. I had 1, and use it so much you are clever …….they are so intricate!
    Thank you Becca!
    Love Both these cards
    Love MargReplyCancel

  • EveleneJune 5, 2014 - 10:39 am

    Two stunningly beautiful cards that never fail to make my day!! Love the way you laid out the flourish die.ReplyCancel

  • Jacquie JacobsJune 5, 2014 - 10:43 am

    Two stunning cards Becca and I do love this die. Your bows always look amazing.

    Love & Hugs

    Jacquie J xxxReplyCancel

  • Susi KJune 5, 2014 - 10:46 am

    Dear, dear me … those cards are simply GORGEOUS! Love the different ways you used that Heirloom Flourish die.ReplyCancel

  • Clare CurcioJune 5, 2014 - 10:48 am

    Beautiful work, Becca. It’s never to early to start Christmas cards! :)ReplyCancel

  • Mary SchmidtJune 5, 2014 - 10:54 am

    Becca, To design these intricate dies and how you layer them all together is amazing! They are beautiful!ReplyCancel

  • Cathy HomanJune 5, 2014 - 11:58 am

    OMG – I wish I had all your dies!!!!! These cards are gorgeous. Thanks for what you do – you do it soooo well.ReplyCancel

  • CraftysusanJune 5, 2014 - 12:36 pm

    Gorgeous cards Becca. I must take a closer look at the justrite Christmas stamps. Thanks for taking the time to show us your lovely creations. xReplyCancel

  • christiJune 5, 2014 - 1:39 pm

    beautiful cards. love your creative spirit. always finding a new way to use things. so wonderful.ReplyCancel

  • Maureen KillenJune 5, 2014 - 2:07 pm

    Good Evening Becca,
    It’s 8.03 p.m. in the U.K. and I’m late posting as my eldest granddaughter (Eleanor, 10 years old) was off school poorly today and we (my better half and I) looked after her.
    Your cards are simply divine, and I second every comment that’s been made so far. I don’t mind Christmas cards in June, as I make them all year! That way, when Christmas arrives I’m not dashing at the last minute.
    Take care, enjoy your day xxReplyCancel

  • HelenJune 5, 2014 - 2:30 pm

    Amazing beautiful cards. the dies are so gorgeous. I love the results they give. Thank you for sharing, I just love it when you post, I am NEVER disappointed. Love HelenReplyCancel

  • Patricia HowarthJune 5, 2014 - 2:56 pm

    Hi Becca, Truly gorgeous cards.
    Lots of love from Patricia xxReplyCancel

  • Ruth UKJune 5, 2014 - 3:35 pm

    Always love your cards Becca and the new dies are lovely,
    XxxRuthReplyCancel

  • Blue RoseJune 5, 2014 - 5:17 pm

    Becca,
    Both cards are awesome. Love the way you manipulate your dies to give them a very different look and feel. You have amazing talent.ReplyCancel

  • ConniecrafterJune 5, 2014 - 5:23 pm

    Oh my they are both gorgeous, such creative way of using the flourish dies, the flowers with the gold are just beautiful on the first and love the layering of the dies on the second!ReplyCancel

  • Dorina DJune 5, 2014 - 7:36 pm

    Stunning holiday card. that is just gorgeous. Love that die. thanks for sharing your beautiful work.ReplyCancel

  • Carol H.June 5, 2014 - 8:02 pm

    You, and your talent, are AMAZING! I always know when I get the email for a blog post from you that it will be beautiful and heartfelt. Thank you.ReplyCancel

  • RebekkaJune 5, 2014 - 10:55 pm

    WOW..BOTH OF THESE ARE JUST STUNNING BECCA! I LOVE THIS DIE.ReplyCancel

  • Marilyn in E-TownJune 5, 2014 - 11:44 pm

    OMGosh Christmas already, impressive and beautiful card. Love your pink card to, so sweet.ReplyCancel

  • RoseJune 6, 2014 - 12:26 am

    Hi Becca,
    both cards are absolutely beautiful, but the red of the first card is more my colour. Love what you have done with your dies.
    Hugs, RoseReplyCancel

  • NoreenJune 6, 2014 - 1:49 am

    Your red and white card is strikingly beautiful! Lovely for Christmas.ReplyCancel

  • LaceladyJune 6, 2014 - 5:27 am

    Wow, I love that die, and what you have done with them – the cards are really lovely.ReplyCancel

  • Mrs BJune 6, 2014 - 5:59 pm

    Hi Becca. Beautiful cards, the new goodies are lovely : ) Take care.ReplyCancel

  • Beth EllisJune 7, 2014 - 12:58 pm

    MORE lovelies! I especially like the Christmas card. Thanks again for sharing your talents with all of us.ReplyCancel

  • Terri WJune 8, 2014 - 7:49 am

    Just gorgeous Becca!ReplyCancel

  • LageneJune 8, 2014 - 1:17 pm

    OH my goodness! ELEGANT, AMAZING cards, I love the intricate dies!ReplyCancel

  • Anne (UK)June 12, 2014 - 3:06 am

    Just adore these! Fabulous!
    Hugs
    Anne (UK) xReplyCancel

  • Petra SzakallJune 12, 2014 - 6:30 am

    So very, very pretty!ReplyCancel

 Thank you Card Making Ideas by Becca Feeken using  JustRite Vintage Filigree Layers and Spellbinders A2 Filigree Delight

Hi there friends, today is Day Three of JustRite Papercraft’s June 2014 release.  Today there are new stamp sets to see and I have a new die releasing.  I’m so excited about the Vintage Filigree Layer Die – it’s a medium sized die – just right to layer on top of most labels and fabulous to layer under most sentiment sized dies for a frilly layer (I’m showing you examples of both of these today).   For my first card, I’m layering it underneath a small sentiment sized element.   I  knew it would work fabulously inside the oval opening of Spellbinders A2 Filigree Delight, not too big and not too small — fitting just between the oval the the smallest A2 Filigree element.  When I designed it I was trying to think of something to add to the dies we already have in our stashes, to further embellish :-)

Thank you Card Making Ideas by Becca Feeken using  JustRite Vintage Filigree Layers and Spellbinders A2 Filigree Delight
For my card I cut both layers of A2 Filigree Delight at the same time.  In addition, I cut a large oval to fill the oval hole in the back side of the card.  On the front side I simply cut Vintage Filigree Layers and added the smallest element from A2 Filigree Delight – you can see from the picture that it fits into dips on both edges of that element.  The sentiment comes from Rose Bouquet Vintage Labels Seven.

CRAFT SUPPLIES I USED 
Rubber Stamps: JustRite Papercraft – Rose Bouquet Vintage Labels Seven
Craft Paper: Coredinations, Neenah Classic Crest – Natural White 80 lb, Bazzill
Ink:  Versafine Onyx Black, Victorian Velvet Distress Ink
Accessories:  JustRite Vintage Filigree Layer Die, Spellbinders A2 Filigree DelightThe Paper Studio Pearls, May Arts Silk Ribbon, Grand Calibur Die Cut Machine

Congrats Card Making Ideas by Becca Feeken using Vintage Filigree Layers and Spellbinders Scalloped Borders One and Two

For my second card I’m showing you how to add Vintage Filigree on top of a plain labels die to give it some fun embellishment.   I double cut Spellbinders A2 Scalloped Borders One and Spellbinders A2 Scalloped Border Two on the top and bottom of a panel.  The panel is layered with Spellbinders Labels Twenty and then I added the JustRite Vintage Filigree Layer Die.  The sentiments are from JustRite Celebrations Labels One

WRBF-4316-2014

CRAFT SUPPLIES I USED 
Rubber Stamps: JustRite Papercraft – JustRite Celebrations Labels One
Craft Paper: Coredinations, Neenah Classic Crest – Natural White 80 lb, Blue cardstock
Ink:  Versafine Onyx Black
Accessories:  JustRite Vintage Filigree Layer Die, Spellbinders A2 Scalloped Borders One, Spellbinders A2 Scalloped Borders TwoThe Paper Studio Pearls, May Arts Silk Ribbon, Grand Calibur Die Cut Machine

The JustRite Designers have made some lovely creations – be sure to peek in and see what they made.

Tomorrow I have a new die and a new stamp set . . . I hope you’ll come and see :-)


pinTHIS SHAREthis TWEETTHIS EMAILthis
  • Joan FrickerJune 4, 2014 - 9:12 am

    Becca, both of these cards are gorgeous. I love the soft colors and the dies are beautiful. As always, your work is suberb!!!!
    Hugs
    JoanReplyCancel

  • Marilyn in E-TownJune 4, 2014 - 9:13 am

    Gorgeous cards and dies! I can’t wait to get my hands on these new dies!ReplyCancel

  • Theresa KJune 4, 2014 - 9:15 am

    Really pretty! I got the Big Shot diecutting machine and tried using the spellbinders dies in them and they didn’t cut all the way through. What did I do wrong?ReplyCancel

  • AndreaJune 4, 2014 - 9:19 am

    I love these cards. You are such and inspiration!ReplyCancel

  • MaryannJune 4, 2014 - 9:20 am

    Oh Becca these are so beautiful and sooo romantic cards here today. I love the soft romantic look on both the stamps, dies and the colors too, they´re so soooo gorgeous made. You simply rock lady.ReplyCancel

  • Joanna DicksonJune 4, 2014 - 9:40 am

    So very pretty. They look so dainty. Lots of crafty love, Jo xxReplyCancel

  • Susi KJune 4, 2014 - 9:55 am

    Oh .. My … Goodness! Such beauties!ReplyCancel

  • Dolly LaBelleJune 4, 2014 - 10:00 am

    Simply beautiful card.ReplyCancel

  • Dorina DJune 4, 2014 - 10:03 am

    Gorgeous Card. Love the layers. Beautiful workReplyCancel

  • Cathy HomanJune 4, 2014 - 10:03 am

    Both cards are wonderful. I wish I had these dies, they are really stunning.ReplyCancel

  • Kathy JoJune 4, 2014 - 10:06 am

    Beautiful cards and what a gorgeous die!ReplyCancel

  • ChelseaJune 4, 2014 - 10:15 am

    OOOoooH! I’m so excited to get your new die!!! It is gorgeous! You know how I love the lacy stuff – this will be a wonderful addition to my arsenal. The cards you have made here are so pretty. What a wonderful use of the lacy filagree theme. Absolutely fabulous!!! Thank you so very much, Becca!!!ReplyCancel

  • Clare WJune 4, 2014 - 10:25 am

    2 great cards – your new die is a must have! Love it.ReplyCancel

  • Judy BJune 4, 2014 - 10:26 am

    Such beautiful cards! I love looking at your work and seeing how you put your cards together. You are so inspiring to me. Thanks for sharing.ReplyCancel

  • Crafty.EileenJune 4, 2014 - 11:21 am

    I love those dies….your work as always is beautiful Becca.
    You never fail to produce gorgeous cards.
    Hugs Eileen U.K.ReplyCancel

  • Maureen KillenJune 4, 2014 - 11:40 am

    Good afternoon Becca,
    These cards are both gorgeous but I really love the first one most. As soon as I saw it I thought of my late mother (who’s birthday would have been today) as she was a lacy, pink or lilac lady!
    I hope you are well and have a good day xx

    Theresa K, I find that my spellbinder dies cut best in the Grand Calibur, I’ve also had problems cutting them with the Big Shot, even after turning them 90 degrees. xReplyCancel

  • ANN ROBBINSJune 4, 2014 - 12:33 pm

    Two of the daintiest beautiful cards I have seen lately. Just another Becca fantastic project!!!!!!!!!! I sometimes roll the dies through the machine 2 or 3 times on the cut cycle to make sure they cut all the way through, before I emboss them. Works for me.
    Hugs,
    Mstgane
    AnnReplyCancel

  • melitaJune 4, 2014 - 12:56 pm

    So lovely! Question – what do you mean when you say you double cut the borders? And do you have a tutorial showing how you did it? Thanks!ReplyCancel

  • annJune 4, 2014 - 1:10 pm

    Pretty, pretty, pretty!! Those of us who have followed you for awhile would expect nothing less!:-) You also have answers to most problems, so can you help me with this. Even though I keep my dies in binders, (didn’t win the CD cases) when I cut white paper there is what appears to be a black residue on the cut object. It’s not just certain dies, it’s practically almost all of them. I’ve cleaned them but it keeps happening. Do you know what I can do to alleviate this problem?ReplyCancel

  • HelenJune 4, 2014 - 1:19 pm

    Stunning! Just when I think that I have everything that I could possibly need along comes the most beautiful card using your fabulous dies and I’m back to desparately longing for something that would enhance my card making skills. Love the A2 Filigree die it is my most favourite, and the new dies could be my 2nd favourite. Love HelenReplyCancel

  • Dottie DavisJune 4, 2014 - 2:25 pm

    Very dainty and pretty cards bows and all. Question comes after looking at it a bit is that did you attached the die on to the ribbon or on to little spots on the filigree frame? Is the ribbon stuck on top to bottom ribbon or onto a paper spot? Attaching things nicely always seems to be a dilemma for me. Thanks for your help in these questions we pose!ReplyCancel

  • Marilyn ClarkJune 4, 2014 - 3:06 pm

    Amazing Paper Grace! You are the best. TFS. God bless.ReplyCancel

  • JOYCE ANDERSONJune 4, 2014 - 3:36 pm

    Sooooo BEAUTIFUL….Oh my, Love the layers and also the
    simplicity —-looks Classy.
    God Bless you,
    joyceReplyCancel

  • lindaJune 4, 2014 - 3:48 pm

    Hi Becca oh my l so need these dies ,l am on wait list as not relased in uk till end of june so will have to wait.Super Super card how do you do it ,just love everthing you do hugs lindaReplyCancel

  • Becky GreenJune 4, 2014 - 4:29 pm

    Absolutely Gorgeous Becca!!!!!!!! :)ReplyCancel

  • Anne(UK)June 4, 2014 - 5:26 pm

    Stunning. Simplicity in perfection!
    Hugs
    Anne (UK) xReplyCancel

  • Glenys RichardsonJune 4, 2014 - 6:25 pm

    Just beautifulReplyCancel

  • Barbara WilsonJune 4, 2014 - 9:14 pm

    Beautiful cards.ReplyCancel

  • RebekkaJune 4, 2014 - 10:54 pm

    wow..Both of these are stunning. I love the dies you used.ReplyCancel

  • WandaJune 5, 2014 - 12:11 am

    Love these cards.ReplyCancel

  • ElaineJune 5, 2014 - 2:06 am

    Aww How beautiful i just love them .xReplyCancel

  • MargaretJune 5, 2014 - 5:09 am

    Good morning Becca
    Wow you are one fantastic lady what a fantastic die you have created, I do hope it will soon find it’s way over her to the UK so we can have it too. Your card is stunningly beautiful you are one talented and very kind lady thank you so much for sharing with us.
    With love
    Margaret corgi owner

    UK time 11amReplyCancel

  • RoseJune 5, 2014 - 6:48 am

    Hi Becca,
    Love both cards, the dies are so beautiful. You are a very gifted lady, thank you for sharing.
    Hugs, RoseReplyCancel

  • SueJune 5, 2014 - 10:58 am

    Both cards are absolutely gorgeous, Becca!ReplyCancel

  • BunnyJune 5, 2014 - 4:49 pm

    You do the most amazing work. Just Beautiful.ReplyCancel

  • BarbaraJune 8, 2014 - 9:48 am

    How perfect the blue and white one would be for my 4th grandchild who was born on June 4! It is a VERY special day for our family!ReplyCancel

Card Making Ideas by Becca Feeken using Spellbinders Bracket Border One and JustRite Rose Bouquet with envelope
Hi there friends.  Today is Day One of June releases for JustRite Papercraft and we’ve been playing around with some stunning goodies.  (In fact, I have new dies that are releasing this week along with stamps – just hang around with me this week and you’ll get a look see). Today I’m sharing a card and envelope ensemble using Rose Bouquet Vintage Labels Seven.   These sweet roses were cut out using SVG Rose Bouquet Digital Cut File and then colored using Spectrum Noir Markers.
WRBF-4311-2014
To assemble the card I cut using Spellbinders A2 Bracket Borders One along each edge then made a back piece with a hinge so that I could attach front and back.  Next I layered Spellbinders Grand Decorative Labels One (edged with a gold krylon pen) followed by Spellbinders Grand Labels One  Spellbinders Classic Squares SM.  My sentiment is stamped on Spellbinders Back to Basics Tags.
Card Making Ideas by Becca Feeken using Punch Board enveloped embellished with Spellbinders A2 Bracket Border One
I created my envelope using the We’R Memories Envelope Board and before gluing the envelope together I embellished each side of the flap using Spellbinders A2 Bracket Border One.  I also used it at the bottom of the envelope.  To close off the holes but leave the lacy pattern, I backed the die cut holes in the envelope with the same print used in the card.

CRAFT SUPPLIES I USED 
Rubber Stamps: JustRite Papercraft – Rose Bouquet Vintage Labels SevenSVG Rose Bouquet Digital Cut File
Craft Paper: Coredinations, Neenah Classic Crest – Natural White 80 lb, My Minds Eye
Ink:  Versafine Onyx Black, Brushed Corduroy Distress Ink
Accessories:  Spellbinders A2 Bracket Borders OneSpellbinders Postage StampsSpellbinders Classic Squares SM, Spellbinders Grand Labels OneSpellbinders Grand Decorative Labels One Spellbinders Back to Basics TagsThe Paper Studio Pearls, May Arts Silk Ribbon, Spectrum Noir Markers, Krylon Gold Pen , Grand Calibur Die Cut Machine, We’R Memories – Envelope Board

The JustRite Designers had a chance to play with these delightful sets – be sure to stop by and see what they dreamed up.

pinTHIS SHAREthis TWEETTHIS EMAILthis
  • ANN ROBBINSJune 2, 2014 - 9:16 am

    oH MY GOODNESS, I just might be the first today to respond to this lovely card. Just love the envelope and so enjoy making my envelopes with this neat product. Have a great day, Becca.
    Hugs,
    Mstgane
    AnnReplyCancel

  • Clare WJune 2, 2014 - 9:20 am

    Love hte card and the envelope is fab – must try thisReplyCancel

  • Beverly FuchsJune 2, 2014 - 9:25 am

    Another spectacular card. I really like the frame that you created using the Bracket Borders One. I have used that to make an edge but have never thought to use it as a frame. Something new that I will have to try. Thank you so much for all of your clever and beautiful ideas.ReplyCancel

  • MaryannJune 2, 2014 - 9:27 am

    WAUW another stunning creation Becca. Soo beautiful as always hun I just love it. You are such a genius, when it comes to design these awesome cards, and this is no exception, that´s for sure.ReplyCancel

  • margaret driscoll UKJune 2, 2014 - 9:33 am

    Hello Becca
    Lovely to see you have used the Spectrum Noir Pencils!
    I have them and only just getting to grips with the blending….. so taking tips from you!
    Lovely images Becca
    Take care
    Love MargReplyCancel

  • TeriJune 2, 2014 - 9:47 am

    Beautiful card, your cards are always so well put together, I’d love to know how you make all your perfect bows. Love your cards, Thank you for sharing.ReplyCancel

  • TeriJune 2, 2014 - 9:49 am

    I saw the link on your page for bow making, thank you and good bless youReplyCancel

  • Blue RoseJune 2, 2014 - 9:51 am

    Becca,
    What a gorgeous set. Love the roses. Please, please, please, do a video tutorial on this set. Would love to see how to…ReplyCancel

  • CynthiaJune 2, 2014 - 10:07 am

    Fabulous card! And, I love the sentiment: Choose Hope!ReplyCancel

  • Jacquie JacobsJune 2, 2014 - 10:14 am

    Hi Becca,

    Beautiful card, love the Roses and use of dies.

    Love & Hugs

    Jacquie J xxx
    ReplyCancel

  • Becky GreenJune 2, 2014 - 10:24 am

    This is lovely Becca! The image is gorgeous & what you’ve done with it is gorgeous too! :)ReplyCancel

  • Gladys Michelle HardnettJune 2, 2014 - 10:27 am

    Dear Dear Becca,

    Please add a video onto YouTube showing how you used the A2 bracket border to create the lovely square. You are so talented and I am always amazed at your creativity. Blessings!!!ReplyCancel

  • JoanneJune 2, 2014 - 10:31 am

    Another fabulous creation Becca! How clever to make a frame using the Borders One set…this card is definitely over 6 inches. I will have to put on my thinking cap when I attempt it! Thanks for sharing.

    Joanne from CanadaReplyCancel

  • Margaret CrawfordJune 2, 2014 - 10:35 am

    Hi Becca, WOOHOO! I tried this with the brackets and it WORKED!!!!! These dies may just have a new lease of life…. thanks to you. Love your ideas. Thanks again for sharing.
    Margaret (Scotland)ReplyCancel

  • Anne (UK)June 2, 2014 - 10:43 am

    Such an inspiring sentiment and a beautiful effect with the lace look. I love the matching envelope for the card too. The envelope board has been used a great deal in my home!
    Hugs
    Anne (UK) xReplyCancel

  • EveleneJune 2, 2014 - 10:43 am

    This is breathtakingly beautiful. The frame amazes me how you made it with the bracket border. Your ingenuity never ceases, Becca. Please do a tutorial on how you did the frame. Please, please, please.ReplyCancel

  • Judy BJune 2, 2014 - 10:46 am

    Such a beautiful card! But then, I have never seen one that wasn’t just gorgeous. Thanks for sharing with us.ReplyCancel

  • Mrs BJune 2, 2014 - 11:50 am

    Hi Becca. I love it, the roses are so pretty and the bracket border is great. Decorating the envelope makes such a difference too doesn’t it : ) Take care.ReplyCancel

  • Janet CastleJune 2, 2014 - 12:26 pm

    Stunning card Becca!!!!ReplyCancel

  • Maureen KillenJune 2, 2014 - 12:30 pm

    Good evening Becca,
    This is absolutely gorgeous and the envelope is inspired. I always decorate my envelopes with stamps, distress inkpads, brayer, etc. but have never thought of using dies. Guess what I’m going to do as soon as I’ve posted this!!! (lol) Hope you have a great day and regards to all bloggers xx.ReplyCancel

  • Cathy HomanJune 2, 2014 - 12:34 pm

    Absolutely gorgeous!!!! Keep doing what you do – you have amazing talent.ReplyCancel

  • Beth NormanJune 2, 2014 - 1:18 pm

    Absolutely stunning! The red really pops.ReplyCancel

  • ElaineJune 2, 2014 - 1:23 pm

    Well i am loving todays card Becca beautifil style and colors
    Take Care
    God Bless
    Elaine H XReplyCancel

  • EveleneJune 2, 2014 - 3:33 pm

    The square frame must be more than six inches. I tried doing it using the bracket border with my Big Shot, but it didn’t work for me. I guess it can only be done with the Grand Calibur, which I don’t have. I hope you’ll do a tutorial, Becca. Thanks and great blessings ahead of you.ReplyCancel

  • Deborah ArtliffJune 2, 2014 - 3:58 pm

    Evaning Becca WOWthis absolutley stunning I adore it. Now Ive seen what you have done with these dies im going to get mine out and have sgo at this one. I just love it. Take care Becca xx

    Debs xxReplyCancel

  • Kathy HJune 2, 2014 - 4:45 pm

    This is stunning! Wow!ReplyCancel

  • Linda CarsonJune 2, 2014 - 5:13 pm

    Breathtaking!ReplyCancel

  • barb macaskillJune 2, 2014 - 5:27 pm

    GORGEOUS! I love the Roses and your envelope is divine! TFS!ReplyCancel

  • Vicky SchmidtJune 2, 2014 - 5:33 pm

    Just so beautiful. I love the envelope.ReplyCancel

  • Marilyn in E-TownJune 2, 2014 - 6:13 pm

    Gorgeous card! You are so Amazing!ReplyCancel

  • Lynn HardyJune 2, 2014 - 6:25 pm

    This is simply stunning Becca! Your cards always are though!ReplyCancel

  • Vicki RobeJune 2, 2014 - 6:51 pm

    Becca,

    This card is just spectacular!! I love everything about it including the colors, layout and design. You are so clever and what I aspire to be.

    Thank you for sharing your lovely work.

    Vicki RobeReplyCancel

  • MildredJune 2, 2014 - 10:21 pm

    You have outdone yourself again, Becca. Beautiful.ReplyCancel

  • LageneJune 2, 2014 - 10:55 pm

    ELEGANT & Beautiful! Love the matching envelope!ReplyCancel

  • ChelseaJune 2, 2014 - 11:50 pm

    OooooOO Becca! I love how you made a square with the borders die. Fabulous – and soooo creative!! I must try this. The roses are just gorgeous – this is just such a pretty card. Full of inspiration! Thank you so very much for sharing it with us!ReplyCancel

  • Linda RashJune 3, 2014 - 2:42 am

    Becca,
    I am from Tyler, Tx which is known for its roses and rose parades. This rose stamp has really caught my attention. The color of the rose makes that rose just pop out.
    I would also like to add that I have been looking at your cards for the last four hours and it is 3:40 in the morning. They are all so fascinating to me and the sentiments are inspiring even at this hour. Your love for what you do is very evident in your work. ThanksReplyCancel

  • BrendaJune 3, 2014 - 6:04 am

    Becca, another stunning card, I never thought to use the A2 bracket borders in a square or as part of an envelope! You are so clever, thank you so much for sharing.

    Crafty hugs

    BrendaReplyCancel

  • Marion TurnerJune 3, 2014 - 7:13 am

    Becca Just STUNNING Keep up with your AMAZING work
    Thanks for sharing
    Love Marion xReplyCancel

  • Debra MillerJune 3, 2014 - 9:05 am

    Wow!!!!ReplyCancel

  • Petra SzakallJune 4, 2014 - 3:10 am

    A real beauty!ReplyCancel

  • Patricia HowarthJune 4, 2014 - 5:37 am

    Hi Becca, What a fabulous combination of dies, they ‘marry’ perfectly together, I love how you have used the bracket border, and the envelope looks gorgeous.
    Lots of love from Patricia xxReplyCancel

  • kathy/NorthCarolinaJune 4, 2014 - 7:08 am

    Becca, that envelope is stunning! I ‘m not sure which I love more…card or envelope! LOL Stunning work on both!ReplyCancel

  • ConniecrafterJune 4, 2014 - 7:12 am

    that is just too cool how you used the borders for the framing and the envie, just beautiful coloring of the flowers, Gorgeous card!ReplyCancel

  • PeggyGeeJune 11, 2014 - 1:53 am

    Beautiful as always. A tutorial on how you put everything together would be nice and greatly appreciated.ReplyCancel

I N F O