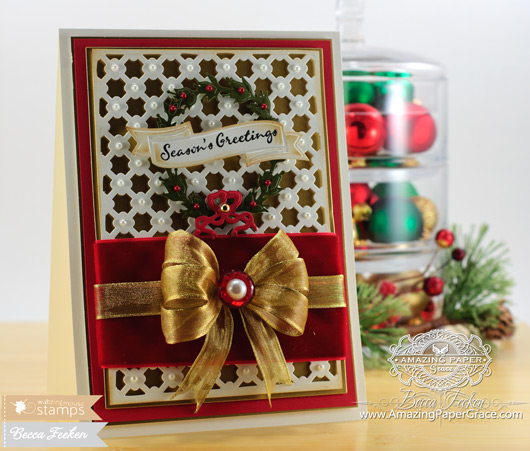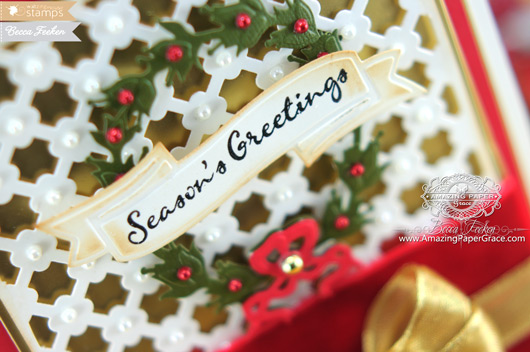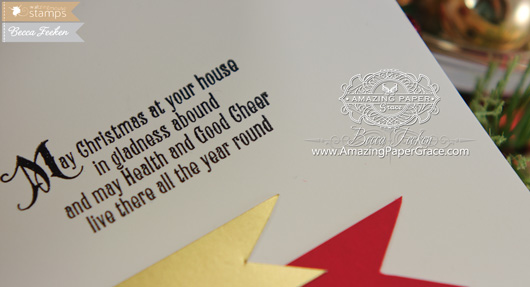 
Yep, I double dog dare you!! :-) I double dog dare you to even think about using this background without wanting to put a pearl on every dot. If you can do it then I’ll have to give you a hand – you’re a brave crafter. Me, I couldn’t resist, I had to do it. I even counted and knew that it would take 94 little pearls, but I revved up a movie and sat down with my tweezers. The awesome thing is that it only took me about 10 minutes to put the pearls on the Spellbinders Crisscross Expandable Pattern. So this is a card I’ve had on my mind for a while and had to get it out of the way because I kept thinking about it. The other little thing I could not resist was to take the laurel garland from Spellbinders Laurel and Bee and make it into a wreath – so easy I’m smiling and now I have a double use for that die and adore the little bow :-) I took a sentiment from Waltzingmouse Stamps called Compliments of the Season and curved it ever so slightly to fit the Spellbinders Ribbon Banners die template.

Here’s your Step By Step Recap of die cuts and layers, from the bottom up: Start out with a Card Base 7-1/2″ tall by 5-1/2″ wide (or see how to make that size with the Hinge Technique HERE) , foam tape, gold matting layer cut to 7-1/8″ x 5-1/8″ , red layer cut to 7″ x 5″, foam tape, gold matting layer cut to 6-5/8″ x 4-5/8″, die cut layer using Crisscross, foam tape (double layer), die cut layer using Laurel and Bee, foam tape (triple layer), die cut layer using Ribbon Banners. As always, stack, position ribbon, pearls and bow on correct layer, admire, then glue! 
Hope you’re having a blessed weekend! See you tomorrow!
 
 
Hi there blog friends, I’m back with a card today. The occasion is one I don’t want to trumpet but this the very reason we make cards, right? While I was away I learned of a death in the family of an acquaintance, so I took some time out to pay respects. At first I thought it might be crass to make links and go over instructions, but thought twice because my friend would want me to. Moreover, if it makes it easier for you to whip out a card and send it to someone that’s hurting then I feel like I’ve accomplished something. I can’t tell you what a blessing it was when I received an abundance of sympathy cards three years ago – they are treasured and I’ve kept them all together. When I wonder if I could, should, or will make another card I glance through that box and remembered all the prayers that were coming in for me.
Sympathy is such a solemn occasion so I sought to do it justice with elegance. During the August Release, Waltzingmouse Stamps came out with an insanely elegant set of sentiments called Big Day – Today which I stamped at the bottom of the card. I built up may layers using a number of die templates including Spellbinders Diamond Effects, Spellbinders Gold Majesty Circles and Spellbinders Stately Circles.
 
Here’s your Step By Step Recap of die cuts and layers, from the bottom up: Start out with a Card Base 7-1/2″ tall by 5-1/2″ wide (or see how to make that size with the Hinge Technique HERE) , foam tape, brown matting layer cut to 7-1/4″ x 5-1/4″ , dusty rose matting layer cut to 7-3/16″ x 5-3/16″, design paper layer cut to 7-1/8″ x 5-1/8″, foam tape, die cut layer using Diamond Effects, dusty rose matting layer cut to 2-7/8″ x 4″, design paper layer cut to 2-3/4″ x 3-7/8″, foam tape, die cut layer using Stately Circles #3, foam tape, die cut layer using Gold Majesty Circles #2, #3, and #4. As always, stack, position ribbon, pearls and flowers on right layer, admire then glue!
Thanks so much for your kind words. I’m so grateful for good health, good friends and home. This week finds me tickled, humming and savoring my passion for crafts. I hope you feel the same way too.
 
Posted in >Best of 2013, *Diamond Effects, *Gold Majesty Circles, *Stately Circles, -Sympathy Cards, :Brown, :Cream, Stamping, Waltzingmouse, |Elegant, |Many Layers
Sweet blog friends, I just know you think I fell off the face of the earth. How lucky am I to have received so many prayers in my inbox. Let’s just say I was on a little adventure that took a little longer than planned. I’ve been out of town at a retreat and during the retreat came an injury to my foot that saw the emergency room there, then the emergency room here followed by several days in the hospital. It’s all good now, I couldn’t feel better if I tried, but it certainly detoured up my plans to blog about my trip and I found myself with no internet access at the hospital. 
I had a wonderful opportunity to go to the west coast for an event called Spellbound with A Gilded Life. It was honestly a case of the stars and planets aligning; my sweet kids made a way for me to attend. It’s a retreat of crafty folks that was full of vintage gorgeousness, wonderful fellow crafters, food, shopping and classes. I was searching for something to rejuvenate my crafty spirit – something that was positive, full of hope, bubbling with inspiration and overflowing with new friendships. It was all that! To give myself a creative push I signed up for a swap (brave me) where each of 7 people would make a zippered bag to swap on the night of our dinner. I made 10 bags like the one above – yikes I haven’t sewn anything in year. I was so floored by the ones I received in return – they were filled with vintage trinkets of lace, buttons and ephemera – (the kind we like to hoard). I was so struck to receive such treasures. I’ll be sharing some of the few pictures I was able to take on Instagram…. Here’s one that goes to the top of my list to try. I thought these flower centerpieces that were on the tables were dreamy. Lace, tissue paper and gems….so simple but so delicately vintage.

No worries, I’ll be back to cardmaking as soon as I can unpack :-) In the interim, JustRite Papercraft has an amazing sale you might want to peek in on – here are the details!
 
We are very excited to announce that our log in issue with our new website has been fixed. Thank you to everyone who helped us trouble shoot the issue. In celebration we have a Grand Opening Coupon Code for you to use in the store – simply type RESET (all caps) in the coupon code box at check out and you will receive 25% off your entire purchase. If this is your first time shopping in our new website – you will need to reset your password. You may use your password from our old website or you can create a new password. Have fun shopping!
Thanks for stopping by! I’m just itching to make some cards so drop back in as I try to round out the month with some crafty catch up!!
 
|


Becca I agree that it needs a pearl in every dot. beautiful card as usual.
Hugs Trish.
BECCA! THIS IS LOVELY!!!!!!!!! :) I don’t think I could resist either!!!!!!!!!! LOL You did a FABULOUS JOB again!!! I LOVE your cards! AND your Christmas Cards are JUST AS FABULOUS!!!!!!!!!!!!!:)
Beautifully done Becca!!!!
You’re right, Becca! I would want a pearl on each dot. And, I love how you used the laurel. This is a stunning card~ Thank you, for the inspiration!
If not pearls Becca it would be crystals, but it would really have to be something. You did a gorgeous job on this one and I am sure you about have all your Christmas cards done by now even being injured and all. You never did say, did you enjoy your trip on the west coast even with your accident? Did you meet lots of new friends? I hope you had loads of fun and learned loads of new things to teach (though for the life of me I can’t think of what it could be!!!) Have a blessed day.
Hugs, Jean
An awesome card Becca! I love how you have utilized the dies. Brilliant
ALLLLL those pearls sure made a Gorgeous card!
Becca, you’re my kinda gal! Yep I would have put pearls all over too! Beautiful card!
Oh my goodness…this is such a beautiful elegant card…I love it…it took my breath away…
You are the cutest person in the whole wide world (with the cutest cards to boot)!!
Ohh my goodness, I’d love to take that dare but I don’t have any of these dies, not to say they aren’t on my extensive wish list. OMGosh 95 pearls….I don’t think I have 95 pearls!?!!? LOL When I add stuff like that I try to do it after so I don’t cover to many up, LOL I’m the worst kind of hoarder I tell ya, LOL LOL
This card is so utterly gorgeous Becca, I love your creative use of that die, another one I don’t have, lol Nice to see you creating again, big inky hugs
Totally awesome! I think I would do the same except I hope you didn’t put pearls under the ribbon where it wouldn’t be seen!! LOL I know I would take the lazy woman’s way out and not put them there. Georgous card Becca!!
Hugs
Mstgane
Ann
Becca – Such a lovely card. You really have a lovely talent that you share so freely – thanks so much
Hi Becca, Did you put the pearls on even where the ribbon is ? I think I would have skipped that area… You can’t see it !!! Anyway you look at it…. It’s a beautiful card !!
I love it!
Becca, this is beautiful! You could always speed up the time adding all the pearls by using dots of Perfect Pearls!
Gorgeous, Becca! Such patience.
WOW BECCA SO NEAT. YOU HAVE TO COME TO THE UK WITH SUE (WILSON) AND APPEAR ON CREATE AND CRAFT. YOUR SO TALENTED.
Becca, this is one of the most Beautiful Christmas cards I have ever seen. However I cannot afford to put 96 pearls on about 50 cards, but I plan on doing something else to make them look like pearls…It should come out just as nice…wish me luck….and thank you! Blessings, v
Fabulous!!! I just love it!! Couldn’t be prettier!! Kudos to you, Becca!!
Love it, love it, love it!!!!! This is so pretty, and yes I would want to put pearls on it also, a few would not do. I would love it if someone sent this to me. Great job, again
You are the queen of everything. I can’t believe it only took you 10 minutes. You ninja cardmaking guru.
Egad, haven’t heard that expression since I was a very small girl! Lovely Becca and yes all the pearls could NOT have been left off. Another beauty. Hope you are doing well!
Oh my, gorgeous card! I absolutely love ALL those pearls, they are perfect!
Very pretty, Becca!
stunning card ,pearls are a must with this die
Hi Becca. I love this card. The wreath is so delicate, and yes, anyone would have to put pearls on each dot : ) And as usual a stunning bow. Take care.
What a card – really lovely. Yes I would have had to put pearls on no questions about that but not under the bow – have you tried making pearls with Cosmic Shimmer pearl PVA? – Sue W uses that technique – it looks fab and is low cost. Thanks for sharing.
Morning Becca, This is a stunning card, love the criss-cross die, I will definitely be trying this one, and like you, I will have to put pearls on ha ha.
Lots of love from Patricia xx
This is absolutely gorgeous Becca, I just LOVE it. It has exactly the simpple yet elegant look, that is sooo beautiful, and don´t demand loads of different things, but biy it looks beautiful. really stunning as always hun.
Hello Becca
A misty, damp morning here in England today!
But I love this card and the Bow is beautiful!
I don’t think I would use pearls though….. Sue Wilson uses Cosmic Shimmer Pearl Glue which is cheaper, and nearly as beautiful ( almost).
Just glanced back and I see Clare W mentions it too!
Take care Becca
Love Marg
Hi Becca
A very beautiful card i just love the inset verse
Elaine H
What a great card. I guess it would be hard not to put a pearl on every connection! Have a great day.
Just beautiful Becca!
Well done! 94 pearls!!!!! It so posh!
Becca,
Your card is beautiful. I probably would not do all the pearls like you did.
Love the wreath on the other card too, I have been making christmas tree cards & my husband, who is my sounding board, saids that they are great.
Not as beautidul as yours but with limited supplies, they turn out good.