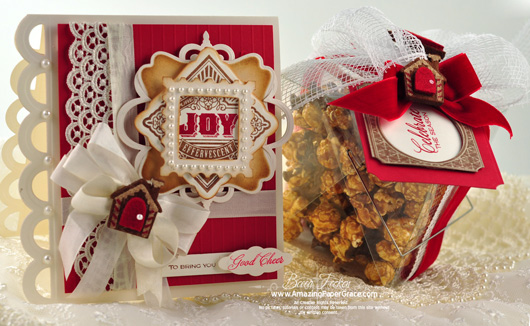
Hi there blog friends!!!  This is an exciting month because there are so many fabulous stamps to create with!!  Today is Preview Day 1 of the new October releases with Waltzingmouse Stamps and I have to tell you, I had an absolute hissy fit over this new set.  There wasn’t really an opportunity for me to do Christmas cards last year, so this year I’m savoring all the sights and sounds of a crafty Christmas.  Today I have a card to share along with a little snicky snack gift and a tag to go along with.  These were simple items to put together and are they every putting me in the mood for Christmas.  We won’t divulge exactly how much of that Christmas Carmel Corn I consumed (um…quality tested) while making up the tag and wrappings :-)
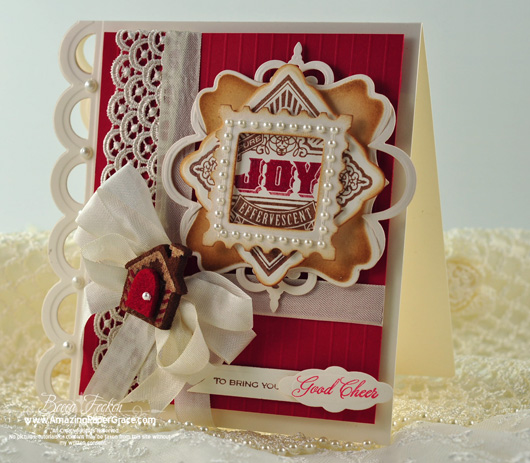

So, Claire has put together another smashing set of labels called Seasonal Remedies, that will lend themselves very well to items of the food variety and even items of the beverage variety. You can spin them to make them work out for just about whatever you want.
.
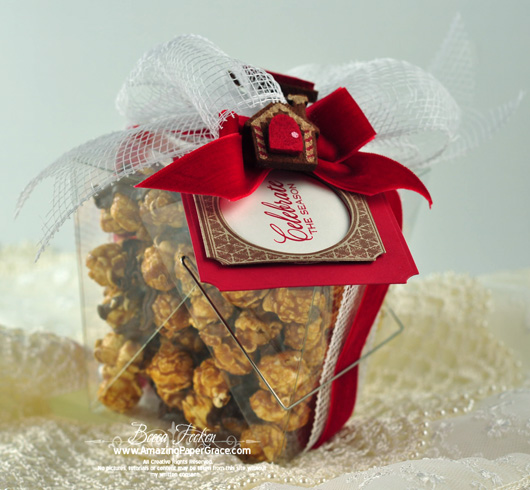
I made my card base using Spellbinders™ Classic Scallop Edgeabilities then on another layer that I scored with my Scor-Buddy, I created a medallion using Spellbinders™ Twisted Metal Tag and Accents  followed by Spellbinders™ Labels Sixteen then stamped my label and cut it using Spellbinders™ Labels Fifteen – a perfect match!  I topped off with Spellbinders™ Postage Stamps that I bordered with some Zva Creative pearls in my stash. The sentiment is stamped on Spellbinders™ Nested Lacey Pennants.     For the tag on my caramel corn I used Spellbinders™ Small Labels, then cut out a frame using Spellbinders™ Classic Ovals SM.

SUPPLIES I USED
Stamps:  Waltzingmouse Stamps – Seasonal Remedies
Paper:  PTI Kraft, Neenah Classic Crest Cream, The Paper Company
Ink: Colorbox Chocolate Roan Chalk Ink, Pigment Red, Versafine Vintage Sepia (with clear embossing powder), Vintage Photo Distress Ink, Brushed Corduroy Distress Ink
Accessories: Spellbinders™ Labels Sixteen, Spellbinders™ Labels Fifteen, Spellbinders™ Twisted Metal Tag and Accents, Spellbinders™ Postage Stamps, Spellbinders™ Nested Lacey Pennants, Spellbinders™ Classic Ovals SM, Spellbinders™ Small Labels, Spellbinders™ Classic Scallop Edgeabilities, Zva Creative Pearls, Felt Stickers (World Market), Mesh Ribbon (World Market), Recollections Pearls, Prima Lace, seam binding

Everyone on the design team has been workin’ up a storm!!  I hope you can pop in and have a peek at what they have been working on!!

Fabulous Design Team Creations
1. Anya Schrier 9.   Lynn Mercurio
2. Becca Feeken 10. Mona Pendleton
3. Julia Aston 11. Niki Estes
4. Belinda Chang Langner 12. Sandie Dunne
5. Jennifer Holmes 13. Sarah Martina Parker
6. Kate Whelan 14. Tosha Leyendekker
7. Kelly Schirmer 15. Claire Brennan (Owner)
8. Laurie Schmidlin 16.

More to show tomorrow, I hope you’ll pop in to see!!

pinTHIS SHAREthis TWEETTHIS EMAILthis
  • Anita braddockOctober 12, 2011 - 2:11 am

    Beautigul card you always do great work. love love this. the colors work so well. thanks for sharing. :):)ReplyCancel

  • racheOctober 12, 2011 - 2:52 am

    oh my goodness! that is beautiful!
    thanks for inspiring me to get up and get Christmas going.
    And I know I can do this one because I have learned so much from you.
    Thanks and have a blessed day!ReplyCancel

  • ~ Ali Watson ~October 12, 2011 - 3:35 am

    Wow fabulous as always Becca, love it

    Ali xReplyCancel

  • Christine Harrop, Oxfordshire, UKOctober 12, 2011 - 4:20 am

    Hi Becca
    Certainly is festive. Love the mesh ribbon! Maybe now I will be in the mood to continue my Christmas cards and gifts. I actually made a start a couple of weeks ago but soon ran out of festive oomph and gave up! Maybe I need to play some Christmas music, eat a mince pie and have a glass of wine to get into the “spirit”… Or maybe not! I am enjoying seeing your creations for
    inspiration.
    love Christine xReplyCancel

  • SandieOctober 12, 2011 - 4:45 am

    {HEART} these. The colours just pop out. Fabulous work Becca. xxReplyCancel

  • KaryOctober 12, 2011 - 4:59 am

    Fabulous card & treat box, Becca!! Love how you layer the different die cuts for the focal image on your card. Both projects are so wonderfully decorated, so festive and pretty.ReplyCancel

  • Lynn MercurioOctober 12, 2011 - 5:17 am

    Stunning, Becca. I realize I must use that adjective a lot when I comment on your projects, but that is the first word that comes to mind. I love the way you have framed the labels in such a way to really bring out their “essence”. Your layers and colors are so appealing. Love them both!ReplyCancel

  • Deborah FringsOctober 12, 2011 - 5:18 am

    What a super set of Christmas goodness! I think your card is just stunning with the lovely layers and the box of popcorn – yummy!!ReplyCancel

  • Karen StarkOctober 12, 2011 - 5:45 am

    Absolutely stunning!! Your things are gorgeous! : )ReplyCancel

  • Marilyn ClarkOctober 12, 2011 - 5:52 am

    Stunning Awesome Beautiful TFS.ReplyCancel

  • HeatherOctober 12, 2011 - 6:06 am

    Becca – once again you have created something stunning… love the colours and all the layers (must try that!!) and the popcorn looks yummy and beautifully presented. tfs
    Hugs
    HW(UK)
    xReplyCancel

  • Renee LOctober 12, 2011 - 6:35 am

    Gorgeous!!
    I absolutely LOVE that pearl frame…
    it’s all so stunning…
    I’m still taking it all in! :)ReplyCancel

  • Regina aka Mrs. HamOctober 12, 2011 - 6:37 am

    Such a beautiful set.ReplyCancel

  • Edna BurgessOctober 12, 2011 - 6:41 am

    Very pretty card and the goodies look good enough to eat. EdnaReplyCancel

  • Julia AstonOctober 12, 2011 - 7:04 am

    Wonderful layering of die cuts on your beautiful card Becca! and I just love the clear box of caramel corn (yum!!) with its pretty ribbons and lovely label!ReplyCancel

  • PeggySOctober 12, 2011 - 7:11 am

    Becca, fabulous card. Love the many layers, stamps, bow & embellies. The snack also looks yummy. Well done.
    God bless,
    PeggyReplyCancel

  • lois skiathitisOctober 12, 2011 - 7:18 am

    In a word it’s a stunning gift set. Your work always amazes me Becca. Love the texture and how you have embellished this set. Beautiful work. As always Becca, TFS!!! :-DReplyCancel

  • PatriciaOctober 12, 2011 - 7:20 am

    Yet another wonderful card, plus a yummy “Snack Box” .
    Love everything about this project.

    Patricia xReplyCancel

  • Clare CurcioOctober 12, 2011 - 7:24 am

    Becca, you always amaze me with your beautiful creations! I love your style! Your colors are so well-matched!ReplyCancel

  • Frances EricksonOctober 12, 2011 - 9:19 am

    Becca this is such an amazing card. I love the layering as I do all of your cards. We just got a contract on our house and are moving to Olympia, Washington. I will miss card making for a while but you will keep my juices flowing while I move and set up my room. Keep them coming!!!!ReplyCancel

  • BernieOctober 12, 2011 - 9:37 am

    Brilliant! Love everything about it. So inspiring to get started on Christmas, gosh it’ll be here so soon.
    Blessings BernieReplyCancel

  • DeniceOctober 12, 2011 - 9:54 am

    Sooooo pretty. My mom always gets in the Christmas spirit early too. Me…. well for some reason I find myself singing Christmas songs in summer time. I wonder if that might be because that is closer to the real birth date of Jesus. Who knows, I guess if it were important to know the real birth date, God would have made it known for sure in the Bible. Wouldn’t it be nice if we ALL had the Christmas spirit year round? Loving, Kindness, Giving, year round. What a much nicer world it would be. All my best to you and your family, God bless…… DeniceReplyCancel

  • Niki EstesOctober 12, 2011 - 10:13 am

    Becca, these are just beautiful!ReplyCancel

  • KathyOctober 12, 2011 - 10:31 am

    Great job on both!ReplyCancel

  • Mona L PendletonOctober 12, 2011 - 10:36 am

    Beautiful gift ensemble Becca! Love the rich color combo!ReplyCancel

  • conniecrafterOctober 12, 2011 - 11:42 am

    Great card, love the layering and the way you framed the joy. Love the lace and punched edge togetherReplyCancel

  • Laura ~ Layers of ColorOctober 12, 2011 - 12:07 pm

    Mmm, such goodness! Yummie projects! Love the delicious layers of pretties!ReplyCancel

  • KarenOctober 12, 2011 - 12:47 pm

    This is so beautiful!ReplyCancel

  • DarleneOctober 12, 2011 - 12:48 pm

    Truly stunning!! I admire your talent for layering!!ReplyCancel

  • Marie-LouiseOctober 12, 2011 - 1:14 pm

    Another really beautiful card.ReplyCancel

  • Robin GasserOctober 12, 2011 - 2:59 pm

    I really love your card and the colors are amazing!! I had already decided to use red and gold as my Christmas wrapping theme this year (already bought the paper and ribbons) so this confirms my choice. I think the caramel corn looks yummy!ReplyCancel

  • MelanieOctober 12, 2011 - 3:42 pm

    All I can say is…… YOU ARE AMAZING! I wish I had just 1% of your talent! Won’t you PLEASE open an Etsy store or website where I can made your projects!!!!ReplyCancel

  • Cheryl StaufferOctober 12, 2011 - 5:49 pm

    What a wonderful gift ensemble!! I love the red and gold on the card and gift box!!ReplyCancel

  • TerriSOctober 12, 2011 - 6:05 pm

    Love your attention to every detail. Speaking of detail, these stamps are so crisp and beautiful.ReplyCancel

  • Becky GreenOctober 12, 2011 - 7:46 pm

    WOW!!!!!!! VERY NICE!!!!!!!! This is QUITE SHARP Becca!!!!!!!!! :)ReplyCancel

  • GeorgetteOctober 12, 2011 - 7:54 pm

    OMG this is so so so beautiful and the color is wow
    thank for showingReplyCancel

  • RufusOctober 12, 2011 - 8:15 pm

    Well of course you had to run quality control tests on the caramel corn! If you intend to give it as a gift, the quality much match that of the packaging and card! Since they are incredible…well it’s obvious you had to “test”! LOL. Gorgeous set!
    R/ReplyCancel

  • ToshOctober 12, 2011 - 9:31 pm

    What a gorgeous gift set Becca!! Your framing is exquisite! And that little house is just darling!! Love your caramel corn packaging also!! WOW!ReplyCancel

  • FrancineOctober 13, 2011 - 7:02 am

    You give us the real spirit of Chrismas with you beautiful project and the idea for something ready to give, but it is hard to resist with caramel popcorn… They look good.ReplyCancel

  • RichardOctober 13, 2011 - 7:42 am

    Wow!! Talk about your Nestie Heaven!!! Amazing job!!!ReplyCancel

  • RebekkaOctober 13, 2011 - 9:15 am

    wow…This is fabulously stunning!ReplyCancel

  • Lisa FolleyOctober 13, 2011 - 11:50 am

    Becca, your creations are truly amazing and provide so much inspiration! I really enjoyed skipping through your blog and appreciate you sharing your wonderful talent! Just Lovely!
    Lisa :)ReplyCancel

  • Pet73October 13, 2011 - 12:47 pm

    What a great wrapping! What a fantastic card!ReplyCancel

  • Francie (Montreal)October 14, 2011 - 5:59 am

    What a lovely set! I’m dazzled by your creativity as usual. Thanks for sharing.ReplyCancel

  • LageneOctober 14, 2011 - 9:26 pm

    Great gift box & the card is Gorgeous!ReplyCancel

  • lori fiorelliOctober 15, 2011 - 7:42 pm

    becca.thats a very red paper on card. thanks loriReplyCancel

  • lori fiorelliOctober 15, 2011 - 7:45 pm

    forgot the word pretty above ha,ReplyCancel

  • AnyaOctober 17, 2011 - 8:21 pm

    Yummy yum! What an amazing card – your layers are so perfectly combined, I just love all the different dies you use. And that is one smart, easy, and lovely way to package up a treat! Yep, I think I’ll use that idea! Thanks, chickie! ;)ReplyCancel

  • Pamela AOctober 18, 2011 - 12:18 pm

    These are soooo fabulous, when I look at the Spellbinders I have, mine are nothing like this – I need more!!ReplyCancel

Hi there blog friends. Yes, I know I’ve been missing. I decided to try to conquer the new (had it since January) HD video camera and software I have.  Sheesh, I don’t think I’m winning but at least I have something to show for my absence and I’m encouraged to keep with it.  It’s so much of a better setup for me but it’s honestly waaaaay, way, way over my head.   Oh, the grumbling that came from my room.    It seems that I had to research every next step to figure things out.  Anyway, I’m riding without my training wheels now and hopefully this will let me produce better videos in the future!   Be sure to click the resolution button (it probably says 240p or 360p) and watch in HD, it’s much clearer!!!!

I did a walk through of how to make the triangle shaped Christmas Tree favor boxes that I showed on my JustRite Stampers Post and hopefully I can get to some of the tutorials and such that have been piling up on my to do list.    Enjoy!!


Oh gosh, I’ve missed you all!!

pinTHIS SHAREthis TWEETTHIS EMAILthis
  • KathyOctober 9, 2011 - 10:29 pm

    AWESOME!!!ReplyCancel

  • AndreaAOctober 9, 2011 - 10:29 pm

    Thank You Becca!!!!
    I am a visual person.

    You make everything look so easy.
    I don’t have this set yet.
    I would like to make these for my great nieces and nephew for Christmas with their names and date on the bottom.
    Thanks for all you great ideas and wonderful projects!!ReplyCancel

  • Becky DOctober 9, 2011 - 10:51 pm

    Thanks so much for this tutorial Becca! I absolutely loved these trees when I saw them before and I was hoping you would do a tutorial! I am a visual person too and it helps me immensely to see it in action :)ReplyCancel

  • BernieOctober 9, 2011 - 10:53 pm

    BRILLIANT!!!! Wonderful to see you back. I am electronically challenged so I admire you for figuring out how to use your video equipment. You’ve done a beautiful job but I hope you have taken some time for yourself.
    Blessings BernieReplyCancel

  • JalineOctober 9, 2011 - 11:11 pm

    Wonderful tutorial. Thank you so very much and I love your tree.ReplyCancel

  • SusanOctober 9, 2011 - 11:14 pm

    Wow — what a fabulous tutorial! You make it all look so simple. Thanks for sharing your amazing talents with us Becca.ReplyCancel

  • Linda W...October 9, 2011 - 11:30 pm

    OMGoodness Becca!!!! you are a gifted person… thanks for shairingReplyCancel

  • LMcBurneyOctober 9, 2011 - 11:39 pm

    Super cute tree box! I always get inspired by your tutorials! ThanksReplyCancel

  • Linda GreenOctober 9, 2011 - 11:51 pm

    I always love your tutorials!! You make everything look so easy! Keep up the wonderful work!ReplyCancel

  • CyndeOctober 10, 2011 - 12:37 am

    Thanks Becca, You are so Multi-Talented you never cease to amaze me!ReplyCancel

  • MaryannOctober 10, 2011 - 1:26 am

    WOW thanks so much for another awesome tutorial here. It´s really great and soo easy to follow, that even a kid can make this tree now. You´re just amazing to get all these wonderful ideas always and thanks so much for sharing them with all of us here.
    Have a great time ahead hun and lots of fun, I hope.ReplyCancel

  • PatriciaOctober 10, 2011 - 1:48 am

    Thank you Becca,
    You have made that look soooo!!!! easy I know even I will manage follow it.
    I am a very visual learner and that is just so fantastic.
    Glad to see you back I was rather worried about you.

    God Bless

    Patricia xxReplyCancel

  • Nic KeilyOctober 10, 2011 - 1:49 am

    Thank you for taking the time to prepare the tutorial. It was fantastic. I really loved being able to see step by step how you made the box. You make it look so easy – here’s hoping it is!ReplyCancel

  • Christine Harrop, Oxfordshire, UKOctober 10, 2011 - 1:54 am

    Oh, we have missed you too Becca! Thank you for sharing this tutorial – I am one of those visual people. It all makes much more sense when I see it.
    love from Christine xReplyCancel

  • Larrik (??????)October 10, 2011 - 2:18 am

    These boxes are gorgeous!!
    Thanks for your brilliant idea and video tutorial !ReplyCancel

  • JessicaOctober 10, 2011 - 2:58 am

    Very cute idea! TFSReplyCancel

  • GerryOctober 10, 2011 - 3:58 am

    Thank you for the tutorial. Your tutorial production was excellent. Good luck with your new camera.ReplyCancel

  • Debbie BOctober 10, 2011 - 4:31 am

    Talk about missing someone. I have checked every day just to see if I missed something. You are one of my happy luxuries. Thank you for all you do!ReplyCancel

  • EileenOctober 10, 2011 - 4:53 am

    Thank you so much for this visual tutorial, you make everything look sooo easy!
    Pleased to hear you managed to come to terms with your camera,
    LOL EileenReplyCancel

  • EllenaElizabethOctober 10, 2011 - 5:10 am

    So pleased you’re back Becca! I might give the tree a go now i have watched your tute. Thanks.ReplyCancel

  • DeniceOctober 10, 2011 - 5:58 am

    I honestly think you should be doing a crafting show on television. You are an excellent teacher and way better than what I have seen on the crafting shows. Thank you so much for sharing and making crafting / card making so much fun. You take the frustration out of the picture for all of us here in computer land. We love you. God bless ……. DeniceReplyCancel

  • Barbara WilsonOctober 10, 2011 - 6:10 am

    Thanks for tutorial. You always make things look easy.ReplyCancel

  • Marilyn ClarkOctober 10, 2011 - 6:10 am

    Glad you are back. Thanks for the video. You and your camera are going to get along just fine.ReplyCancel

  • IreneOctober 10, 2011 - 6:21 am

    Thanks for all of the effort with the new equipment…it was a great video!ReplyCancel

  • lois skiathitisOctober 10, 2011 - 6:27 am

    I’ve missed you too Becca, but I had a feeling that you were behind the scenes creating something. Thanks for the great video tutorial. Being a visual learner it has been very helpful. As always Becca, TFS!!! :-DReplyCancel

  • ValleyOctober 10, 2011 - 6:31 am

    Love your testimony for our LORD!! Thanks also for the great video. Thank you for using your talent for Him!!ReplyCancel

  • Mary HOctober 10, 2011 - 6:58 am

    Thanks Becca!! That is really cute. :)ReplyCancel

  • Carol LOctober 10, 2011 - 7:31 am

    Love your tree box Becca, but please…won’t you make the video for the pop up snowflake card that you said you’d make (I think last year). In five days I’ll be going away on a week’s stamping retreat, and usually work on my Christmas cards. I know a lot of other ladies have asked you for that video. I’d sure LOVE to have the knowledge to make that pop up. Thanks much. CarolReplyCancel

  • EliOctober 10, 2011 - 7:37 am

    Becca,
    This is so fabulous. It will sell a lot of stamp sets and bless a lot of people with precious gifts. Thanks for the tutorial.
    EliReplyCancel

  • FrancineOctober 10, 2011 - 7:42 am

    It is nice you are back. The video is perfect clear , simple pleasant to look Thank for make it for us. Francine.ReplyCancel

  • PatriciaOctober 10, 2011 - 8:26 am

    Becca, Patricia here again!!
    Have you ever thought about doing a DVD of some of your “Tuorials”.
    I am sure it would sell “Like Hotcakes”
    Although I live in the UK, I for one would “Jump Hoops” to be able to get it.

    Patricia xxReplyCancel

  • MickieOctober 10, 2011 - 8:47 am

    Thanks for the video, very well done me lady!! You are so ingenious.ReplyCancel

  • Bonnie WeissOctober 10, 2011 - 9:50 am

    How in the world do you come up with these ideas and then create them??!! Does your imagination ever get any rest?? This is an amazing project with very clear, concise instructions Becca … thanks once again for sharing your talent and creativity with all of us.ReplyCancel

  • Monica LoreOctober 10, 2011 - 10:16 am

    Thanks so much for sharing Becca!
    Just a note – in raising the resolution, you risk slowing the video down. I had to stick with 480 otherwise there was drop out.ReplyCancel

  • Cindy H.October 10, 2011 - 10:57 am

    What an excellent tutorial!! Thank you so much!!! Love these little tree boxes :)ReplyCancel

  • DOTTIE MCFADDENOctober 10, 2011 - 10:57 am

    Do you have a degree in engineering? I ask because you must have training to design all the things you do. I can’t imagine how you come up with all the wonderful design and then teach us how to do them too. You are fabulous!!!!ReplyCancel

  • StephanieOctober 10, 2011 - 11:04 am

    Glad you’re back. I was worried.ReplyCancel

  • RubyOctober 10, 2011 - 11:06 am

    Wow… great tutorial! I too am visual so thank you very much for the instructions. These tree boxes are just great and will look so beautiful on my table. I just hope I will have time to make them, because you did make it look easy, but I’m all thumbs! haha tks again!ReplyCancel

  • Jane SuperOctober 10, 2011 - 11:22 am

    Becca, Thank you Soooo much for the instructions on those beautiful tree boxes. You did an excellent job of showing us just how to make them.
    Thank you again!!!ReplyCancel

  • GeorgetteOctober 10, 2011 - 11:25 am

    love the tree box that will make a good gift and add candy inside
    thank for showing
    like very much your video
    thank again
    have a very good dayReplyCancel

  • BrendaOctober 10, 2011 - 12:45 pm

    Missed you too. Glad to see you back!!!ReplyCancel

  • Laura ~ Layers of ColorOctober 10, 2011 - 12:59 pm

    Oooo, all these projects are marvelous, Becca! Wonderful, clear and easy steps to your tutorials! It was worth every frustrating moment with that new camera! Superb!ReplyCancel

  • Jean PippOctober 10, 2011 - 1:32 pm

    Becca. Just absolutely love the Christmas tree box…it is fabulous. I will be doing a craft show in a month and I am going to try to make some boxes. Thanks as always for sharing you beautiful work….ReplyCancel

  • Suzi YerkesOctober 10, 2011 - 1:56 pm

    Thank you Becca for being a kind and amazing person for sharing your talents wil all of us. You really do beautiful work. Thanks.ReplyCancel

  • Cheryl StaufferOctober 10, 2011 - 2:24 pm

    Thank you so much, Becca, for the video on how to make your wonderful tree box!! You are so creative and create such gorgeous items. I appreciate you sharing your talent with me and all of us. I hope to find some time soon to try making one of these!!ReplyCancel

  • stephOctober 10, 2011 - 2:42 pm

    this is super, love it.ReplyCancel

  • Carol E BrookerOctober 10, 2011 - 3:13 pm

    Wow! That is amazing thanks so much for sharing it. You make it look so easy.ReplyCancel

  • Judy McMullenOctober 10, 2011 - 4:13 pm

    Thanks, Becca, for another terrific tutorial! Love this Christmas tree box!!ReplyCancel

  • TerriSOctober 10, 2011 - 4:27 pm

    Fantastic! I’m a visual learner, so I’m very grateful that you ‘took the training wheels’ off! Great job!ReplyCancel

  • Jeanette DukeOctober 10, 2011 - 5:36 pm

    How kind you are to share your wonderful creations. I can’t wait to make this.
    Thanks for all you do and the video was so clear.ReplyCancel

  • mary friederichsenOctober 10, 2011 - 5:41 pm

    Becca this was wonderful! You did a great job with this video!

    Thank you so much for sharing, It is nice to see you back again,I missed you too!

    Blessings,
    MaryReplyCancel

  • AnnelieOctober 10, 2011 - 6:05 pm

    Love all your tutorials — so much easier to understand than written directions, for me anyway. Thanks for much for taking the time to do this for us, Becca.ReplyCancel

  • Joyce M (Scotland)October 10, 2011 - 6:06 pm

    Love love love your boxes – did try a run on my own but now that you have such clear video instructions can’t wait to try it out again – the proper way!! Thanks for sharing your amazing talent.ReplyCancel

  • caroline hillOctober 10, 2011 - 6:13 pm

    Thanks Becca loved your tutorial.You put Martha to shame.lolReplyCancel

  • ColleenOctober 10, 2011 - 7:14 pm

    Your videos are always such a pleasure to watch. Your voice is soothing and your technique is spot-on. I will have to see about trying a box like this! Thank you for taking time to do these tutorials.

    May God continually bless you. ?ReplyCancel

  • RufusOctober 10, 2011 - 8:05 pm

    BECCA!! I’ve missed you. Love your tutorial on the tree box, new camera is very nice! Hope it hasn’t driven you to crazy. It was really nice to find you in my in-box. Have a great week,
    R/ReplyCancel

  • Theresa RomaniOctober 10, 2011 - 8:21 pm

    Awesome tutorial and real “outside of the box” thinking for this stamp, LOL.ReplyCancel

  • Becky GreenOctober 10, 2011 - 8:29 pm

    WHAT A BEAUTIFUL JOB Becca!!!!!!!! You did a WONDERFUL JOB on the video!!!!!!! Thanks for showing us!!!!!! How EASY you made it look, & without a template to boot!!!!!!!! :) SUPER!!!!!!!!!!!!!!!!!! :)ReplyCancel

  • Charlotte ZweigoronOctober 11, 2011 - 8:19 am

    Thanks for the tutorial. I had to try it right away! Mine came out a little more squat because I was using a Cheery Lynn doily die cut which I cut into pieces along the solid areas within the doily to make the four sides very lacy. I am busily experimenting with other sizes for the four sides because I don’t have any of these wonderful stamps. Got to make do with what I have! So good to have you back on the tutorial trail! I feel silly saying I love this project because I love ALL your projects!! Just wish I could get some of your cards to add to my collection of my favorite designer’s works… You are #1 in a circle of four including Tim Holtz, Andrea Ewen and Teresa Kline. #1!!!ReplyCancel

  • HeatherOctober 11, 2011 - 8:38 am

    I was so happy to hear all was well – and that you had a tutorial for us!
    You are such a whipper-snapper. I would have had to have the template then search for the stamp, whereas you create as you go along. A ‘true’ use of creativity-lol. I’ll be making these as table toppers (I may leave off the trunks, we’ll see) and will try using a vellum with a battery candle inside. Won’t know if I don’t try, right?
    Thanks, as always, for sharing with us Becca!ReplyCancel

  • Carol WOctober 11, 2011 - 9:35 am

    Great to see you back, and the tutorial looks wonderful (I took your advice and watched in glorious HD)!
    As others have mentioned, I really love how you walk us through how you created a shape/idea/etc. by using straight-forward spatial reasoning rather than a template. Templates are great, but your work empowers me to figure things out myself (especially when forging new paths that don’t have templates!). Even when I just re-create a project you’ve already perfected, the “constructive” part of my brain gets wonderful exercise. Thank you so much for that.ReplyCancel

  • RockyOctober 11, 2011 - 3:23 pm

    Thanks for a really clear tutorial, it was so easy to follow. There’ll be tree boxes all over my house this year !ReplyCancel

  • NimueOctober 12, 2011 - 6:33 pm

    Thanks so much for the tutorial. Your ability to think outside the box amazes me. You always find different ways to use things. Love it.ReplyCancel

  • sandie carterOctober 12, 2011 - 8:09 pm

    Thank you so much for the wonderful tutorial. It would have taken me ages to try and work out how to make this gorgeous little tree box. Thanks you for sharing your never ending talents on your blog – you are truly amazing!!ReplyCancel

  • SaBrinaOctober 13, 2011 - 8:42 am

    Thank you so much for the tutorial! I am a little intimidated by the difficulty of it, but I will give it a try! Once I have the proper stamp set! Ms. Becca you make it look sooooooo easy. Once again, beautiful work awesome talent. SaBrina B.ReplyCancel

  • Sue AlgOctober 13, 2011 - 11:35 am

    You are truly a paper engineer. To have the vision to create a box from a triangle stamp is a wonderful talent. I thought your video was great and it appears you have learned how to use your new equipment. Thanks for much for sharing your videos because I think most people are visual learners.ReplyCancel

  • Dee DiGiambattistaOctober 14, 2011 - 9:16 pm

    Becca, this is wonderful!! Thank you so much!!!!!!ReplyCancel

  • AnneOctober 15, 2011 - 10:04 am

    Becca, Love all your cards and Turtorials. I have a Beeca file on my computer! Would you please do a step by step photo turtorial on how to make this Christmas Tree Box? I tried to write down the steps as I was following the vidieo (twice), but I am sure I missed some steps.

    Thank you so much for sharing.ReplyCancel

  • chaunOctober 19, 2011 - 3:16 pm

    Very clever! Great video tutorial! Thanks!ReplyCancel

  • Dee DiGiambattistaNovember 3, 2011 - 3:21 pm

    Becca, you are brilliant!! I made one of these and I was okay up until I had to tape down the flap and I taped the wrong one down. So close, I should have taped the one next to it. I Will try it again and I’m confident I will be successful. I am going to try to make this as an advent for my grandson for Christmas, I think it would be wonderful!! Thank you for your great ideas!! P.S. I hope this is okay with you.ReplyCancel

  • Conceição VarellaNovember 9, 2011 - 11:40 am

    Este trabalho e de extremo bom gosto. Lindo… lindo… lindo! Parabéns!ReplyCancel

Hi there blog friends!  Yep, box mode again!   I can’t explain why but I’m rolling with it and it’s a good change of pace for me.  This is another of the October JustRite Stampers releases and this one is called O Christmas Tree.  I love the font and love the shape!!   I stamped the shape multiple times, scored and came up with a simple box that will work for place settings and favors and can be opened by a flap on the bottom.


Some of the smaller Spellbinders elements were used on the favors.  The two smaller elements from Spellbinders™ Layered Poinsettias were used on the red tree while Spellbinders™ 2011 Snowflake Pendants were used on the gold and white tree,

I stamped the three stamp four times in a fan arrangement and scored between each stamping.  Before cutting I allowed for a 3/8″ flap on one side and 1″ on all the bottoms.  I then matched the right sized Spellbinders™ Classic Squares LG and cut it on a fold to fashion a flap that I adhered to one of the 1″ flaps.  That let my box close on the bottom.  Then I cut a strip of paper 4 1/2″ long and scored it at 1″ intervals, turned and scored 1/2″ in.   This made the trunk of the tree – once assembled, I attached it to the bottom lid with glue dots.

SUPPLIES I USED
Stamps: JustRite StampersO Christmas Tree
Paper: Bazzill, Kraft, Strathmore Bristol
Ink: Versamark and Embossing Powder, Colorbox Chalk Ink – Warm Red, Vintage Photo Distress Ink
Accessories:  Spellbinders™ Layered PoinsettiasSpellbinders™ 2011 Snowflake Pendants,  Spellbinders™ Classic Squares LG, pearl brad, embossing powder, seam binding

Quite a few of the JustRite Desigers worked with this set and their links are listed below:

JustRite Inspiration
Becca Feeken (You are Here)
Debbie Olson
Sharon Harnist
Heidi Blankenship
Kazan Clark
Kellie Fortin
Michele Kovack 
Angela Barkhouse

Happy Monday friends!  I hope you are waking up to a beautiful new week.

pinTHIS SHAREthis TWEETTHIS EMAILthis
  • EmilyOctober 3, 2011 - 9:12 am

    You are just so creative and such an inspiration! I recently came across you’re blog and have tried out a few of your ideas. They are so much fun. Thank you for getting my creative juices flowing again and for sharing your talent. One day I’m going to tackle the awesome pop up bird cage card. That’s my absolute favorite.ReplyCancel

  • Charlotte ZweigoronOctober 3, 2011 - 9:13 am

    I copied your instructions and am going to try this because it is so darn cute! What a treat to hang on the tree! Blessings, Becca, I hope your road has smoothed a bit. Your creative genius just keeps flowing, that’s for sure!!ReplyCancel

  • auntie em (emily)October 3, 2011 - 9:27 am

    Your little tree boxes are so adorable! Love the different colours you have created them in. So festive!
    Thanks for sharing! :)ReplyCancel

  • Marlena M.October 3, 2011 - 9:28 am

    Brilliant idea! I love this Becca…you never cease to amaze me with your creativity. ;)ReplyCancel

  • Sheila-UKOctober 3, 2011 - 9:32 am

    Oh these are gorgeous Becca!!!

    Love Sheila xxReplyCancel

  • AndreaAOctober 3, 2011 - 9:34 am

    Wonderful ornament to hang on your tree!!!
    I love the colors also but can see that it would look good in many colors.

    I always make the younger kids a ornament for when the get old enough to have a tree of their own. Or some already do!!
    This just may be the one I do.
    Thanks Becca for sharing a great idea.ReplyCancel

  • Dianne GuilingerOctober 3, 2011 - 9:36 am

    I would love to see a video tutorial!ReplyCancel

  • Sally GasparriOctober 3, 2011 - 9:42 am

    These boxes are gorgeous as is all your work, Becca. You truly are an artistic genious. I would love to make these, but like Dianne would need a video tutorial. Thanks for everything you so lovingly share with us.

    Sally GasparriReplyCancel

  • MargieHOctober 3, 2011 - 9:44 am

    Oh, I bow down to you!!!!!!!! LOL!!
    So clever – great for centerpiece if you put a bunch of them together on a hall table! Thanks for the inspiration, my sweet friend!! xoReplyCancel

  • AdairOctober 3, 2011 - 9:49 am

    These are absolutely gorgeous!ReplyCancel

  • RebekkaOctober 3, 2011 - 9:51 am

    WOW … WHAT GORGEOUS TREES.. YOU ARE SO CREATIVE GIRL!ReplyCancel

  • Cindy H.October 3, 2011 - 9:51 am

    Wow, these boxes are just gorgeous!! I think the tree boxes would be wonderful on a Christmas dinner table – so elegant! I’ll have to put this on my list of things to make :)ReplyCancel

  • Clare CurcioOctober 3, 2011 - 10:02 am

    What a great idea! Beautiful! Will you be sharing your box pattern with us? Please, pretty please!ReplyCancel

  • Queen MaryOctober 3, 2011 - 10:04 am

    Becca, these are beautiful! You make it sound so easy! I’m going to try it, they make cute table toppers!ReplyCancel

  • Connie C.October 3, 2011 - 10:05 am

    Another great idea! It’s on my “I wanna do that” list, too, now.ReplyCancel

  • KathyOctober 3, 2011 - 10:08 am

    Awesome Becca… I LOVE box mode!!ReplyCancel

  • Lillian ChildOctober 3, 2011 - 10:12 am

    These trees are SO adorable! Thanks for sharing!ReplyCancel

  • Bobbie MasseyOctober 3, 2011 - 10:19 am

    Just love the little trees. A template for the box and a tutorial would be great. Each time I get an email from you, I can’t wait to see what you have made. Elegant is the word I use to describe your cards etc.ReplyCancel

  • Francie (Montreal)October 3, 2011 - 10:24 am

    Nifty! These are precious. Thx for sharing your genius with a dull normal like me.ReplyCancel

  • michelle frasherOctober 3, 2011 - 10:25 am

    wow, these are so wonderful, but i am more of a visual learner. i think i need to see how you did these on a video, please?ReplyCancel

  • LynetteOctober 3, 2011 - 10:25 am

    Beautiful, just might have to get those stamps. The Cricut “Bags Tags and Boxes” cartridge cuts a really nice Christmas Tree box in any size you like, but when I used them for gifts last Christmas they didn’t look anything like yours! Thanks for your beautiful ideas every day.ReplyCancel

  • SheilaOctober 3, 2011 - 10:37 am

    Hi Becca,
    I have been following your blog for a very short time,but WOW.I have a sight problem,so I print your beautiful works of art out,not to copy,but to give me inspiration.
    Thank you so much.
    Sheila H. U.K.ReplyCancel

  • Marianne COctober 3, 2011 - 10:38 am

    Becca, these are so beautiful! What size are the trees. I went to the stamping website but it didn’t have that info.ReplyCancel

  • Judy I, St. Louis MOOctober 3, 2011 - 11:00 am

    Awesome as always!ReplyCancel

  • Diana E.October 3, 2011 - 11:51 am

    Where do you come up with all this knowledge. I only wish I had just a little bit so I could just once do something original. Beautifully done and thanks so much for sharing ! ! !ReplyCancel

  • Becky GreenOctober 3, 2011 - 12:03 pm

    BEAUTIFUL Becca!!!!!!!!!!!! I saw these on the JustRite site but, just didn’t pay attention to WHO made them!!!!!! I SHOULD HAVE KNOW it was YOU!!!!!!! :) These WOULD be PERFECT for a place setting! MAYBE, add a little candy inside???? :)ReplyCancel

  • Pat HarveyOctober 3, 2011 - 12:06 pm

    Would love to see a video on this tree…beautiful!ReplyCancel

  • Jane SuperOctober 3, 2011 - 12:09 pm

    Becca! What a stunning use of those stamps. You continue to amaze me. Thank you sooo much for sharing your creativity with us.ReplyCancel

  • RubyOctober 3, 2011 - 12:17 pm

    I just love this stamp set as well as how you used it. I agree with all the comments you are so creative and just wish I had one/tenth of it! Tks for sharing! (yes, I too would love to get the pattern!)ReplyCancel

  • Julie (Joypup on SCS)October 3, 2011 - 12:31 pm

    I would love a visual for how you stamped this and for the template (generalized) that you used for cutting and folding. This is a great project to re-create. Wonderful work, truly!ReplyCancel

  • Ann LindOctober 3, 2011 - 12:44 pm

    I would love to see a tutorail on how to make your tree books. These would be lovly on my Christmas table with small favors at each place setting. I love to check out your blog daily you are an inspiration your work and style are breath taking. TFS AnnReplyCancel

  • HeatherOctober 3, 2011 - 1:03 pm

    These are fantastic! I’m really hoping you will “show” how you made these since I am a very visual learner XX crossing fingers :)ReplyCancel

  • GerryOctober 3, 2011 - 1:03 pm

    What a neat idea for table decorations. I couldn’t find a description for the clearcut stamps — are they ready to use? Do they need to be cut out? How large are the various triangular stamps? How large is your finished triangular box?ReplyCancel

  • GerryOctober 3, 2011 - 1:05 pm

    Correction — JustRite “Clear” stamps (not Clear cut)ReplyCancel

  • mel mccarthyOctober 3, 2011 - 1:08 pm

    These are so clever & so lovely!ReplyCancel

  • TheaOctober 3, 2011 - 1:12 pm

    Hi Becca,

    Beautiful christmastree’s!

    Hugs
    TheaReplyCancel

  • PatriciaOctober 3, 2011 - 1:27 pm

    Hi Becca,
    These boxes are “Amazing” I am off to try it out.
    I am a very “Visual” crafter so maybe a “Tutorial” would be good.
    Hugs

    Patricia xxReplyCancel

  • alsmouseOctober 3, 2011 - 1:38 pm

    This is a breathtaking design. Thanks for sharing it.
    alsmouse ~C8> Ratty HugsReplyCancel

  • sheri sOctober 3, 2011 - 1:56 pm

    Prrrrreeety clever!!! Would like to have a tutorial. REALLY would!!! If you are so inclined, it would be appreciated and put to good use. Thanx for the inspiration.ReplyCancel

  • Judy McMullenOctober 3, 2011 - 2:04 pm

    Becca, you are amazing! What a wonderful Christmas tree box!! I stand in awe of your creativity!!!ReplyCancel

  • Marlene IacuzziOctober 3, 2011 - 2:06 pm

    This would have to be stored with the other Christmas decorations —who could bear to part with it.ReplyCancel

  • lois skiathitisOctober 3, 2011 - 2:34 pm

    These little boxed trees are gorgeous. You need some fake snow and a few other decorations and you have a cute little village. You have decorated them so nicely. As always Becca, TFS!!! ;-DReplyCancel

  • NoreenOctober 3, 2011 - 3:34 pm

    Wow! Beautiful trees – and a clever idea!ReplyCancel

  • BettyeOctober 3, 2011 - 3:55 pm

    Love the boxes, your work is so inspiring.
    Isn’t your birthday Thursday? Want to wish you a blessed birthday.ReplyCancel

  • Janice P.October 3, 2011 - 4:51 pm

    This is one project I certainly would like to do. Please, please do a visual tutorial for this one!ReplyCancel

  • Cheryl StaufferOctober 3, 2011 - 4:56 pm

    Ooooooh Becca, this is absolutely gorgeous!! I can see these at each of my Christmas Eve family dinner, to hand out at my mother’s assisted living residence, for my fellow choir members, to friends who I make small gifts for, ……etc. I hope you will do a video tutorial for us as you always make the videos so easy to understand. Thank you for sharing you creativity with us all again.ReplyCancel

  • ElaineOctober 3, 2011 - 7:25 pm

    Genius idea! These are great!ReplyCancel

  • SusanOctober 3, 2011 - 7:29 pm

    These boxes are just beautiful!ReplyCancel

  • Robin GasserOctober 3, 2011 - 8:12 pm

    That’s a GREAT idea for the shape of the little image!! Looks like a tree, indeed!ReplyCancel

  • PeggySOctober 3, 2011 - 9:07 pm

    Becca,
    You stay on the box kick. I love the Christmas tree boxes. You are and always will be AMAZING.
    God bless,
    PeggyReplyCancel

  • FrannieOctober 3, 2011 - 9:14 pm

    WOW you are truely very creative. I just love your blog. TFSReplyCancel

  • RufusOctober 3, 2011 - 10:01 pm

    Becca, while it may be a box, you are def. thinking Outside the box! Glad that you’re having fun with it! Really like your Christmas tree boxes, not sure if my fav is the red/white with poinsettia or the one with snowflakes, then again the last one has that gorgeous Becca bow!! lol
    Hugs,
    R/ReplyCancel

  • Gloria WestermanOctober 3, 2011 - 10:36 pm

    How pretty!!! Bet you could put a lot of Hershys kisses in those….tfsReplyCancel

  • SianOctober 4, 2011 - 1:33 am

    Oh my goodness!! These tree boxes are beautiful! You really have an awesome imagination and excellent execution – I am very jealous! They’d make lovely little gift boxes all filled with chocolates, mmmm! :)ReplyCancel

  • JocelynOctober 4, 2011 - 3:29 am

    Just gorgeous, Becca you are so clever with your designs… we appreciate you from down under in New Zealand…you have a lot of followers!ReplyCancel

  • HeatherOctober 4, 2011 - 3:37 am

    Becca, Becca – you’ve done it again….. These little boxes are gorgeous and will be so useful for lots of occasions… my head is buzzing …. like all your followers it seems … I do hope you do a tutorial (no pressure!!!).
    Hugs
    HW(UK)
    xReplyCancel

  • cynthia beynonOctober 4, 2011 - 3:46 am

    Becca
    We sure are getting clever in our old age as the saying goes. What a clever
    idea and can be used for so many different ideas. You sure are coming up with some good ideas. Becca, just keep it up.

    cynthia beynonReplyCancel

  • FrancineOctober 4, 2011 - 5:42 am

    Our traditionnel Chrismas tree have a great look like this… I would like to see a little village with the Becca touch a kind of collection that we can built and add pieces through the years. I like so much all your paper decorations they are all attraction pieces . Thanks for all the beauty you bring in our life. FrancineReplyCancel

  • JudyOctober 4, 2011 - 7:16 am

    Hi Becca! You make the best “stuff!” I love everyone of the trees and they look like they could fold flat to mail too?ReplyCancel

  • LindaOctober 4, 2011 - 8:15 am

    Becca, I just love your tree box. Would you be so kind as to share the template you made please? I have a similar template, but the base is loose and fits into the bottom of the tree.ReplyCancel

  • LindaOctober 4, 2011 - 3:52 pm

    Becca, these are gorgeous, as always. Will you ever run out of ideas? Thanks for sharing. LindaReplyCancel

  • PJOctober 4, 2011 - 4:37 pm

    I’ve always thought how well you think “outside” of the box… and now you’re proving how “amazing” you are “inside” the box. As always you are such an ispiration. I hope you know how much we all appreciate you and your generosity in sharing your creativity.ReplyCancel

  • Saundra GroseOctober 4, 2011 - 4:41 pm

    I love these boxes; will you do a tutorial?ReplyCancel

  • AnneOctober 5, 2011 - 2:38 am

    What fabulous tree boxes! Just love them!
    Hugs
    Anne (UK) xReplyCancel

  • kendellOctober 6, 2011 - 6:25 pm

    I love the boxes, thanks for sharing, Kindest regardsReplyCancel

  • SaBrinaOctober 6, 2011 - 9:50 pm

    What a wonderful box! Will we have the pleasure of viewing a tutorial!
    Please!:)ReplyCancel

  • Nancy WOctober 7, 2011 - 1:27 pm

    Inspirational as always! It’s wonderful—and 3-D too!ReplyCancel

  • Julia AstonOctober 8, 2011 - 8:54 pm

    I LOVE your pretty trees Becca! what lovely stampings and colors on them all – SO creative!! and a wonderful table decoration!ReplyCancel

  • PatriciaOctober 9, 2011 - 10:24 am

    I just love those decoations.

    Becca are you OK???
    Not like you to be away from us for so long.
    Maybe I have missed something and you are off on holiday.

    God Bless.

    PatriciaReplyCancel

  • Barb GhigliottyOctober 9, 2011 - 3:33 pm

    Oh, how BEAUTIFUL!!!ReplyCancel

  • Jacky WilsonOctober 9, 2011 - 11:16 pm

    This is just too cute! Thank you for all your wonderful ideas, what would we do without you!! :)ReplyCancel

  • christiOctober 10, 2011 - 5:43 am

    thanks for the tut. i was looking for an idea for my little cjhristmas goodies and i think this h=fits the bill.ReplyCancel

  • Laura ~ Layers of ColorOctober 10, 2011 - 12:45 pm

    Wow, Becca! What a gorgeous project! So unique, fresh and lovely! Beautiful workmanship too!

    Many blessings and hugs!ReplyCancel

  • […] a walk through of how to make the triangle shaped Christmas Tree favor boxes that I showed on my JustRite Stampers Post and hopefully I can get to some of the tutorials and such that have been piling up on my to do […]ReplyCancel

  • debbieOctober 30, 2011 - 9:01 am

    Becca – What a beautiful box…I would love to make these for co-workers. Do you have a tutorial for this?
    Thanks
    DebbieReplyCancel

I N F O