Hi there, as promised I’m back with the tutorial that shows a different way to make bows with the Peg Bow Maker.  It’s really a nuance of other versions I’ve shown you but is something I figured out from frustration.  The way this is put together the loops come out separated so that you don’t have to fuss with the bow so much.  Yes, I fuss, and fuss and sometimes fuss more!!   I put together a card yesterday that shows a six loop bow and the one on my card today is a two loop bow.  I’m equally at ease tying bows by hand but I love having the extra hand using the pegs.

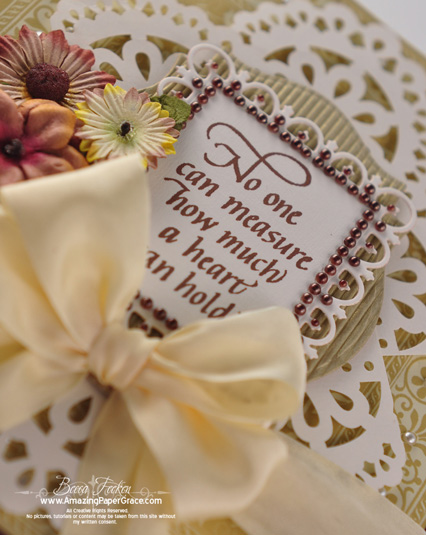
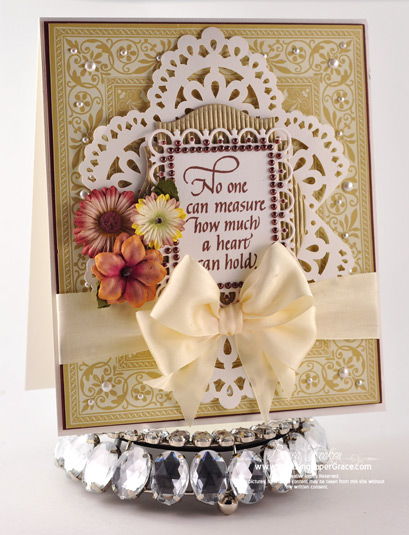
So I’ll tell you a bit about the sample.  I used another wonderful sentiment from Quietfire Design called No One Can Measure.  The base layer is a decorative card stock with pre-applied pearls by the Paper Studio (HL) that I cut down into fourths and pieced together to make a background.  The lacey paper is a piece of Anna Griffin (found at Michaels) and these were leftovers from another card – not a smidgen went to waste.  On top of that I layered Spellbinders Labels Eighteen cut from corrugated gold paper from K & Co. (found at AC Moore) then topped with Spellbinders Fleur de lis Rectangles.   I think I did a happy dance when I applied the Want2Scrap Nestabling right on top of that Fleur de lis Rectangle – they’re so easy to get on and it looks like you applied each pearl individually!!  (If you click over to see what I used, I used the second tier of pearls out of the four tiers you get with the set).

The last thing I did was add a couple of flowers and tie on my Figure Eight Loops Bow!

ETA:  After a year online, video has been retired.   I spent a year perfecting the bows and making the techniques consistent and remade all the videos into a collection I’m really proud of.   This bow is made much differently now and can be found on the DVD that accompanies the professional looking version of the bow maker –  HERE.

SUPPLIES I USEDStamps: Quietfire DesignNo One Can Measure
Paper: Anna Griffin, The Paper Studio, K & Co, Bazzill, Strathmore Acrylic
Ink: Colorbox Chalk Ink – Chestnut Roan
Accessories: Prima Flowers, Want2Scrap Pearls – Fleur de lis Rectangles (Mocha Pearl), Ribbon, Spellbinders Labels Eighteen, Spellbinders Fleur de lis Rectangles

Bless you all!  See you soon!!

pinTHIS SHAREthis TWEETTHIS EMAILthis
  • JeanMay 4, 2011 - 11:27 am

    Hi Becca ~ as always, your card is just beautiful! And the colors!!
    Thank you, Blessings.ReplyCancel

  • D IdletMay 4, 2011 - 12:38 pm

    Beautiful!ReplyCancel

  • cynthia beynonMay 4, 2011 - 2:27 pm

    BECCA JUST ANOTHER FANTASIC BOW . ONE AFTER ANOTHER.
    \JUST DON’T KNOW HOW YOU DO IT. GOD SURE BLESSED YOU
    WHEN YOU WERE BORN. JUST KEEP IT UP.

    CYNTHIAZReplyCancel

  • Sheila - UKMay 4, 2011 - 2:32 pm

    Oh what a beautiful card Becca!! A great tutorial and you always make them so easy. Many thanks.

    Love Sheila xxReplyCancel

  • Nadine BaileyMay 4, 2011 - 2:35 pm

    Thanks for another bow tutorial.

    I would like to ask how you get the spellbinder layers so nice. I will use the 2 dyes next in size and the larger size is still so much larger than what I would really like to have it on my card. I have cut the image down to the embossed impression to get the size I am looking for. Is there a set that goes in between?

    Thanks again for your wonderful designs and sharing your knowledge. You do have a gift.ReplyCancel

  • Debbi (UK)May 4, 2011 - 2:35 pm

    As always, a fantastic tutorial. You really do inspire my card making with your brillant technicques…thank you.ReplyCancel

  • GretchenMay 4, 2011 - 2:59 pm

    Super easy tutorial and what a beautiful bows!ReplyCancel

  • Cyndie MartinMay 4, 2011 - 3:03 pm

    Becca, you have the most wonderful tutorials. I just love your creations. Thanks so much for sharing.ReplyCancel

  • TrinaMay 4, 2011 - 3:20 pm

    Thanks for the fantastic tutorial. You are so clever.ReplyCancel

  • Becky GreenMay 4, 2011 - 3:29 pm

    WHAT A GORGEOUS CARD BECCA!!!!! :) VERY FEMININE!!!!!!!!!!! AND your tutorial is SUPER!!!! Thanks for showing us a better way to do a peg bow!!!!!! :) YOU’RE SUPER!!!!!!!!!!!!!!!!!!!!! :)ReplyCancel

  • froSuziMay 4, 2011 - 3:31 pm

    I am loving my peg bow maker! I thought I was pretty good at bows by hand, but I got a lovely comment from a fellow crafter last night! I was showing her my new fold and tuck technique (new to me), but it was the bow on the card that she noticed! Thanks so much!ReplyCancel

  • JeanMay 4, 2011 - 4:07 pm

    This is a beautiful card and your tutorial was great. I love my peg bow maker!ReplyCancel

  • RebeccaMay 4, 2011 - 4:15 pm

    This can be done on a bow easy too. You have to scrunch the ribbon up more to get it all on the legs but it works great!ReplyCancel

    • Becca FeekenMay 4, 2011 - 4:26 pm

      Rebecca, I always had a hard time even doing a double wrap on a Bow Easy. Probably me and my uncoordinated-ness :-) This way is, way less frustrating for me!ReplyCancel

  • mary anneMay 4, 2011 - 4:27 pm

    This is a great part 2. I was having the same problem you described with my peg bow if I tried for a double bow. Thank you for your help.ReplyCancel

  • bonnie weissMay 4, 2011 - 4:49 pm

    What a beautiful sentiment and card, Becca. And thanks for the newest tutorial for the BPBS. I have a ME day tomorrow and I am going to Michael’s to get some yummy new ribbon to use with my BPBS. As always, thanks for the inspiration.ReplyCancel

  • ChelseaMay 4, 2011 - 5:06 pm

    Beautiful card, Becca. Thank you for another very useful tutorial. I’ve got to get busy and make me a peg bow thing-y!ReplyCancel

  • Honey MowryMay 4, 2011 - 5:19 pm

    Hi Becca, I love watching all the wonderful things you teach, you are amazing at what you know and we don’t! Your new peg bow tutorial is not viewed in its entirity. We lose you when you go to tie the bow. So we either have to figure it out ourselves or perhaps you can redo things so we can see it all. Thanks so much and may God shine his light continually in your heart each day as you continue to healReplyCancel

  • ColleenB.May 4, 2011 - 5:19 pm

    Beautiful card and once again, thank U 4 the wonderful tutorial
    ColleenB.ReplyCancel

  • chaunMay 4, 2011 - 5:44 pm

    Lovely! (as usual!)ReplyCancel

  • FMMay 4, 2011 - 6:25 pm

    Gorgeous card and thank you for the tutorial!ReplyCancel

  • DawnllMay 4, 2011 - 6:49 pm

    Love them!!!ReplyCancel

  • Theresa BonettiMay 4, 2011 - 8:15 pm

    Becca, This card is just beautiful, the colors and all the embellishments are just perfect together. I want you to know that I’ve noticed all the extra details you’ve included about the exact items used on your cards yesterday/today and with the links provided. That means so much to me that you thought to take the extra time to do that for all of us.. This latest Peg Bow tutorial is also great and appreciated. I sincerely THANK-YOU for everything you are showing and teaching me! God’s light is shining forth through you and your blog.. Blessings & HugsReplyCancel

  • MickieMay 4, 2011 - 9:14 pm

    You inspire me sooooo much. Your bows are beautiful, IGOTTA have one of those thingies!!ReplyCancel

  • Lesley BrownMay 4, 2011 - 11:39 pm

    Becca, thank you so much for being so generous and gracious. Your work is so lovely…to look at and it is so kind of you to show us how you do it!ReplyCancel

  • RebekkaMay 5, 2011 - 12:05 am

    Your card is just stunning, as always :)..Wonderful tutorial on the bow, thanks Becca.ReplyCancel

  • MarilynMay 5, 2011 - 1:13 am

    I love my little pegboard. I am so gratefull that you share. I will go and try this new way out. MarilynReplyCancel

  • MarilynMay 5, 2011 - 1:15 am

    I just love my little pegboard. Thank you for sharing… I will go try out the new bows :) MarilynReplyCancel

  • Debbie MeijerMay 5, 2011 - 2:36 am

    Hi Becca.
    Thank you for this great tutorial! I was always having trouble to get the loops seperate from eachother but now i know how to create the perfect bow. :)ReplyCancel

  • MaryannMay 5, 2011 - 3:07 am

    Such a beautiful card, and what an awesome bow too. I just love all your different gorgeous bows. They always looks sooo perfect and sooo lovely and just makes all your cards pop out everytime.
    And thanks sooo much for always sharing all your great ideas to help all of us here too. You´re truely amazing. And thanks so much for that.ReplyCancel

  • lois skiathitisMay 5, 2011 - 6:25 am

    Beautiful card Becca, I love the sentiment and your bow is just so pretty. Thanks for the video showing us how you make some of your bows. As always Becca, TFS!!! :-DReplyCancel

  • […] used the newest technique, Figure Eight Loops on my Peg Bow Maker for the little bow and the Ruffled Flower Tutorial to create a little eyelet […]ReplyCancel

  • Debbie BMay 5, 2011 - 8:17 am

    Thank you for sharing your knowledge and incite with us always.ReplyCancel

  • Janet L.May 5, 2011 - 8:53 am

    Great video! Thanks for sharing.ReplyCancel

  • Susie SugarMay 5, 2011 - 8:54 am

    Again a totally beautiful sentiment , your card is gougeous
    Hugs Susie Sugar xxReplyCancel

  • JessicaMay 5, 2011 - 9:51 am

    Hey Becca, you sure make some lovely Bows. And I love your cards too! TFS
    Hugs, JessicaReplyCancel

  • racheMay 5, 2011 - 10:59 am

    Becca!!! Great idea! I have got to try it
    thanks for sharing another great tip.ReplyCancel

  • AnneMay 5, 2011 - 5:47 pm

    Such sumptuous colours and love that sentiment!
    Hugs
    Anne (UK) xReplyCancel

  • DeniseMay 6, 2011 - 6:01 am

    Thanks for sharing your talented ideas. Love your work.ReplyCancel

  • Terry S.May 6, 2011 - 8:21 am

    I really love this card. I was wondering where you got that card stock. Leave it to you to cut and piece and make such a beautiful creation. And that sentiment is awesome. I’ve already gone to their website and found several stamps I can’t live without (?). Thanks so much for making all your beautiful creations and sharing them with us.ReplyCancel

  • EileenMay 6, 2011 - 11:00 am

    You make everything look soooo easy as always.
    LOL EileenReplyCancel

  • Mi MiMay 6, 2011 - 2:21 pm

    Beautiful card Becca. Love the colors. You make everything look so easy.ReplyCancel

  • Sue WildmanMay 6, 2011 - 7:25 pm

    Thanks so much for all your great idea’s you are such a blessing to all of us! God Bless!ReplyCancel

  • […] Rectangles mounted on top of Spellbinders Labels Eighteen.  On top of my Peg Bow, tied using the Figure Eight Loops technique, I mounted a little butterfly from the Spellbinders Fanciful Flight […]ReplyCancel

  • […] simply Google Hug Snug) that I dyed with Victorian Velvet Distress Ink reinker and tied with the Figure Eight Loops technique on my Peg Bow […]ReplyCancel

  • […] for the center.  I added some lace and sheer ribbon tied with my Peg Bow Maker as shown in this Figure Eight Loops Bow Tutorial.  The card base for this card is 5.5″ x 7″ – my favorite size card and I […]ReplyCancel


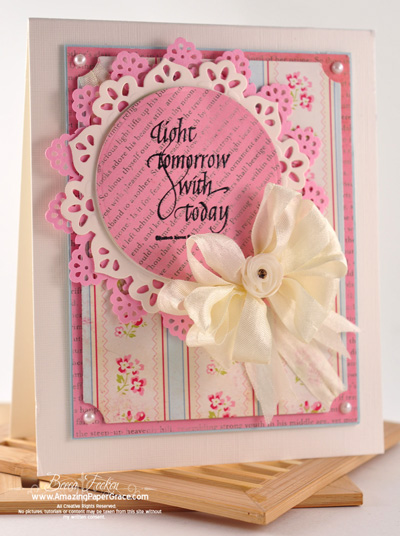
Hi blog friends!!  What a busy day!!  I’m working on a new tutorial, cleaning house, arranging furniture and it seems like I have million other irons in the fire all at once.  I took a break to get this card together.  I am just loving the doily look so I layered up a couple for my card.  My medallion is made using Spellbinders Floral Doily Motif and Spellbinders Standard Circles LG and Spellbinders Standard Circles SM.  The bottom layer is made from a corner punch using my Circular Frame Using Corner Punch Tutorial from a couple of years ago.   You all know that I’ve been smitten by The Girls Paperie paper, so I’m using it again . . . remember, I’m trying not to hoard :-)

I’m highlighting a sentiment from Quietfire Design called Light Tomorrow with Today – simple and pretty for a general card to go into my stash!

The tutorial I’m working on is a new bow made on the Peg Bow Maker.  The bow on this card is a sample because I was playing around with them this morning.  This is a six layer bow and once I pull it off the pegs, it’s ready to go.   I should have the tutorial ready today or tomorrow so be sure to check back.

SUPPLIES I USED
Stamps: Quietfire DesignLight Tomorrow with Today
Paper: The Girls Paperie, Strathmore Acrylic
Ink: Versafine Onyx Black and clear embossing powder
Accessories: Spellbinders Floral Doily Motif, Spellbinders Standard Circles LG, Spellbinders Standard Circles SM, Spellbinders Grand Large Labels, Martha Stewart Deco Flowers Corner Punch, Jolees Hair Pin, Recollections Pearls

Thanks for stopping by!!  See you tomorrow!!

pinTHIS SHAREthis TWEETTHIS EMAILthis
  • DebraKMay 3, 2011 - 12:56 pm

    LOVE the bow–beautiful card and sentiment!ReplyCancel

  • Naomi A. of ColoradoMay 3, 2011 - 1:04 pm

    Beautiful Becca…can’t wait until the tutorial!ReplyCancel

  • WillowMay 3, 2011 - 1:10 pm

    Another beauty Becca!!! Can’t wait to watch your latest video. Just wish I had those bow making tools of yours. Have you thought anymore about selling them????ReplyCancel

  • SheilaMay 3, 2011 - 1:20 pm

    I can’t wait to see how you made the new bow. It is so cute and just in time for Mother’s Day. Becca, yesterday, I rearranged my son’s bedroom furniture and had a blast. There must be something in the air. LOLReplyCancel

  • lois skiathitisMay 3, 2011 - 1:23 pm

    Very pretty card Becca, love the beautiful bow and the colors chosen love the sentiment too. As always Becca, TFS!!!:-DReplyCancel

  • cynthia beynonMay 3, 2011 - 1:32 pm

    BECCA BECCA ANOTHER FANTASTIC CARD FROM YOUR CARD
    IDEAS. AND ITS A WINNER. IT COULD BE USED ANYTIME BY JUST
    CHANGING THE SAYING. LOVE IT.

    CYNTHIAReplyCancel

  • Becky GreenMay 3, 2011 - 1:37 pm

    Oooooo, Becca!!!! Can’t wait to see your NEW TUTORIAL!!!! LOVE the bow you’ve made on this card!!!!!!!! NICE PAPERS!!!! :)ReplyCancel

  • RebekkaMay 3, 2011 - 1:40 pm

    This is beautiful Becca, loving this paper and that gorgeous bow. Can not wait to see the tutorial.ReplyCancel

  • JoAnn BurnhamMay 3, 2011 - 1:42 pm

    Beautiful card. Love the layered doiles. TFSReplyCancel

  • SuAnneMay 3, 2011 - 1:44 pm

    Such a bright and cheerful card. LOVE that bow – and can’t wait to see the tutorial. My best friends husband was SO kind to make me one of your peg bow makers when he made his wife one. It’s wonderful to have such good friends like that. (put my husband to SHAME!) :D Thank you Becca for sharing all your ingenious goodies with us.ReplyCancel

  • DawnllMay 3, 2011 - 1:55 pm

    Love that bow!
    I also like this fun pink paper- I am trying to work on my hoarding also
    blessings to youReplyCancel

  • Mary HarrisMay 3, 2011 - 1:57 pm

    I just love all of your cards!! This one is gorgeous!! I am partial to doily’s can’t get enough of them. Love it!!! :)ReplyCancel

  • JeanMay 3, 2011 - 2:09 pm

    Love the card. Can’t wait to see how you make the bow.ReplyCancel

  • BernieMay 3, 2011 - 2:25 pm

    I so look forward to seeing Amazing Paper Grace in my inbox. No matter what else is in there I always open your message first. I am never disappointed. The hits just keep on coming. I love all your cards and can’t wait for the next card and the next tutorial. You are such a wonderful teacher. THANK YOU for sharing all you create and teaching me/us all you do.
    Blessings BernieReplyCancel

  • MaryannMay 3, 2011 - 2:35 pm

    This card is stunning Becca, and so is the bow. Be sure, I´ll be here tomorrow to see how it´s done, that´s for sure.
    have a wonderful day and please don´t overdo things okay?ReplyCancel

  • mary marshMay 3, 2011 - 3:07 pm

    beautiful card becca-love the doily look you createdReplyCancel

  • Laura/ sandytozMay 3, 2011 - 3:17 pm

    Becca, very pretty! Can’t wait for the tutorial.ReplyCancel

  • lacyquilterMay 3, 2011 - 3:35 pm

    This is beautiful.ReplyCancel

  • Nancy HandleyMay 3, 2011 - 3:38 pm

    WOW! Another beautiful card! I’m under the weather today and your card has cheering me up – Thank you!ReplyCancel

  • RubyMay 3, 2011 - 3:50 pm

    I just love this card… the pink is just a perfect color for it. I also remember your technique to create a circular frame and I visited the page. Of course I also remember when you used corner punches for an entire section.. sorry can’t remember the name of the technique. I went looking for it in your tutorial section and couldn’t find it. Since you got your new website, might it have been lost.. hopefully not! I’ll keep looking!ReplyCancel

  • AlexMay 3, 2011 - 3:59 pm

    Love the card, the color are so soft very beatiful, so is the bow!!. Thanks for sharing.ReplyCancel

  • peggysueMay 3, 2011 - 4:52 pm

    Very pretty! Very happy! I am trying hard not to hoard either, good resolution!ReplyCancel

  • Clare CurcioMay 3, 2011 - 5:42 pm

    I thought it was funny when I read that you’re not trying to hoard, but this card is going in your stash! lol Another lovely creation Becca!

    ReplyCancel

  • auntie emMay 3, 2011 - 6:04 pm

    Your card is so sweet! Love the pretty patterned paper and the sweet bow. Sounds as though you are one busy lady. It is nice when everything is all done but it is such a headache when it’s about half done. Ugh!!!
    Thanks for sharing! :)ReplyCancel

  • FMMay 3, 2011 - 6:19 pm

    I love this paper. The pinks are so girlish! Beautiful…love the bow!ReplyCancel

  • ChelseaMay 3, 2011 - 6:24 pm

    Really, really pretty. And lacy! All my favorite things!ReplyCancel

  • PeggySMay 3, 2011 - 7:16 pm

    Becca, beautiful card and wonderful new peg bow. I can’t wait to see the tutorial. I liked your peg bow maker so much I made 6 of them. One for myself and 5 were given away as gifts. Thank you so much for the idea and inspiration.
    God bless,
    PeggySReplyCancel

  • michelle frasherMay 3, 2011 - 7:41 pm

    oh, i just love the paper you used, it has such an old fashioned look. i am so glad you have decided not to hoard – we get see and appreciate what you create with it.ReplyCancel

  • Phyllis SMay 3, 2011 - 8:18 pm

    Gorgeous card – and the tutorial is so helpful to those of us who can’t afford all the nifty dies and tools. Thanks for the continued inspiration!ReplyCancel

  • Candy MillsMay 3, 2011 - 8:34 pm

    Beautiful as ever, Becca!
    Love the doilies and also the wonderful bow.
    Can’t wait for the tutorial :o)
    Hugs, CandyReplyCancel

  • Corine van der ZeeMay 4, 2011 - 1:53 am

    VERY PRETTY!!!! Thanks for sharing!

    Gr. CorineReplyCancel

  • Sheila - UKMay 4, 2011 - 3:06 am

    Oh this is gorgeous Becca…I’m loving the shade of pink card that you use. The one that is diecut. Could you tell us what make it is please. Can’t wait to see the tutorial on the bow…it’s just so very pretty.

    Love Sheila xxReplyCancel

  • JessicaMay 4, 2011 - 9:32 am

    Wow 6 layers! Holy Cow! You are the best bow maker ever! I did pull out the old bowmaker I told you about yesterday. I was able to find a brad the right size for the center post. So the bow I made was a lot like yours. But I think it’s muc too big. So I know they can be made smaller, I just have to figure out how.
    Looking forward to the new tutorial. TFS
    Hugs, JessReplyCancel

  • […] fuss with the bow so much.  Yes, I fuss, and fuss and sometimes fuss more!!   I put together a card yesterday that shows a six loop bow and the one on my card today is a two loop bow.  I’m equally at […]ReplyCancel

  • EileenMay 4, 2011 - 12:15 pm

    Another beautiful bow, there is no end to your talents!
    LOL EileenReplyCancel

  • […] have to fuss with the bow so much. Yes, I fuss, and fuss and sometimes fuss more!! I put together a card yesterday that shows a six loop bow and the one on my card today is a two loop bow. I’m equally at ease […]ReplyCancel

  • judy rohrMay 4, 2011 - 1:24 pm

    Becca another beautiful card.Don’t they say every thing is better in two’s.Anyway have a wonderful day Happy stamping.ReplyCancel

  • Susie SugarMay 5, 2011 - 8:50 am

    Oh Becca this is so pretty and so much divine detail too
    its lovely
    Hugs Susie Sugar xxReplyCancel

Hi there :-)  We have a  winner!  As promised, I used random.org to pick a winner and the number matched the following:

If the winner could just reach out to me through the contact tab at the top of the blog to claim your prize.  Be sure to include your mailing address so that I can mail them out.  As usual, after 48 hours with no response I’ll pull another number.  You all rock!!

pinTHIS SHAREthis TWEETTHIS EMAILthis
  • cynthia beynonMay 2, 2011 - 11:55 pm

    I guess Willow is the lucky person this time. She sure is luicky.
    I kow she will enjoy the papers.

    cynthiaReplyCancel

  • Steph MitchellMay 3, 2011 - 12:41 am

    Congratulations, Willow.ReplyCancel

  • MaryannMay 3, 2011 - 12:45 am

    Congratulations to the winner. She definately gets a really nice treat here and can do some really awesome things with these gorgeous papers.
    Thanks sooo much again for all the sweet things, you always do Becca, and have a wonderful day everyone, filled with lots of crafty fun.ReplyCancel

  • kathy SMay 3, 2011 - 1:25 am

    Congrats to “willow” lucky girlReplyCancel

  • Joyce CarlsonMay 3, 2011 - 1:29 am

    Congrats Willow!ReplyCancel

  • IngeWillsenMay 3, 2011 - 1:37 am

    Congratulations to Willow, you lucky one ;DReplyCancel

  • IngeWillsenMay 3, 2011 - 1:38 am

    Congratulations Willow, you lucky one :DReplyCancel

  • Susie SugarMay 3, 2011 - 2:33 am

    Well done winner enjoy your treat
    Hugs Susie Sugar xxReplyCancel

  • Sheila - UKMay 3, 2011 - 2:46 am

    Congratulations Willow …enjoy your gorgeous papers.

    Love Sheila xxReplyCancel

  • Anne ( Midlands UK)May 3, 2011 - 4:27 am

    Congrats to Willow. AnneReplyCancel

  • HeatherMay 3, 2011 - 5:03 am

    Congratulations Willow … enjoy!!!ReplyCancel

  • SusanMay 3, 2011 - 5:51 am

    Congratulations Willow,

    Always nice to win a prize and especially when you can put it to good use…hope you enjoy using this lovely paper.

    SusanReplyCancel

  • chrisdMay 3, 2011 - 5:52 am

    What a lucky girl!Enjoy your gift.ReplyCancel

  • Nancy MashburnMay 3, 2011 - 6:44 am

    I see you have a winner – it is not me :-( However I have a question. Whenever I have tried to enter, it will not accept my comment. Is there a problem with the link or is it me?ReplyCancel

  • PatMay 3, 2011 - 6:49 am

    Congrats Willow — What a great prize!!ReplyCancel

  • lois skiathitisMay 3, 2011 - 7:20 am

    Congratulations!!! Willow enjoy those beautiful papers. As always Becca, TFS!!! :-DReplyCancel

  • Becky GreenMay 3, 2011 - 7:48 am

    CONGRATULATIONS Willow!!!! Have fun with those papers!!!!!! :)ReplyCancel

  • MillieMay 3, 2011 - 8:16 am

    Hey Willow, congratulations on winning the beautiful paper….enjoy it bunches.ReplyCancel

  • Mary L.May 3, 2011 - 8:42 am

    Congratulations Willow.ReplyCancel

  • VivaceMay 3, 2011 - 8:53 am

    Congratulations to the winner! Enjoy your new paper!ReplyCancel

  • DeniceMay 3, 2011 - 9:24 am

    So Happy for you Willow, by the way , love your name…. God bless…..deniceReplyCancel

  • sandi ackermanMay 3, 2011 - 10:00 am

    go for it Willow! :)ReplyCancel

  • SusanMay 3, 2011 - 11:01 am

    I’m sure that Willow is a very happy woman today!ReplyCancel

  • Susan GMay 3, 2011 - 11:27 am

    Congrats! Lucky girl :)
    SusanReplyCancel

  • JeanMay 3, 2011 - 12:46 pm

    Congratulations! Thank you Becca for being so generous.ReplyCancel

  • Mary RobersonMay 3, 2011 - 2:09 pm

    Congrats to Willow! Enjoy your goodies:)ReplyCancel

  • RufusMay 3, 2011 - 8:04 pm

    Willow is a lucky gal! Thanks for the chance, Becca.
    R/ReplyCancel

  • Nadine BaileyMay 4, 2011 - 7:28 am

    Congrats Willow. I can only imagine the beautiful creations you will make.ReplyCancel

I N F O