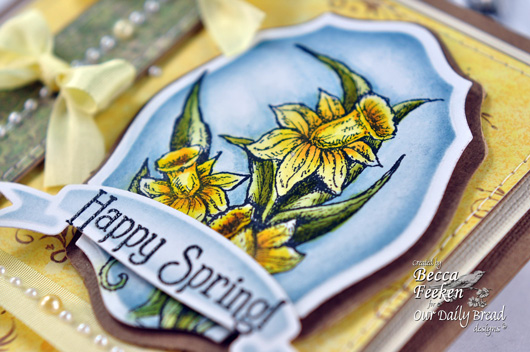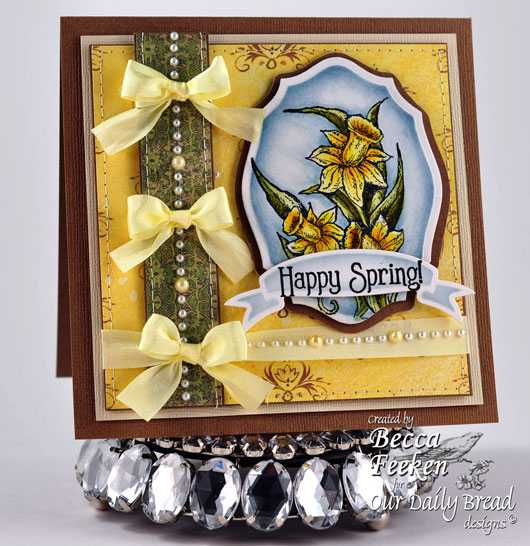
Too soon for you?  Well, I think I have it.  Spring fever that is.  Ahhh….so nice outside it’s hard to sit still.   I don’t know about you, but when spring starts to blossom I have a whole change over that occurs in my studio.  I still have some Christmas paper out, and a little Valentines, but now’s the time to put it away to begin getting ready for a new season.  Yay!!  So I guess this fever comes just in time for new spring stamps and such!!  Well, if you are easily enabled, you might want to look away – today I’m using some new Our Daily Bread Designs stamps.  This is a peek of what’s coming at the beginning of the month – spring stamps!!  Okay, I can hear you saying that you’ve never seen that die cut before – well, you haven’t.  It’s a new custom die from Our Daily Bread Designs – you’ll be seeing more of it in the coming month.  I’ve paired it with Spellbinders Ribbon Banners.

The Happy Spring sentiment comes from a set called Daffodil Tag Set and the Daffodils come from a set called Daffodil Corner – available on March 1st.  What a burst of yellow, hunh?  I tied the tiny bows with my peg bow maker so that I could get them all the same size.  Wow, this little thing has come in handy!!  If felt great to get out the watercolors and paint these pretty daffodils.

SUPPLIES I USED
Stamps: Our Daily Bread Designs – Daffodil Tag Set, Daffodil Corner Set
Paper: Bazzill, K & Co.
Ink
: Versafine Onyx Black and clear embossing Powder, Distress Inks and Reinkers
Accessories: Our Daily Bread Designs – Custom Label,  Spellbinders Ribbon Banners,  Ribbon, Zva Creative Pearls

Thanks so much for stopping in today.  I’m catching my breath and playing around with more tutorials to come soon!!

pinTHIS SHAREthis TWEETTHIS EMAILthis
  • Dolly/scrapthatFebruary 22, 2011 - 2:34 pm

    Beautiful as always…TFS!ReplyCancel

  • Beth B.February 22, 2011 - 2:40 pm

    Beautiful, Becca! I am sooooooo ready for spring!ReplyCancel

  • ShoregirlFebruary 22, 2011 - 2:47 pm

    I’m seeing spring things popping up all over the crafty web….think it’s on everyone’s mind! Love your card — you always do such beautiful work!ReplyCancel

  • Miss GFebruary 22, 2011 - 2:49 pm

    BBeautiful in color the yellow is so bright a pretty love the floral and pearls.
    Thank you for sharingReplyCancel

  • emilyFebruary 22, 2011 - 2:54 pm

    Loving your sunny spring-y card today! We have sunshine but it’s still cold and there’s sooo much snow…can’t wait until I see green grass!
    Your daffys are so pretty and that die shape is lovely.
    Thanks for sharing! :o)ReplyCancel

  • lois skiathitisFebruary 22, 2011 - 3:06 pm

    I think we all have a little Spring fever. Your card is a breathe of fresh air. It is gorgeous Becca. Love the way you colored the main focal and the color combination is just so pretty. Beautiful work. As always Becca, TFS!!! :-DReplyCancel

  • Karen WFebruary 22, 2011 - 3:11 pm

    Beautiful card and I can’t wait to see the new sets and die, how exciting!!ReplyCancel

  • Debby WalkerFebruary 22, 2011 - 3:13 pm

    Delicious! I am ready for spring also! We just had another ice/snow storm in NW Ohio…we’re .needing some sunshine. So, Thank You for sharing yours! This card is yummy rays of hope! Hugs.ReplyCancel

  • Mary Ann MFebruary 22, 2011 - 3:23 pm

    Nice card. I’m ready for Spring, especially since we just got another 10 inches of snow and more to come.

    Enjoy the warm weather for me!ReplyCancel

  • DeloresFebruary 22, 2011 - 3:27 pm

    love your Becca bitsReplyCancel

  • Mary HarrisFebruary 22, 2011 - 3:29 pm

    Great card Becca!! I really love the bows, pearls and the colors and oh yes those daffodils :)
    We still have plenty of snow but I know we are on the downside and that spring will be here soon!! But I just heard last night that we are going to have a colder than normal spring….Boo I hope they are wrong!ReplyCancel

  • DawnLFebruary 22, 2011 - 3:30 pm

    beeeee-U-ti-ful Becca!!!!ReplyCancel

  • ValFebruary 22, 2011 - 3:32 pm

    Good Morning Becca,
    I love your spring card, it is so bright and cheery. It makes me feel like I want to outside and plant my garden and tend to my flowers…however, we still have snow on the ground, so that is not going to happen any time soon. That does not stop me from enjoying your beautiful card and dream of what is to come.ReplyCancel

  • Pam B.February 22, 2011 - 3:33 pm

    Awwww, it looks like we all have Spring Fever. I’m so ready, unfortunately in Florida we don’t have a very long Spring, summer comes fast and with that comes hot, muggy steamy weather. But for all you up North, I know your ready to bypass all those snowstorms. You have experienced some awful blizzard type of weather this year.

    Becca, love your card. As always another beautiful handmade card. Daffodils are always so pretty when they bloom. HAPPY SPRING TO ALL :) :)ReplyCancel

  • Naomi ArmentaFebruary 22, 2011 - 3:36 pm

    Love the colors Becca. Makes me hopeful for spring to be around the corner!ReplyCancel

  • sandi ackermanFebruary 22, 2011 - 3:44 pm

    Your colors are gorgeous. Thanks. We have snow surrounding us so a bit of flowers is always nice. I would like to learn how to incorporate the coloring into my stamping. Yours look very smooth.ReplyCancel

  • Rachel BrooksFebruary 22, 2011 - 3:59 pm

    I have daffodills up along the edge of the house under the overhang. They’ve been up for over a month. Just hope this cold snap doesn’t end their thoughts about blooming! Oove these bright sunny days and your card just lifts one’s spirits right up!ReplyCancel

  • Anne ( Midlands UK)February 22, 2011 - 4:30 pm

    I love it Becca. AnneReplyCancel

  • Nancy FlecknellFebruary 22, 2011 - 4:33 pm

    Becca it’s not quite spring here in Eastern Canada but hopefully in another 3-4 weeks all the snow will be melted and gone. Now put that Christmas paper away (and don’t tell anyone that I bought a bunch a few days ago)!!
    I love love love spring and can’t wait to see my garden flowers popping up!
    Love your card too! It’s lovely as always!ReplyCancel

  • RebeccaFebruary 22, 2011 - 4:36 pm

    Too early for Spring I don’t think so it can’t come early enough! Your card does bring memories of Spring to mind; very pretty love all the little bows.ReplyCancel

  • Dianna N.February 22, 2011 - 4:50 pm

    Hi Becca:
    Yellow… my favorite color! I’m loving the sweet little bows and pearls! This card just radiates sunshine! Thank you for a very happy, and inspiring card!
    Hugs!ReplyCancel

  • Lori mFebruary 22, 2011 - 4:53 pm

    Very pretty and very cheery colors, :)ReplyCancel

  • cynthia beynonFebruary 22, 2011 - 4:55 pm

    BECCA BECCA AS USUAL THE CARD IS BEAUTIFUL. THEY LOOK
    LIKE THEY ARE REAL AND YOU CAN PUT THEM RIGHT INTO A BOWL. I
    DOWN’ KNOW HOW YOU COME UIP WITH SUCH BEAUTIFUL CARDS
    EVERY DAY.

    CYNTHIA BEYNONReplyCancel

  • Barbara WilsonFebruary 22, 2011 - 4:59 pm

    Beautiful card. I am ready for spring. But the weather isn’t.ReplyCancel

  • Marge (mer)February 22, 2011 - 5:28 pm

    EEEK — yet “another” die to die for and I imagine I’ll be wanting several many more than I’m ever able to purchase — you gals and your new dies are killin’ me!!! This is definitely a fabulous one too!!!

    LOVE your colors, Becca, how you’ve layered the die cuts and your fun ZVA Pearls with just a larger yellow one every so often — GORGEOUS!!!ReplyCancel

  • Barbara AKA GardenladyFebruary 22, 2011 - 5:31 pm

    Becca this card makes me smile and looking forward to spring. Today here in Oklahoma the sun is shining and no clouds in the sky! It started out chilly but has warmed up real nice. My green is coming up on my daffodils and hyacinths so enjoyed this card thinking of warmer days and green grass.

    On those angel pins you shared the instructions on. I took that earring back and turned it around and pushed it up inside the cone shaped bead and it held all them together at the top without them sliding down. Of course I then had another one at the bottom to hold the pin on a card or whatever you were using it for. Just thought I would share that info.

    Spring hugs and have a blessed day!ReplyCancel

  • Janet CastleFebruary 22, 2011 - 6:23 pm

    Beautiful, beautiful, beautiful!!! We are having lovely blue skies intermixed with rain and snow showers (nothing sticking…YET!). I’m soooo ready for spring!
    JanReplyCancel

  • MarieFebruary 22, 2011 - 6:46 pm

    Beautiful Springtime card. Makes me think of the warmer weather that’s just around the corner xxReplyCancel

  • Gloria WestermanFebruary 22, 2011 - 7:11 pm

    Love your spring card…..and I do love the new die cut…..but the stamps is gorgeous…..and I am so ready for spring to get here…..I also love how you used two different colors pearls very pretty….thank you for sharing…ReplyCancel

  • Francie (Montreal)February 22, 2011 - 7:27 pm

    Well now. I was enjoying today’s cold crisp winter weather until I saw your lovely card. And now, Spring looks pretty good to me. Thanks for sharing a breath of fresh air with us. It sure looks good.ReplyCancel

  • paulaFebruary 22, 2011 - 7:37 pm

    how refreshing – spring. At last.

    Paula, Derbyshire, UK.
    x x xReplyCancel

  • MichelleFebruary 22, 2011 - 7:44 pm

    It’s not too soon. Spring can’t come soon enough. I love Spring flowers. These daffodils are fabulous!ReplyCancel

  • JaneyFebruary 22, 2011 - 8:30 pm

    Last week we were teased with Spring-like temps and sunshine and all but the huge mounds of snow had melted. Then Sunday night – ‘thundersnow’ as Mike on the Weather channel has coined it….and then sleet and finally by Monday afternoon – huge amounts of snow – 6″ in about 2 hours. It’s Indiana – this is what we expect.

    So, I love your card today – sunny colors, Spring flowers, just beautiful, Becca!

    Thanks fo sharing with us.

    hugsReplyCancel

  • Judy McMullenFebruary 22, 2011 - 8:43 pm

    Hooray for Spring and daffodils…love them! Also love that beautifully colored image on that great die cut layer and love your ribbons! Another Beautiful Becca creation!!!ReplyCancel

  • Becky DFebruary 22, 2011 - 9:08 pm

    Oh Becca – I am so ready for spring! Unfortunately it is not ready to come to Utah yet :( I love this card though – gives me hope that spring will come! This is just beautiful!ReplyCancel

  • Elissa LymanFebruary 22, 2011 - 10:27 pm

    After a wet cold Arizona winter, it is nice to see spring flowers. Love your card, as usual it is beautiful.ReplyCancel

  • RufusFebruary 22, 2011 - 11:16 pm

    Gorgeous! Yes , I think that Spring has finally come to Fl. Only problem with that is so has the pollen! May have to add that set and the die to the want list, which never seems to get any shorter!
    R/ReplyCancel

  • Marcie SmithFebruary 22, 2011 - 11:22 pm

    This card definitely welcomes spring. We are having some wonderful weather right now also, but there is another rain storm due to reach us Thursday- Sunday. I have been spending my mornings spring cleaning our yard. It just feels so wonderful to be able to actually work out there in this gorgeous weather. Our nights have been very cold though. I definitely have spring fever. Beautiful card Becca. These stamps would make lovely Easter cards.
    MarcieReplyCancel

  • KathFebruary 22, 2011 - 11:22 pm

    I am so ready for spring but we got about 18 inches of snow the past 2 days. So your daffodil is well recieved.. in fact I think it is beautiful.ReplyCancel

  • RebekkaFebruary 23, 2011 - 1:05 am

    I am ready for Spring! It is right around the corner :).
    Gorgeous card.ReplyCancel

  • Candy MillsFebruary 23, 2011 - 2:47 am

    Gorgeous Becca!
    Makes me want to see the daffodils blooming – can’t wait for them :o)
    Hugs, CandyReplyCancel

  • Angelina WesselsFebruary 23, 2011 - 4:21 am

    Beautiful card, so springlike! I bought some potted daffodils in the grocery store and they have been blossoming and are oh, so pretty! This is one of my favorite spring flowers. Your card is so colorful, and what a neat shape for the custom die! I will have to watch out for this release. Thanks for sharing.ReplyCancel

  • EileenFebruary 23, 2011 - 6:37 am

    I love Springtime! and your card says it all…..very fresh and lovely colours.
    For me, Spring is the time for new beginnings more than any other time of the year…..it is definately my most favoured season.

    Take care LOL EileenReplyCancel

  • Jeanielou KaufmanFebruary 23, 2011 - 8:45 am

    As I have said so many times…your work is so spetacular and so refreshing to see. I love the uplift I get from everyday’s creation. This spring one just blows me out of the water. I do love spring as my favorite season. A new beginning and the shedding of all old gloomy, dark and cold things, bringing forth a bright, warm cuddly feeling of better things to come. Aren’t we all so blessed?
    Have yourself a week in the Lord.
    Hugs, JeanielouReplyCancel

  • Sheila - UKFebruary 23, 2011 - 8:52 am

    Sooo beautiful Becca and sprinlike too. Thr daffodil is one of my favourite flowers and is the Welsh National flower and as I am born and bred in Wales, UK then it just had to be. It is also the flower that we have for our Patron Saint’s Day which is St. Davd Day, March 1st. So it was so lovely to see this card today even though it’s a week early.

    Love Sheila xxReplyCancel

  • Evette K. CiampoFebruary 23, 2011 - 9:15 am

    OH MY GOSH BECCA….you had me from the start on this card. How amazing it is. You inspire me ssssssooooooooooooo much. Just wish I could make cards like u. I try. LOL Have a great day and thanks for sharing. HugsReplyCancel

  • Beth NormanFebruary 23, 2011 - 9:16 am

    Another stunning card. Everything you touch turns to gold.ReplyCancel

  • ConniecrafterFebruary 23, 2011 - 10:20 am

    Wonderful spring card, such lovely painting and love your pearl and bow border!ReplyCancel

  • ANNETTE KLASINZFebruary 23, 2011 - 10:30 am

    i can’t wait for spring! beautiful!!!!!ReplyCancel

  • yogiFebruary 23, 2011 - 11:11 am

    beautiful. Spring can never come too soon. I meant to mention the other day (or maybe I did, can’t remember), but I watched your tut on the bow maker. Ive never used one, but it definitely looked like a good idea. So i guess i should work my way in to my basement and put one together… Maybe on my way down to get my coffee.ReplyCancel

  • pamela watsonFebruary 23, 2011 - 1:30 pm

    Becca, I have a question? How do you mail your cards with all the large embellishments on the front without having the post office ruin them?ReplyCancel


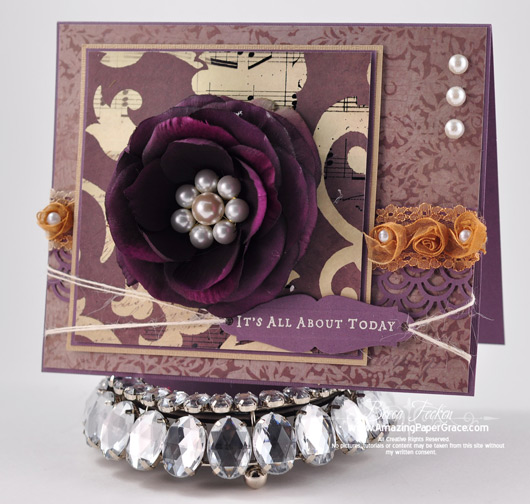
Hi there friends!!  You know me and purple, right???!?  Well I challenged myself again today – good to rid the crafting cobwebs right??  Today I’m embracing purple so I built my card around this luscious flower.  This is a darker purple so I almost feel like I’m cheating.  The stamp I used is one that sits right by my computer all the time because I love the saying!!  I had my card made in less than an hour and on a beautiful day like today, it’s all about getting outside to enjoy!


I’m following the Mojo Monday Sketch 179 and it calls for a round element in the center.  This flower is perfect.  I find these on sale at the craft store all the time but they’re kind of bulky.  I’ve put together a video today to show you how to create this fabulous flower center (in 10 minutes or less).  You never know when you need to add a little spice to a plain flower or another of your found treasures!!

SUPPLIES I USED

Stamps: Hero Arts – It’s All About Today
Paper
: Bazzill, K & Co.
Ink: Versamark and Ivory Embossing Powder
Accessories: Martha Stewart Border Punch, Spellbinders Grommet Tags, May Arts Linen Twine, Pearls, Flower

Happy Monday y’all!!  Take care of yourselves today, because It’s All About Today.

pinTHIS SHAREthis TWEETTHIS EMAILthis
  • CarolFebruary 21, 2011 - 1:11 pm

    Becca, Well, lady, I am a purple lover as well…thanks for the purple flower and card….I really love it! I am also a background person so am glad you went for it! Clever! Have a great day. Where I am in sw WI we are having a dilly of ice, sleet, rain, snow, now extended until Tuesday morning at 3 a.m. In for the day(s)! Time to get out the supplies and create. CarolReplyCancel

  • lois skiathitisFebruary 21, 2011 - 1:22 pm

    Beautiful card Becca, beautiful composition with very pretty colors. Love the center of the flower. As always Becca, TFS!!! :-D

    PS I’ll be back later to see the videoReplyCancel

  • Vickie DoswellFebruary 21, 2011 - 1:24 pm

    Love the deep rich purple in this card. It is gorgeous!
    VickieReplyCancel

  • bonnie weissFebruary 21, 2011 - 1:25 pm

    Purple truly is a regal colour and your card just oozes with royalty today, Becca.ReplyCancel

  • DaviFebruary 21, 2011 - 1:26 pm

    Purple is my favorite color and I think this is spectacular!! Love that gorgeous flower!!ReplyCancel

  • JessicaFebruary 21, 2011 - 1:32 pm

    Gorgeous card, I love the colors!ReplyCancel

  • ShawnaFebruary 21, 2011 - 1:32 pm

    Gorgeous Becca!ReplyCancel

  • DelamaFebruary 21, 2011 - 1:37 pm

    I love the purple flower and it is cute card. Thank you for sharing.
    Have a great day :)
    DelamaReplyCancel

  • Shirley NFebruary 21, 2011 - 1:38 pm

    Becca, this is stunning! Your layout and all the details are gorgeous!ReplyCancel

  • Regina NFebruary 21, 2011 - 1:43 pm

    TFS. Becca as always you made a beautiful card.ReplyCancel

  • Debby WalkerFebruary 21, 2011 - 1:43 pm

    Purple passion all the way, Miss Becca. The flower is stunning! I love making flowers…if you want to see what my creaive juices(and God) created, please check out my blog. Today it is the second card posted. Wonderful card miss, hugs and love!

    ReplyCancel

  • Mary HarrisFebruary 21, 2011 - 1:44 pm

    Just gorgeous!ReplyCancel

  • Francie (Montreal)February 21, 2011 - 1:51 pm

    So beautiful, so so beautiful. You did it again. In fact, you can produce outstanding artwork faster than I can write these comments. Is this normal?
    I think not.ReplyCancel

  • Rosie WaldtFebruary 21, 2011 - 1:53 pm

    Lovely, lovely. The flower is beautiful!!! I always have a problem wondering how to send a card with this depth or how to be able to scrapbook this. In SD we got 17 inches of snow and it is still snowing/blowing……………..time to get the scrapbooking supplies out to get the s.b. finished for my son’s birthday of his twin girls at Christmas time.ReplyCancel

  • RebekkaFebruary 21, 2011 - 1:55 pm

    Gorgeous card and gorgeous purple flower.ReplyCancel

  • Dianne CFebruary 21, 2011 - 2:00 pm

    “Beautiful”ReplyCancel

  • BrookFebruary 21, 2011 - 2:15 pm

    Beautiful card and great tutorial. What a wonderful idea. Thanks for sharing!ReplyCancel

  • jean wilsonFebruary 21, 2011 - 2:22 pm

    Wow that is so beautiful Becca! The first thing I thought of was the old clip earrings I have and wondered if they could be used as flower centers! You’ve got the wheels turning in my creative head! Thanks for the inspiration again.ReplyCancel

  • Cindy ClickFebruary 21, 2011 - 2:22 pm

    Another beautiful, elegant card. Love the pearl centerpiece. CindyReplyCancel

  • ArleneFebruary 21, 2011 - 2:27 pm

    Thank you all those Becca Bits lately. I love watching videos instead of written instructions , I am a visual kind of card maker so i love videos. Keep up the great ideas and cards, they are just beautiful.ReplyCancel

  • Peggy AllenFebruary 21, 2011 - 2:33 pm

    Love it Becca. I have many of these pearls and I will be making some of these. You are the best! Thank you once again for sharing with us.
    Hugs,
    PeggyReplyCancel

  • Dianna N.February 21, 2011 - 2:34 pm

    What a beautiful card, and an easy to follow tutorial!
    This is great way to use up those extra few beads left over from a beading project! I love adding beads to cards and you show so many ways to do it. I can also see how pulling the silk flowers apart will allow a person to make use of all the petals in several different ways!
    Thank YOU!
    Hugs!ReplyCancel

  • KathyFebruary 21, 2011 - 2:41 pm

    Beautiful card Becca.
    Am really enjoying your tutorials, I do much better when I can see it done.

    My husband made me a peg bow maker out of scrap lumber he had, I can finally tie a bow I am proud of. Thanks again.ReplyCancel

  • cardchickFebruary 21, 2011 - 2:50 pm

    What a great tip with pearls!!! weaving the pearls is very helpful to keep my beads from losing its form……gorgeous card!!!!!! tfsReplyCancel

  • geatyFebruary 21, 2011 - 2:53 pm

    hi Becca a big thank you for this new video, you spoil us! Wahoo!a big thank you

    geatyReplyCancel

  • Rachel BrooksFebruary 21, 2011 - 3:04 pm

    My jaw drops every time I visit your site! Wow, wow, wow! Love the idea of wrapping the wire to keep things secure. I wondered how you were going to do that and of course you came through with the perfect solution! Thanks!ReplyCancel

  • Barbara WilsonFebruary 21, 2011 - 3:08 pm

    You have conquered purple. Thanks for the tutorial on the flower center.ReplyCancel

  • ChannaFebruary 21, 2011 - 3:10 pm

    Becca, I love your work!! It is so beautiful, gorgeous….words can not describe it. You are truly blessed! You are my new inspiration. Thank you.ReplyCancel

  • Becky GreenFebruary 21, 2011 - 3:14 pm

    BEAUTIFUL BECCA!!!! LOVE the fact of your using a silk flower!!! Your card REALLY IS LOVELY!!!! The center is WONDERFUL!!!!! You do SUCH A WONDERFUL JOB in showing us HOW it’s done!!! THANK YOU!!! :)ReplyCancel

  • Candy MillsFebruary 21, 2011 - 3:33 pm

    Oh Becca!!
    Thank you!
    This is just perfect :o)
    I always wish I had pretty things to put in my flowers and things but because of where I live can’t buy any. I do have lots of pearls just like this and other beads as well. Now I know how to make my own beautiful decorations!!!!!
    Your card is gorgeous!
    Hugs, CandyReplyCancel

  • FMFebruary 21, 2011 - 3:42 pm

    Love this card done in my very favorite color…Beautiful!!! Thanks for the Becca bit!!ReplyCancel

  • ChaunFebruary 21, 2011 - 4:31 pm

    You’re getting the hang of PURPLE! Looks great! Loved the pearl centerpiece!ReplyCancel

  • Judy McMullenFebruary 21, 2011 - 4:38 pm

    Awesome flower and tutorial, Becca! Thanks!!!ReplyCancel

  • LynneFebruary 21, 2011 - 4:41 pm

    Hi there Becca and thank you for sharing this. It’s lovely and some beads in my stash so that’s my playtime for later today. It looks just great. xReplyCancel

  • lacyquilterFebruary 21, 2011 - 5:20 pm

    What a fabulous way to add a flower center. Thanks for a great video.ReplyCancel

  • Gloria WestermanFebruary 21, 2011 - 5:23 pm

    Love this Becca Bit…..will have to try this….it really set this purple flower….thank you for sharing…..ReplyCancel

  • Virginia S WaddyFebruary 21, 2011 - 5:54 pm

    All I can say I wish you live near me, I love all your work that you do and you do an awesome job and you explain your work so well and it’s easy to understand what you are doing by your tutorials videos. I just love watching your site. ReplyCancel

  • Marge (mer)February 21, 2011 - 6:19 pm

    Love your little bits of amazingness, Becca!!!ReplyCancel

  • Carol WFebruary 21, 2011 - 6:22 pm

    What a great technique for creating and securing that bead cluster! I love making both papercrafts and jewellery, so this will be very useful for me!

    And I had to laugh at myself — I don’t know about anyone else, but I had a little gasp of horror when you started taking the flower apart. Since I’m so used to seeing your lovely hands building/creating, it struck me funny to see you determinedly rip that darn thing apart! LOLReplyCancel

  • Leslie MillerFebruary 21, 2011 - 6:28 pm

    The flower looks so real! Something new and gorgeous every day, Becca. You never cease to amaze me. I hope my comment sticks this time… crossing fingers as I click…ReplyCancel

  • Marcie SmithFebruary 21, 2011 - 6:30 pm

    Becca,
    Purple is not a favorite of mine. But I do like this rich deep kind of wine purple that you are using here. Besides the gorgeous print that this paper has which I personally would be drawn to. I like the pearl center that you came up with. Once again that creative mind of yours is in overdrive.
    It turned out beautiful as always. I had no idea how silk flowers were put together until your video. Never even thought to pull one apart before. This was interesting. Thank you.
    MarcieReplyCancel

  • Mary H.February 21, 2011 - 6:31 pm

    Love the video. Thanks for putting out so many lately. I know it must be a great deal of effort for you. Thanks so much. Beautiful card, as always.ReplyCancel

  • Ginny K.February 21, 2011 - 6:47 pm

    Becca, What a neat frugal idea, I love it!!!!!!!!!!!!! I am always on the look out for ways to s-t-r-e-t-c-h my craft dollars and this will be in my folder of new ways to make my money go further!! thank you for the great tip and trick!!
    ~G~ReplyCancel

  • Deborah HooperFebruary 21, 2011 - 6:48 pm

    Gorgeous. Purple is my favorite color!!ReplyCancel

  • Olga JewellFebruary 21, 2011 - 7:31 pm

    how neat!!!! I will give this one a try for sure!!!! TFSReplyCancel

  • TeresaFebruary 21, 2011 - 7:37 pm

    I love purple too!!! This Card is just beautiful.ReplyCancel

  • SuziFebruary 21, 2011 - 8:06 pm

    Wow! I never would have thought to pull the flower apart like that! Thank you, once again!ReplyCancel

  • Carla MurphyFebruary 21, 2011 - 10:50 pm

    Beautiful! Such a pretty flower too… and I love all your pearls. I have that Hero Arts stamp as well…… somewhere – lol! Must dig it out.ReplyCancel

  • Ginny IngramFebruary 22, 2011 - 12:23 am

    Becca, what size pearls did you use?ReplyCancel

  • Lori AFebruary 22, 2011 - 4:20 am

    VERY nice!!! Thanks so much for showing us how to make this gorgeous flower center. I am definitely going to attempt it!

    …and you are sooooo right about it being all about today. I’ve needed to tell myself that many times and have even needed to tell myself to just take one minute at a time during a time of crisis…

    You are dearly loved ?
    Love n hugs, LoriReplyCancel

  • HeatherFebruary 22, 2011 - 5:02 am

    Thanks Becca, very inspiring…. I’ll be looking around for all those unused jewelery bits now and the quote as you say is very apt. tfs
    Hugs
    HW(UK)
    xReplyCancel

  • AntonellaFebruary 22, 2011 - 6:15 am

    This is a beautiful card – embrace purple :-) I love the saying – something that can be hard to keep in mind sometimes. Hugs, antonella :-)ReplyCancel

  • JenFebruary 22, 2011 - 7:17 am

    Gorgeous love the flower and your tutorial thank u…ReplyCancel

  • emilyFebruary 22, 2011 - 8:12 am

    That sentiment alone could make a card but your flowers and pearls are perfect for such a beautiful greeting.
    Thanks for sharing! :o)ReplyCancel

  • NinFebruary 22, 2011 - 8:52 am

    Stunning card, love purple. Thank you for the tutorial.ReplyCancel

  • Kristin EberlineFebruary 22, 2011 - 11:36 am

    WOW! I am NOT a fan of purple, but you certainly made it shine on this beautiful card! THANK YOU, THANK YOU, THANK YOU for the tutorial on the pearl center! I cannot wait to try it! I was just at the Hobby Lobby the other day and I noticed a selection of adhesive pearl elements designed to take center stage on flowers. I pondered for a moment and decided against buying them because they seemed kind of sloppy. These are MUCH prettier! How funny that I happened across your tutorial today…what a blessing. It will save me a lot of money also, considering I have a HUGE neglected jewelry stash.ReplyCancel

  • LMcBurneyFebruary 22, 2011 - 11:45 am

    Thank you for taking the time to share your talents with us, not just in the beautiful cards you make but in the details of your card making. I love Becca Bits!ReplyCancel

  • MisaeFebruary 22, 2011 - 5:21 pm

    That’s so gorgeous! Dark purple is slightly decadentReplyCancel

  • MarieFebruary 22, 2011 - 6:39 pm

    Such a stunning card, and another fab video tutorial. Thank you, Becca xxReplyCancel

  • paulaFebruary 22, 2011 - 7:36 pm

    this is stunning Becca – I think even I would be able to manage this – next time i’m out and about – i’ll look at flowers and even cheap store bought decorative flowers in a different way.

    Paula, Derbyshire, UK. x x xReplyCancel

  • caroline hillFebruary 22, 2011 - 7:48 pm

    Becca Thank you for your Becca bits love them and
    always look forward to creations. God BlessReplyCancel

  • Elissa LymanFebruary 22, 2011 - 11:00 pm

    I love purple too! What else can I say…gorgeous!!!!!ReplyCancel

  • Sheila - UKFebruary 23, 2011 - 8:46 am

    I’ve been away for a couple of days to recharge my batteries i rediness for my DD who will arrive home fro respite care tomorrow….so I’m doing a catch-up Becca as I don’t like to miss any of your wonderful works of art. This is one stunning work of art love the colours especially the flower and thanks for a great tutorial.

    Love Sheila xxReplyCancel

  • Evelyn CraigFebruary 23, 2011 - 9:19 am

    Thanks for the Ironing board snippet. Oh, how true. I come to your blog for inspiration and you seem to have the right words and cards to get me going.

    Thanks,

    EvelynReplyCancel

  • ConniecrafterFebruary 23, 2011 - 10:14 am

    Wow that is gorgeous, I love that deep purple, the pearls really stand out and the golden mustard color of your flower ribbon is perfect with it! neat videoReplyCancel

  • ANNETTE KLASINZFebruary 23, 2011 - 10:26 am

    purple is my favorite color beautiful!!!!ReplyCancel

  • JessicaFebruary 23, 2011 - 2:52 pm

    Great way to secure the pearls. I’ve made some jewelry and I’ve never seen that technique before! Thans for sharing!
    Hugs, JessicaReplyCancel

  • OlenaFebruary 26, 2011 - 11:50 am

    Your card is absolutely gorgeous! OlenaReplyCancel

  • […] Add your favorite flower, learn how to make the matching center with the Becca Bit called Frugal Decorative Pearl Flower Center […]ReplyCancel


Hi there.  I hope you all have had a wonderful, wonderful weekend.  I’ve spent most of the weekend with my daughter but did get some time to pull together a card.  I’m really loving the way the pleated background looks and many of you asked me to go into more detail.  You asked, you got it!!  Everyone will find their own way, but in the video I show you how I get this set up for my card.
Pleated Background CardI’m using a sweet little sentiment from Quietfire Design called A Smile That You Send Out; it was just the perfect size to fit the heart.  I love that this heart gives you the ability to pull in color by adding a stenciled color.  I’m using Spellbinders Reverse Wonky Rectangles and inside I’ve put Spellbinders Nested Hearts backed by Spellbinders Classic Hearts.  The elements are all very simple – it’s really the pleating that gives the card interest.  The paper that I’m using is Bella Bleu and it just so happened to have a coordinating border that I thought would be perfect for the pleating without being too distracting.  I repeated the border along the bottom in flat form just for reinforcement.

SUPPLIES I USED

Stamps: Quietfire Design – A Smile That You Send Out
Paper
: Bazzill, Ella Blue
Ink: Brushed Corduroy Distress Ink
Accessories: Spellbinders Reverse Wonky Rectangles, Spellbinders Nested Hearts, Spellbinders Classic Hearts, Ribbon, Zva Creative Pearls, Recollections Flower

Have a look at the video – it’s pretty short and it will give you the gist of how the card is put together.

Thanks so much for peeking in to see me today!!  See you soon!!

pinTHIS SHAREthis TWEETTHIS EMAILthis
  • Jane KFebruary 20, 2011 - 6:33 pm

    So lovely, Becca! And just what I needed, as we’re in the middle of a heavy snow storm in the Twin Cities. You’re an inspiration to us all – thanks!ReplyCancel

  • bonnie32002February 20, 2011 - 6:39 pm

    I have been making fan fold flowers for ages…I really love the wonderful twist that you’ve done with the accordion fold. I look forward to giving this a try…ReplyCancel

  • Beth B.February 20, 2011 - 6:45 pm

    What a lovely card, Becca! Thanks so much for the tutorial as well….perhaps one day I’ll get up the courage to try it! :)ReplyCancel

  • Carol FroehlichFebruary 20, 2011 - 6:52 pm

    Another Gorgeous Card. BEAUTIFUL papers. Thank you for the tutorial.
    I am definitely going to try this one.

    God Bless!ReplyCancel

  • Phyllis M.February 20, 2011 - 6:53 pm

    Beautiful card, Becca and I sure do love the pleated background on there. Love the pretty papers you used also. Thank you for the wonderful tut on how to do the pleating too. I live in MN so we are having a blizzard today so its so nice to have pretty cards and inspiration to keep us going and thank you so much for sharing your beautiful creation.ReplyCancel

  • FrancesFebruary 20, 2011 - 6:55 pm

    Love the folds in the center, great idea! Thanks for the inspiration, hugs, Frances.ReplyCancel

  • Susan BugalskiFebruary 20, 2011 - 6:57 pm

    Fantastic card. I love everything about it but especially the pleating and colors you used. Thanks for the tutorial.ReplyCancel

  • Candy MillsFebruary 20, 2011 - 6:57 pm

    Hi Becca,
    Hope you had a nice time with your daughter.
    Thank you so much for showing us how you do your pleating. I tried it the other day, but because I didn’t know how you anchored it – it didn’t work for me.
    NOW I know :o)
    Big hugs, CandyReplyCancel

  • Shelly SchmidtFebruary 20, 2011 - 6:59 pm

    OOhhhh! This is one amazing card! I love the pleating through the frame. Thanks for the tutorial.ReplyCancel

  • Gloria WestermanFebruary 20, 2011 - 7:10 pm

    Love this!!!!! I want to make one of these….so thank you for the great tutorial…..I think I can make one now…..thank you for sharing….ReplyCancel

  • Barbara WilsonFebruary 20, 2011 - 7:11 pm

    You always come up with wonderful ideas. Beautiful card.ReplyCancel

  • Diane LFebruary 20, 2011 - 7:16 pm

    So stunning Becca!!!ReplyCancel

  • Marilyn ClarkFebruary 20, 2011 - 7:25 pm

    Beautiful card. Thanks for the video. Something for me to practice. TFS.ReplyCancel

  • Valerie MatinFebruary 20, 2011 - 7:42 pm

    Oh my…Beautiful!!! Thanks for sharing. I was wondering how (or what) you do/use to adhere the outside corners…esp. on that ribbon strip. There is such wonderful height and dimension… I was not able to tell in your video…
    Thanks,
    Valerie
    P.S. CATCH!!! I just sent you back your SMILE!!! Have a GREAT day!!!ReplyCancel

  • NancyFebruary 20, 2011 - 7:45 pm

    What a beautiful card Becca. Thank you for making the how to video.ReplyCancel

  • Leslie GFebruary 20, 2011 - 7:48 pm

    you make it look so easy . . . Love the tuit! I will give it a tryReplyCancel

  • Evelyn in OregonFebruary 20, 2011 - 7:53 pm

    You are just a wonderful card artist!ReplyCancel

  • ChaunFebruary 20, 2011 - 8:02 pm

    Thanks for sharing the video on “how to pleat”.

    You are so generous with your time!ReplyCancel

  • Susan GFebruary 20, 2011 - 8:12 pm

    This is a gorgeous card!!! Thanks for the how-to!!
    SusanReplyCancel

  • JamieFebruary 20, 2011 - 8:23 pm

    Wow! Mystery solved! Thanks so much for sharing the details of this technique.ReplyCancel

  • lois skiathitisFebruary 20, 2011 - 8:32 pm

    Beautiful card with a beautiful sentiment. I love the shades of brown and blue they are very pleasing to the eye. Love that pleated background. Thanks for the video, it always makes more sense. As always Becca TFS!!! :-DReplyCancel

  • Robyn JosephsFebruary 20, 2011 - 8:39 pm

    TFS
    love the pleats and how it sets off the quietfire quote.ReplyCancel

  • Vicky SchmidtFebruary 20, 2011 - 8:59 pm

    Oh my gosh Becca, Thjs card is beautiful. When I saw it, I want my husband to see it. He also thought it was a wonderful card.
    Thanks for sharing
    VickyReplyCancel

  • Darlene JFebruary 20, 2011 - 8:59 pm

    Becca,
    Such a beautiful card. I am enjoying all the Becca Bits. Thanks for sharing.
    DarleneReplyCancel

  • Naomi ArmentaFebruary 20, 2011 - 9:04 pm

    Beautiful Becca. Thank you for the video!ReplyCancel

  • Deborah HooperFebruary 20, 2011 - 9:05 pm

    Beautiful. The flower is perfect on that card.ReplyCancel

  • Mary H.February 20, 2011 - 9:15 pm

    Fantastic! Thanks for the video showing exactly how you do that. And as usual, thanks for sharing.ReplyCancel

  • emilyFebruary 20, 2011 - 9:20 pm

    Love this technique. I played with the rosettes a little at Christmas time. They are rather fun and I love yours behind the frame. Nice twist!
    Thanks for sharing! :)ReplyCancel

  • chrisdFebruary 20, 2011 - 9:41 pm

    Such a lovely card and the video is great also.ReplyCancel

  • NancyFebruary 20, 2011 - 9:47 pm

    Very nice video, well presented. Thanks.ReplyCancel

  • MickieFebruary 20, 2011 - 10:01 pm

    Love your video, so informative!ReplyCancel

  • KathyFebruary 20, 2011 - 10:18 pm

    I simply adore the pleated background!!!!! I am going to view the video tomorrow as i’m running late this evening… looking forward to it… This is an awesome card…thank you for sharing your creativity with us!ReplyCancel

  • JaneyFebruary 20, 2011 - 10:32 pm

    I think your pleating in a card is ingenious! I am just ‘catching up’ on email before I turn out the lights, so I will watch the video tomorrow morning before I head to the office. As always, Becca, thank you for sharing many of your techniques with us.

    hugsReplyCancel

  • JenFebruary 20, 2011 - 10:39 pm

    Beautiful love the colors and the pretty flower!!!!ReplyCancel

  • Barbara AKA GardenladyFebruary 20, 2011 - 11:14 pm

    Becca you just amaze me with all your wonderful card designs. Each time I open your blog you take my breath away! Nothing is ever duplicated! You are so generous with all your tuts! I loved the one yesterday and love the one today as well! I hope you had a lovely day with your daughter!

    Hugs,
    Barbara AKA GardenladyReplyCancel

  • DebraFebruary 20, 2011 - 11:42 pm

    Nice tutorial – thanks for sharing! Love the fast forward .. you made it look so easy!ReplyCancel

  • Dianna N.February 21, 2011 - 1:21 am

    Hi Becca,

    Another splendid card!

    You always find a new way to do something with an old standby. This time it’s accordion pleated paper. Who would have guessed that you could get pleated paper twisted around to come out like that! Just beautiful!

    Today, my husband made me a bow maker like yours, and I made four bows right off the bat! He was so happy! Now all I have to do is make some cards to go under them! Ha! Ha!

    Thank you bunches!

    Hugs!ReplyCancel

  • Marcie SmithFebruary 21, 2011 - 1:23 am

    Glad you actually showed a tutorial on this. The first time I saw you use this technique, it looked as thou the window was cut thru the card base itself and that the pleating was mounted from inside the card rather then laying on the outside and mounting the window over the pleating element. You probably thought I was nuts when I asked if you had box scored your card base to accomodate the pleated element. Seeing your tutorial just cleared that all up. Thanks. Beautiful card – what gorgeous paper.
    MarcieReplyCancel

  • Cathie (Owen Sound)February 21, 2011 - 1:32 am

    Hi Becca,
    Love your beautiful card and instructional video. I could listen to your videos all day. You have such a soothing and calming voice that makes me want to listen more!
    I can see many possibilities for this technique with different shapes and a variety of patterned paper.
    I have been away lately and just trying to catch up on all that I miss from your blog. Your blog is the first I open in a day!
    Thanks for all your gifts you share, sweet Becca,
    Love and hugs,
    CathieReplyCancel

  • Linda LFebruary 21, 2011 - 2:49 am

    Awesome Becca…thanks for sharing how that is done. Love the look it gives. xLReplyCancel

  • EllyFebruary 21, 2011 - 3:39 am

    You did it again….such a gorgeous card!!!

    hugs, EllyReplyCancel

  • Corine van der ZeeFebruary 21, 2011 - 4:05 am

    WOW, GORGEOUSSSS!!! Love this card and thank you for the tutorial.

    Greetings CorineReplyCancel

  • Sheila - UKFebruary 21, 2011 - 4:17 am

    Oh I just adored this card Becca, I’ve used the pleating when I first saw you do it as a flower, but this is so clever and the blues and chocolate go beautiful together. Thanks som uch for another great tutorial.

    Love Sheila xxReplyCancel

  • HeatherFebruary 21, 2011 - 4:45 am

    Oh Becca – this card is gorgeous and thanks so much for the excellent video tutotrial. It’s so much ‘nicer’ to have visual and of course to hear your lovely voice. tfs
    Hugs
    HW(UK)
    xReplyCancel

  • Karen WFebruary 21, 2011 - 5:39 am

    Oh Wow i just watched the video, thank you so much, I would not have known how to start this. I’m off to see if you are the one that had the video on the folding for the doilies to make a flower also. Just gorgeous card and thanks again.ReplyCancel

  • Lori EllFebruary 21, 2011 - 5:39 am

    Thanks Becca. So beautiful. I love that paper too. God Bless you for sharing your talent with all of us!ReplyCancel

  • Evette K. CiampoFebruary 21, 2011 - 6:35 am

    Thank you for answering my question so quickly…as it seems others had the same one too, lol. Just love this effect. Great card Becca. Hope your daughter is doing ok. Hugs. God bless.ReplyCancel

  • caroline hillFebruary 21, 2011 - 7:28 am

    Thank you so much for pleated background tutorial.
    You always amaze me . Your blog is my favorite.
    Thanks CarolynReplyCancel

  • Miss GFebruary 21, 2011 - 7:52 am

    Oops, I put my pleating comment inthe wrong section.
    However, thank you for the video and the card is a beauty as usualy.
    Have a great week!ReplyCancel

  • RebekkaFebruary 21, 2011 - 7:57 am

    Gorgeous card Becca, and great tutorial.ReplyCancel

  • Anne ( Midlands UK)February 21, 2011 - 8:38 am

    It is another beautiful card from you Becca, thankyou. AnneReplyCancel

  • EileenFebruary 21, 2011 - 8:48 am

    Thank you for that great tutorial Becca…..I love the way you think ‘outside the box’ it makes your cards so interesting.
    Take care LOL EileenReplyCancel

  • JessicaFebruary 21, 2011 - 9:25 am

    Lovely card Becca. What an amazing difference the accordian folding makes. Without it, the card would be pretty but with it…as Emeril would say “BAM”. lol Thanks for sharing your talent with us.
    Hugs, JessicaReplyCancel

  • ConniecrafterFebruary 21, 2011 - 9:33 am

    Beautiful, and love the border strip, like how it makes it look like you’ve used two papers, love the blue and brown combo and the flower is lovely!ReplyCancel

  • Leslie MillerFebruary 21, 2011 - 9:55 am

    Oh, Becca! This card is like a beautiful sculpture! I didn’t see the beauty in those Wonky shape Spellbinders before, but you’re sure opened my eyes. Leave it to you! You make everything beautiful!ReplyCancel

  • Claudia CullenFebruary 21, 2011 - 9:59 am

    This is probably one of the most beautiful cards I’ve ever seen. You are such a miracle worker. Hope I can copy.ReplyCancel

  • ANNETTE KLASINZFebruary 21, 2011 - 10:43 am

    beautiful!ReplyCancel

  • Mrs. HamFebruary 21, 2011 - 11:25 am

    Becca, thank you so much for this tutorial. I have wondering how you do the pleating. One question. Are you using the Martha Steward score board?

    ReginaReplyCancel

  • lacyquilterFebruary 21, 2011 - 12:20 pm

    This is awesome, Becca. What a beautiful technique.ReplyCancel

  • Francie (Montreal)February 21, 2011 - 12:34 pm

    Thank you so much for everything you share with us. Today’s big thank you is for the Becca Bit. This pleating is just so very neat. I hope when I try it, it’s as easy as you make it look.

    I love your beautiful card(s), your website and all the fun creative stuff you share with us. You have no idea what a huge influence you have on so many people. You’re one amazing lady! Please excuse me for gushing. I’m particularly grateful today.ReplyCancel

  • CarolFebruary 21, 2011 - 1:08 pm

    Becca, Thanks for the video on the pleated background…you make it look soooooooooooo easy! And loved the way you speeded up the placement of the pleated circle…cool! Excellent! CarolReplyCancel

  • geatyFebruary 21, 2011 - 2:12 pm

    Hello Becca, another gorgeous card, and thank you for this video, I was in the people you require more detail on the construction of this map and I’m delighted, thousand thank you you have shown great kindness, very Good evening to youReplyCancel

  • Becky GreenFebruary 21, 2011 - 2:58 pm

    WOW! Thanks Becca! Great tutorial!!!! AND VERY EASY!!! :)ReplyCancel

  • LynneFebruary 21, 2011 - 4:46 pm

    Thanks Becca for the great tutorial on pleating. Wow your card is beautiful.
    I was wondering how to do this and it is so good of you to share. I’m sure the recipient of your card will treasure it always as it deserves.ReplyCancel

  • SuziFebruary 21, 2011 - 8:16 pm

    I love it when you say you are done, just a flower and maybe a few pearls. . . . And your work turns into a masterpiece! Thank you! Love these videos!ReplyCancel

  • LeanneFebruary 21, 2011 - 10:41 pm

    Wow ! What a beauty. I’m so glad I found your blog again. It’s so inspirational.
    When time permits do stop by my blog. I’m very happy about my new post and would like you to see it too.ReplyCancel

  • Linda BandowFebruary 22, 2011 - 12:25 am

    Just a lovely filip….TFS Becca, your work is so special.ReplyCancel

  • pat pFebruary 22, 2011 - 4:38 am

    Becca
    I always love your Becca Bits and tutorials..I’m so happy that you showed us the flower project and the fan paper to put behind the frame. Now I know how to do this and approach it..

    Your cards are always so beautiful ..thank you so much

    patReplyCancel

  • ArleneFebruary 22, 2011 - 10:19 am

    We love your cards. We are using an idea of yours to make a centerplace for each table at the funeral for my sister in law. My question is: where do you get the jeweled bottom for the card to sit on. It would be very special for each table.

    Thanks!!

    Arlene Wallin
    ReplyCancel

  • MarieFebruary 22, 2011 - 6:32 pm

    Another fab tutorial! Many thsnk, Becca xxReplyCancel

  • Karen LinarezFebruary 23, 2011 - 3:00 am

    I really love this card. That accordian folded background is great. You are always soo creative. You do such beautiful work!ReplyCancel

  • Lillian F.February 24, 2011 - 11:19 am

    Hey Becca
    I really loved this card. You make it look so easyI had to try it. And you know it took me more than an hour! It came out beautiful and I gave it to my aunt for her eighty-first birthday she really loved it. Thanks for the ideas and techniques I can’t get enough of your use of the nestabilities…..keep them coming! I am also working on the 31 days but this one might take ME sixty! :)ReplyCancel

  • Lillian FFebruary 24, 2011 - 11:57 am

    Hey Becca
    This was such a lovely card I just had to try it. Of course you know it took ME more than an hour. :) Following your techniques made it look so easy. It came out beautiful and I gave it to my aunt for her eighty first birthday she thought it was so beautiful she has it on display! Thanks for the videos and techniques with the nestabilities you give us so many good ideas. Can’t wait to see what you come up with next.ReplyCancel

  • Rebya FalkMarch 18, 2011 - 3:11 pm

    Thank you so much for your tutorials. You are a wonderful teacher. Your work is absolutely beautiful.ReplyCancel

I N F O