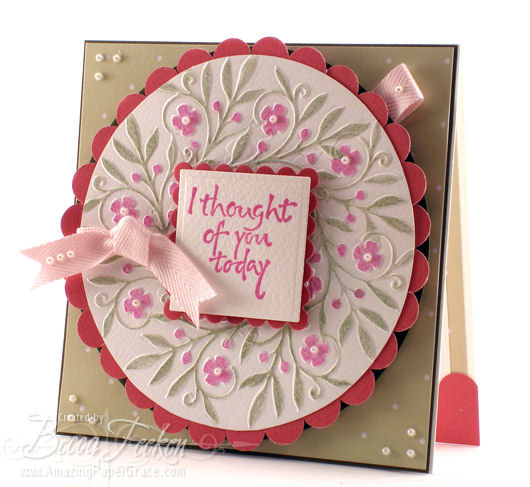
How many of you purchased those small Cuttlebug embossing folders and then were disappointed that their use was limited? Yeah, me too. It seems that you couldn’t really bite in far enough to get the image where you wanted it and some of them have an orientation that limits their use as well. I’ve been toying around with the templates and came up with a slightly different way to use them that allows you to get around some of those limitations. Here’s one of my first samples:


Here is a closer look . . .


In a nutshell what I did was figure out how to do circular embossing. By placing a hole in the center of the paper and inserting my template into the hole, I was able to pivot around the circle from the inside and emboss in enough locations to fill in my circle and make a complete background. Once finished, I was able to camoflage the opening with my stamped sentiment. I played around with varying the number of embossed images on each circle and found you can do as few as four and as many as eight.
For this card, after I finished the embossing I colored the image with chalks and embellished with pearls. I cut a scalloped border and chopped up the border in order to fit it around the circle. I cut a Nestability scalloped square and a Nestability square with my sentiment to cover the hole used for embossing. The cute little feature of the three pearls sitting on the ribbon is a great idea I snagged from my friend Janine of 2BKrafty – you can see the card she made here where she floored me with that idea. Here is a diagram showing how I tackled this card.
Step 1
Cut a large circle about 5½” in diameter. I used my EK Success Circle Cutter, but you could easily cut one by hand using a plate as a template. Using the second smallest circle from the Nestabilities Petite Scallop Circle Large Set, cut a circle in the center of your paper.


Step 2
Note the eight locations with arrows. I embossed at each of these locations with one of the Fancy Corners Small Embossing Folders. The joint of the folder is placed on the inside of the circle and then the folder is pivoted through to embossing at each of the noted arrows. On this particular folder there was some overlap so as I embossed, my current embossing smashed part of what I had already embossed. I didn’t really worry about it. This will vary depending on which template you use – some will look good overlapped and others will not.


Step 3
Complete the embossing then leave plain for texture or color as you will!
Optional:
You don’t have to start out with circle, it can be a square as with my card from yesterday.


Here’s how I did circular embossing on the Cuttlebug to make the background for this card:


Using the same Nestability circle, I cut out the center of my paper which measures 5½”.x5½” On this particular card I embossed four positions to start out with – North, South, East and West with the joined edge of the template on the inside. Then I embossed on each corner with the joined edge of the template on the outside with the arrow showing where the join should be positioned.
I hope this gives you many ideas on how to stretch your templates! If you share this idea, I would appreciate a link to this post so that folks can see exactly how to work through the embossing step.
Thanks so much for stopping by!!
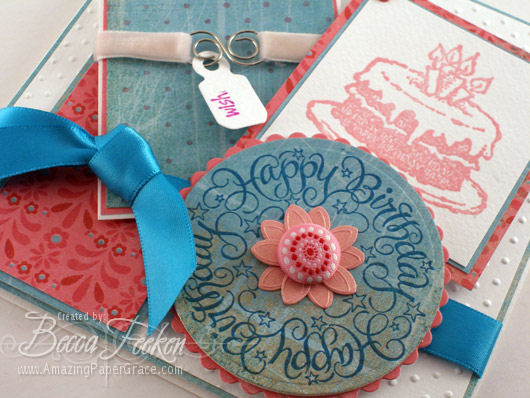
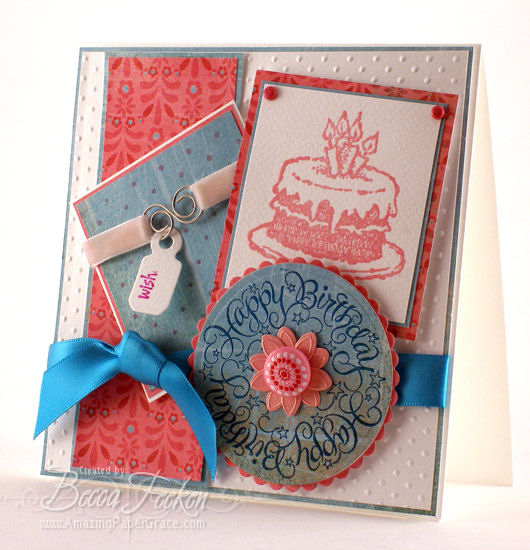
.jpg) I just love this sketch. It’s this weeks Sketch For You To Try from Jen del Muro over at I{Heart}2Stamp. This poor card languished on my desk needing something more, alas I rescued it from a possible trip to the trash can and was able to rework so things so that I could post it. When you look at the recipe you will notice that more was more in this case. I guess I was afraid that I might leave some company out on this one he…he..
I just love this sketch. It’s this weeks Sketch For You To Try from Jen del Muro over at I{Heart}2Stamp. This poor card languished on my desk needing something more, alas I rescued it from a possible trip to the trash can and was able to rework so things so that I could post it. When you look at the recipe you will notice that more was more in this case. I guess I was afraid that I might leave some company out on this one he…he.. 


Oh my gosh, this is just fabulous! I love the Happy Birthday medallion, it’s gorgeous with the button in the center. A perfect birthday card.
You’re so funny! As if any card of yours would need *rescued*, lol :-)
I agree with Anita, Becca creations never need rescued.
Lisa A.
A real beauty Becca, love that sketch.
Awesome!! Love the colors and all the details – and love how you did the Happy Birthday in a circle!!!
hugs, Jami
B!!!!!!!!!!
e!!!!!!!!!
a!!!!!!!!
u!!!!!!!
t!!!!!!!
i!!!!!!
f!!!!!
u!!!
l!!!
Great card Becca!
Joan
This is soooo pretty. I can’t believe it was almost trash. I love the birthday medallion also.
Also I made a card with your last cuttlebug embossing corners tutorial and LOVE it. I haven’t posted it yet but I’m so excited by the new trick!
So getting another year older wouldn’t be so bad, if you rec’d b-day cards like this… beautiful!
Becca,
I’m loving that sketch.
Great card!
~~Diane~~
This is wonderful. I’m so happy it was rescued from the trash can! I love all the detail and all the embellies in this card. Great job!
Awwww…what a cute card! Love all the detail. I just picked up a one of those bucket o’ flowers from Michael’s last night. :)
How pretty , love this card !
Thank goodness you rescued this card because it came out wonderful. It is so generous of you to use every name brand tool on this card…..he he. You really rocked this challenge. TFS.
Debbie/Phx AZ
WOW! Becca this is gorgeous! Love that birthday stamp and the velvet ribbon. You put everything together so elegantly!
love this one. i like the colors and the way u put every thing together.
another great card
hugs kay
Love it & love your creativity………..it just oozes out of you!
Thanks so much for sharing what the Lord has given you!
Happy Huggies to you!
I am amazed at all of the layers on this card and how well they all tie together. Another great creation from your gifted hands!!!
Cathy B.
I absolutely love this card. Very nicely done!
:)
kzjiw4p9kprre6zf
I found your site quite by accident, but am glad I did! It is awesome… I loved your ribbon storage idea and am in the process of putting mine on bobbins. It is amazing how many you can get in one of those storage containers!
Smart way to use the paper clip. I have many of those and now you have given me a new use. Your design mind must run faster than sound. I am thankful your your creative mind.
birthday cards that are personlized are the best in my opinion, they really come from the bottom of the heart of the sender:`~