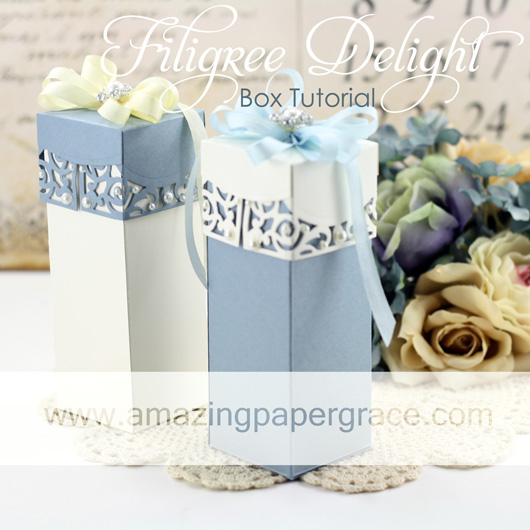
Hi there blog friends! By request, I have a tutorial for you today to show you how to make the filigree topped box!! If you missed it before, with the matching card, hop over HERE to see the set!! This makes up quickly and when you see how easily the top is made, you’ll just smile. Enjoy!
Thank for you sweet comments! If you’ve asked a recent question in a comment, please check the comment thread for a reply. See you soon!!


Gorgeous, so elegant, and beautiful, for wrapping gifts to make someone feel special.
J’admire tout ce que vous faites c’est extrêmement joli et réalisé avec soin et goût. Bravo et félicitations !
Thank you for the excellent video tutorial. I have this die set now (didn’t you design it?) – it’s so pretty. Now I can make boxes to my hearts content!
Thanks for this Becca must have a go .Melanie
I am working with that very die for my husband’s anniversary card. Just such elegance but guess who was the designer, what else could we expect. Thanks Becca.
Mstgane
Ann
Beautiful! Thanks for the great tutorial!
THANKS FOR THE TUTORIAL BECCA!!!!!!!!!!!!!! IT’S A LOVELY BOX!!!!!!!!!!!!!! :) NOW, I WANT THAT DIE!!!!!!!!!!!!! :) (I’m SLOW at getting dies!) :)
Sweet.
What an amazing, beautiful box. Thanks for the tutorial that was very easy to follow. You are a very gifted lady and thanks for advising that you created the die which is awesome. This will definitely go on my wish list to do for Christmas gifts. Thanks again!!!
I love this box it is so pretty!!!!!!!!! You are a fabulous designer, creator, I could go on and on. You motivate me beyond my imagination, thank you for all you do!
Absolutely love your video tutorial. Thank you for sharing! I will have to break down and get the A2 Filigree Delight.
Thank you for sharing your work and ideas with us all, it is much appreciated. You are a very talented lady.
LOL Eileen
I’m so excited to give this a try! What a beautiful set. Thank you for sharing with all of us in blog world.
What a great project! The box is beautiful. Thanks for sharing!
Thanks so much Becca I can’t wait to try this. I make jewelry and this box shape will be perfect for presenting bracelets as gifts. Where do you buy your pins for your lovely stick pins?
Another wonderful tutorial from your hands of magic! Thank you so much for sharing this with us!
Thank you so much for the time spent creating and making this tutorial. The box is delightful and beautiful.
Thank so much Becca for such a wonderful tutorial. I will definitely give it a try.
Oh so Beautiful..and a must have Die. Thanks so much Becca, your out of this world!!!
Thanks so much Becca.I truely LOVE all of your creations and look forward to your emails and tutorials!
Beautiful work and easy to understand. Thanks for all you do to make so easy to follow
Thank you so much for this tutorial. Love having a matching box to tuck some sweets or treats in. Your creativity continues to amaze me. So kind of you to share your ideas.
What a graceful box and lovely video – superb job Becca ?
Such a beautiful and elegant box! What a wonderful tutorial! You are just the best teacher. :)
Totally amazing and truly fabulous, how do you do it??
Hugs
Alice x
Gorgeous lic on your box! Thanks so much for the excellent tutorial!
Thanks for another wonderful tutorial Becca.
Another excellent tutorial, Becca. What a pretty box, with of course, a gorgeous bow! Thanks for sharing it. You always do such a great job with filming your tutorials and your directions are clear and precise.
R/
Fabulous tutorial as always!!!! Thanks for always sharing your talented manipulations of these wonderful dies Becca. Always coming up with the coolest ideas. Your the best.
Marcie
Becca, you make this look so easy – and gorgeous! Thank you for taking time to do these tutorials, I haven’t tried any of them yet but I love watching them and you always have such detailed and simple to follow instructions. Thank you again!
That is a pretty cool box and you embellished so nicely!
Beautifully decorated box! I do love your projects, Becca. I am curious about the brad or button on top of your bows. Do you purchase them somewhere special or do you make them? They certainly add a crowning touch of bling.
Thank you so much for sharing your wonderful ideas!
Becca: I totally love your work and made the cute little box, now am working on the card (thx to you for the tutorial). I’m assuming you folded the cardstock to cut the card & didn’t cut the oval out. Did you cut a separate piece to place over the sentiment part and put the sentimate on that? Thx for your reply in advance.
I have just made this…it is so special. Thank you!!!!