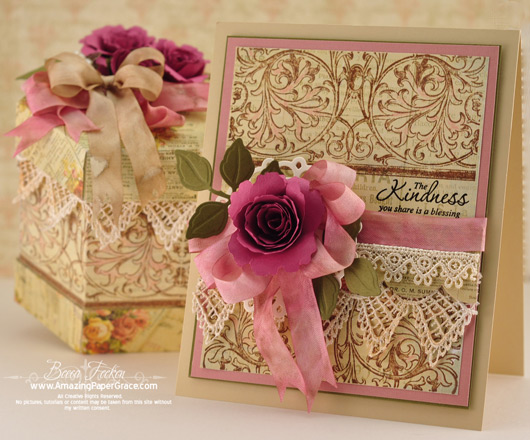
Good morning dear blog friends! There’s lots to cover today so here’s the short version — a card and matching box and a video to show you how, a new background stamp, questions about paper for the honeycomb ornament and a surprise tonight at midnight — read my entire post to get all the details! Okay, now the long version, lol!! I have a project to show today and a video to accompany it, that I’ve been trying to get to since the beginning of October. It feels great to have it done! Remember the Hexagon Box I made last month? Since it was very clean and simple, today I’ve gussied it up and given it a vintage flavor using some of my favorite Romantique Prima paper.
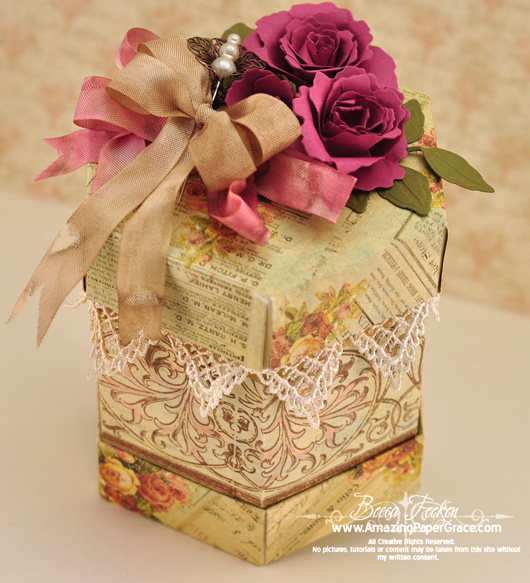
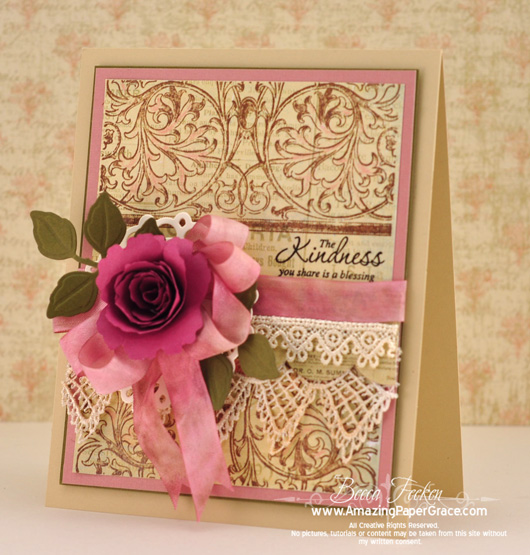
 The hexagon box allows for so much embellishment that I just know it will be my “go to” box for a while to come. I know I’ve mentioned that I love for the box to be a part of the gift and I don’t want them to be tempted to throw it away. It feels sturdy so I know it can be used for other things after the gift is removed. The best part of the box is that the walls of the box lend themselves so stamping and especially using borders. I’m using a new background stamp by JustRite Stampers, the Scrolled Vine Background Stamp. I’m a background stamp kind of girl, so I stamped the Scrolled Vine Background stamp right on top of some subtle paper to get the effect I wanted for both the card and the box.
Now the box is made using Spellbinders™ Hexagon Petal Envelope and I added embellishment using Spellbinders™ Hexagon Petal Envelope and Spellbinders™ Foliage. For my card, many of the details match – I used Spellbinders™ Classic Scallop Edgeabilities layered in between my lace and the flower is Spellbinders™ Spiral Blossom One backed by Spellbinders™ Picot Edge Circles and embellished with Spellbinders™ Foliage. Here’s detail from the top of the box.

Here’s a step by step video to guide you through the process of making your own!
| SUPPLIES I USED |
| Stamps: JustRite Stampers – Scrolled Vine Background Stamp, Kindness Set Paper: Prima Romantique, Neenah Classic Crest Cream, Bazzill, PTI Autumn Rose Ink: Versafine Vintage Sepia, Versafine Onyx Black Accessories: Spellbinders™ Hexagon Petal Envelope, Spellbinders™ Spiral Blossom One, Spellbinders™ Classic Scallop Edgeabilities, Spellbinders™ Foliage, Spellbinders™ Picot Edge Circles, Clear Embossing Powder, Pearl Pic, Hug Snug Seam Binding, Bead Landing Finding, Lace, pink chalk pencil |
I’m going to have to get used to the video processing time now that I’ve moved to HD, yikes!! With my flip video it used to take 8 minutes max to render the video, now it takes two hours to send to my computer and about 45 minutes to upload to YouTube! I’m shortening the learning curve but my brain is aching, lol!! For those of you who are interested in doing the Honeycomb Ornament tutorial, many have emailed me to say they are having trouble finding paper. Apparently the paper I’ve used is no longer stocked at Hobby Lobby. I’m soooo sorry – I’ve seen that type of paper at art stores but I live in a small city and would not have a clue where to find it if not at Hobby Lobby. As an alternative, I’ve recommended any double sided paper that is not thicker than typing paper – I believe that Close To My Heart has or used to have a text weight double sided paper. If not, try book pages, like those from an old vintage dictionary, magazine pages, brayered or stamped printer paper or wrapping paper. These should all be thin enough to do the trick!!
I hope you can stop by and see me tomorrow :-) I’ll have the opportunity with a group of designers, to reveal a seriously cute, new Spellbinders Die that you’ve never seen before! As you know, no reveal comes without the chance to win something very cool so the fun starts at Midnight EST.


WAUW Beca this is as usual absolutely gorgeous creations, and I just love both to pieces here. Your box and card is sooo beautiful and so well done, and it just looks fabulous hun. Gosh if I was just as talented as you to get all these ideas, that would be soooo awesome.
Have a great day hun and I´ll look forward to see, what you´ve made with Spellbinders tomorrow.
Wow this is so lovely! Who wouldn’t love to recieve this GORGEOUS set!
Love this beautiful hexagon box and the card that goes along with it. The flowers look real. Have missed seeing you on line lately. Hope you haven’t been ill. Really enjoy all your projects. Edna
You’ve been busy! Gorgeous!
Beautiful box and card. You are the most talented designer I know. I absolutely look forward to everything that you do. Thank you for sharing with us.
Oh my Becca, this is sooooo gorgeous.. I love the box and the colors with the flowers on toop and the card is so very beautiful… So stunning just like everything else I have seen on your blog.. you are so talented that I am in awe.. I enjoy your blog and look forward everyday to see what you are going to come up with next. Thank you Becca and God Bless…
Gorgeous box and card, love the colors chosen it looks very victorian to me. Just absolutely lovely. This really is a very nice gift set. As always Becca, TFS!!! :-D
The box, the card, all so pretty! Your email so exciting! It’s the first I’ve recieved and I feel as if I should go nap now and be ready at the strike of 12! LOL
Not sure if I follow you, but are you looking for Honeycomb paper???
There is a online supplier…… I can check for info if you need…
I buy some of mine from CropStop.com.. am I allowed to share that info?
And also, please, explain the just rite stamps. I”m not sure I understand them. You need to purchase alot to use them??? Very confussed here…….
But love all you do. Thanks so much for sharing your creative ways with us. I’m a long time stamper, but new to crafting and trying to catch up and try it all. :)
Febe
from AZ
Your work is always so lovely! Great job!
Oh my! This is soooo pretty. They have all my favourite elements – pink, roses, lace, beige, pretty paper and your fabulous ribbon/bow treatment. What can I say? Simply that I’m in awe of your talents sums it up. Thank you for sharing this.
How exciting! I can’t wait to see a new spellbinders die…I think I’ll stay up just so I can see what you’ve made. I love your box and matching card. I’ve really fallen in love with the vintage look and I need to try more cards in this style. I think I’ll be adding this box die to my Christmas wish list.
Wow Becca what amazing projects! Love everything about them both. Thank you for always giving us a link to the dies etc. that you use. If it’s a die I don’t have sometimes it’s difficult to see what you’ve used or to figure out how you’ve altered it until I see what the die looks like. The links helps the light go one. :)
See ya tomorrow.
Blessings Bernie
Gorgeous set. Just darn right Outstanding.
ColleenB.
What a beautiful gift set, Becca. You are just a creative genius!! Thank you so much for sharing your gorgeous work!
I go on line every day to see if you have a new post. You make my day and I LOVE all your cards etc.
What a beautiful, BEAUTIFUL gift set, Becca. You always manage to take it one step further and create the most perfect projects. Thanks for the tutorial for the hexagon box. I have added it to my list of projects to try. BTW … I have been using my BPBS for all of my bows for my Christmas cards and have yet to have even one not turn out perfect. You rock Becca!
Becca
What a beautiful box. Is there someway you could post a pattern of the template that we could enlarge for those of us who would like to to try it but do not have the grand calibur or the die?
Thanks for sharing your creativity with all of us.
Hi Becca, Stunning box & card set and a fabulous tutorial that was so easy to understand. The embellishment you created on the top is just perfect too. Well worth all the time & trouble you spent sorting the video out. Thank you.
Tine :)
I can’t imagine how difficult to get each step just right to film. My son in law is a videographer and he takes literally thousands of feet of film to get one usable shot. But, you did an amazing tutorial, actually just figuring out the box steps makes me tip my hat to you. This box is just so gorgeous, so girly girl. Love it and can’t wait to jump into this project. Thank you so much for your time and effort to share with all of us your beautiful cards and such.
This is so beautiful! Love the colour and details – it’s gorgeous in every way.
Wowee Becca! What a fabulous tutorial. So straightforward. Makes me wish I had that die for sure!
I absolutely love your feminine, gorgeous card and hexagonal box. They are definitely something any woman would love to have — and you’re right — they would absolutely want to keep them!
I just love Spellbinders products and you take them to a whole new level — they must be so thrilled to have you on their design team. Can’t wait to see the new release after midnight!
Hi Becca – it’s been a long while since I’ve posted a comment, although I visit your site regularly. The hexagon box and matching card are just beautiful. What gorgeous creative talent you are gifted with, and thank you for sharing!! Take care!
You have reached a new level of creative and clever! Spellbinders needs to pay you double! You ARE amazing!
Wow Becca! What a stunning box and wonderful tutorial! Thank you so much for providing us with gorgeous creations and well thought out videos. My wish list grows bigger and bigger everytime I visit your blog!
Ooooo – so gorgeous and what a wonderful idea!!!
My, my, my Becca! This has to be the most beautiful thing you have made to date. It is breathtaking!! I can’t imagine anyone would throw away this beautiful gift. May I ask what you do with all your creations? Do you have an Etsy store? If your give-aways were for your creations, I think I would have received a priceless piece of art!
WOW that box and card take my breath away! I am always amazed at how you take the simplest items and make these gorgeous boxes and cards. That’s why I love visiting your blog, so I can see what you’ve done with the latest dies, stamps, embellishments, etc. You are the BEST!!
Becca-
What else can I say that has not been said? This is just gorgeous, sweet and lovely. You are a very sensitive woman.
Have missed you lately. Glad you are okay.
Lauren
Great tutorial… wonderful creation. Tku so much for sharing this with us! I can see using it for a set of stamped coasters!
This card and box is beautiful, thanks for sharing…:)
Becca,
You are so talented. I love everything you do. I missed you not posting but I am sure you have a life to live too. Be sure that I think of you often & pray for you.
Vicky
Incredibly beautiful, Becca! Love how you made the box!
Becca, this is a fabulous set. However the lucky recipient may be will be THRILLED! I’m quite sure that they won’t be throwing that box away, it’s as much of a gift as whatever may end up inside it. Will be looking forward to the new die you’ll be showing. Miss seeing you post as often, but I’m sure that you’ve got many, many things going on in your life. Hope that you are well and happy, I KNOW you’re busy!
R/
I don’t even know what to say. . . .one lucky terrific person is going to feel very loved and special whom will get this set from you!!!!
What talent you have, absolutly love your pink flowers. This is an over the top beautiful project.
You are so kind to do tutorials, give us all the links to what you’ve used. How kind and thoughful you are!!!
You are a Blessing to all you have touched with your talents in life!
Wonderful as usual Becca. This might sound like a dumb question but does the hexagon die fit through a Cuttlebug?
the hexagon box tutorial is not available, it says error occured. am i doing something wrong?
Thank you so much Becca. Your cards and boxes are amazing as usual.
Your tutorials are a gift!
Cheers,
Jane
God has blessed you w/some amazing creative talent! Your box and card are absolutely divine!
Becca I love this hexagon box! You did not mention the size of the sb die. Will it fit in a Big Shot or Cuttlebug? Oh I hope because I will definitely get the die if it fits in one or the other. Thank you for all the directions for the different things you make. I adore making 3D items so this box is right up my alley. This would be beautiful for Valentines Day. You are such a lovely talented lady. I can tell you have a sweet spirit. So thanks for all you do and share with us in blogland!
This card and box is just so elegant. And what an awesome tutorial.
Becca the box and card are just so elegant….Love the roses also….
Thanks so much for the tutorial on the box….You are such an inspiration….
Becca
Another great tutorial..clear and easy to understand. I just love your tutorial video’s. I’m learning so much from watching you..thank you Becca.
pat
Just STUNNING! I love the beautiful colors you used. Thank you for inspiring as always! I love your attention to detail!
Wow, it’s a lovely box! Thank’s for the great video.
Becca you have done it again! Amazed me with your beautiful creations!!!!
The card is gorgeous and the box is outstanding! I can also picture the box as a Christmas Box with cosmetics, lotions or chocolates inside for someone special and on the top instead of the Roses you could have Poinsettias and Christmas ribbons….wouldn’t that be beautiful too? Unfotunately I don’t have the Spellbinders Die that is required or I would have a go right now! Thank you for another ‘Becca Special’.
LOL Eileen (U.K.)
THIS IS GORGEOUS!!!!!!!!! The papers, yes are BEAUTIFUL!!!!!!!! The lace, the ROSES!!!!!!!!!!!!!!! The box & the card are TRUELY BREATHTAKING!!!!!!! Hmmmm, WHAT goody will you place inside the box????
I found your scrapside and i love it………You are the best.
Hugs from Titti in Sweden
A
A B S O L U T L Y A W E S O M E……… You are the sweetest person to go to so much trouble with all these wonderful tutorials. God bless you ……. Denice
You make my day with all these beautiful item’s you make
such a talented designer !!
God Bless
Becca, You are so talented. This is a great box!!! My only problem is I don’t own the spellbinders die for the lid. We live on a fixed income and I can’t afford to get this yet so, is there any other way to make the lids? Thanks so much
Superb tutorial, but sadly I could never afford the Spellbinder’s die :( But certainly food for thought on trying to create something similar even without it. Thanks for taking the time to put it up :)
Becca it is nice to hear from you. You will be in my prayers. Thank you for the beautiful card ;this is why I look forward to your entries. May the Lord grant you all grace.
BECCA I HAVE BEEN AWAY FROM MY COMPUTER AND AM NOW
HEARING ABOUT YOUR BEING AWAY. I AM SO SORRY TO HEAR ABOUT
THE MEDICAL PROBLEMS YOU ARE HAVING.
I LOVE THE HEXAGON BOX AND ALL THE OTHER ITEMS YOU
HAVE PUBLISHED. WITH ALL YOUR PROBLEMS THANK YOU FOR TAKING THE TIME ……WE ALL APPRECIATE IT.\
CYNTHIA