How can it possibly be the beginning of April?!? Well it is!! I’m giddy about the feelings of spring, they are a blessing, a breeze of hope and a healer to my soul. I’m tickled to jump in on a beautiful morning to share my new Die of the Month, Elegant Swivel and Sashay Die Set. It’s an interactive card with an elegant twist. The thing that I love most about this die set is that even if you are not into interactive, with all the other sweet and cozy little pieces you can make a regular card.
This month you’ll see that I did a card that is super feminine, one that is super elegant, and one that could be given to any one – guy, girl or youth. Die of the Month is an opportunity for me to create a multi-purpose die that will create many items. Plus it works well with that you have in your stash! I also love the program because it can be budgeted for every month or for the months you like to participate. Yes, I still have new collections coming, but the Die of the Month is sold for less than collection dies of a smaller size.
Inspiration for Elegant Swivel and Sashay Die
This month’s die has 20 pieces including a swivel mechanism, four words, four flowers, an adorable scalloped panel, and some more elegant touches. I normally make 5 x 7 cards but this set is sized to accommodate the A2 folks!! It will make an A2 card and can be sized up to make 5 x 7. Check out my samples. My goal was to create a set that would make a lovely pop up card that could be downplayed to make a normal card as well. This one is a no-brainer! For the basic swivel card, there is no measuring, just cut and glue. I will say the card looks lovely when you add matted panels on the inside and out and that’s what I’ve done with my samples. Tap the play arrow to see my tutorial!
Assembling the Elegant Swivel and Sashay Card
Elegant Swivel and Sashay Samples

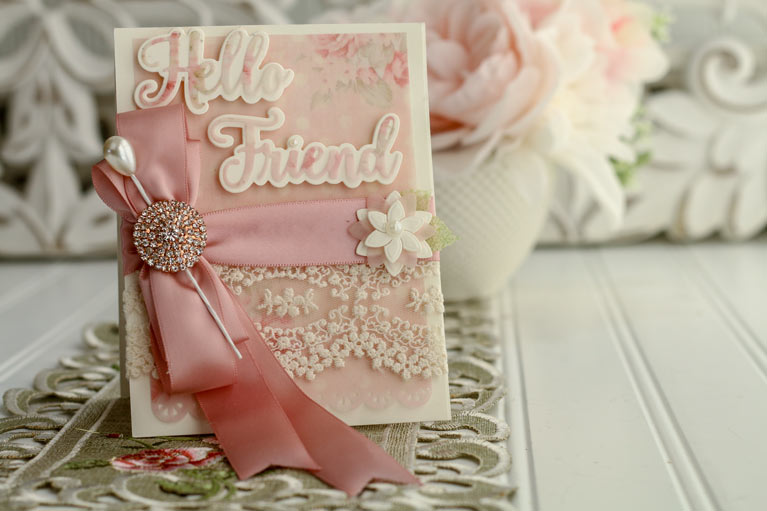
This card is all girl. Lace, powdery vellum papers, vintage pink and gold – my favorite kind of card. I have a friend who has asked me for this one. She says that it speaks to the woman in her and that all of the elements are dreamy and cozy. Personally, I love it when I can put feeling into a card and I hope this one makes you smile. Card size is 4-1/4″ Wide x 5-1/2″ Tall
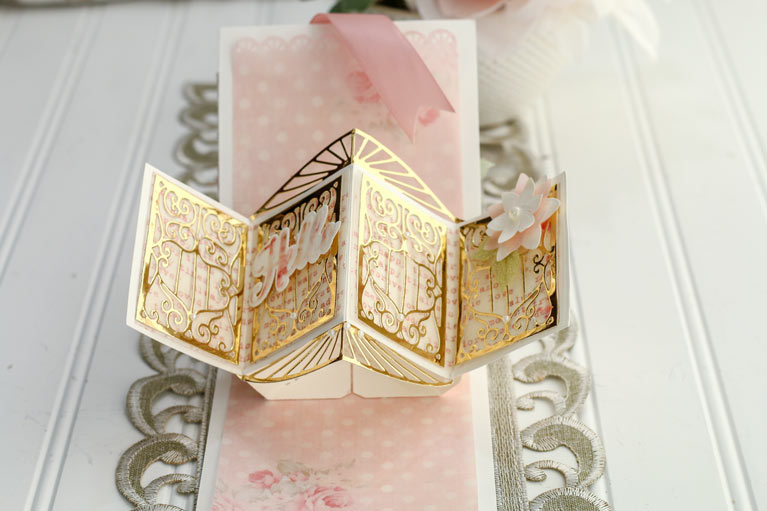
And the inside :-) I created the little starburst edging just to add a little bit of flair.
Belly Band Thank You Card

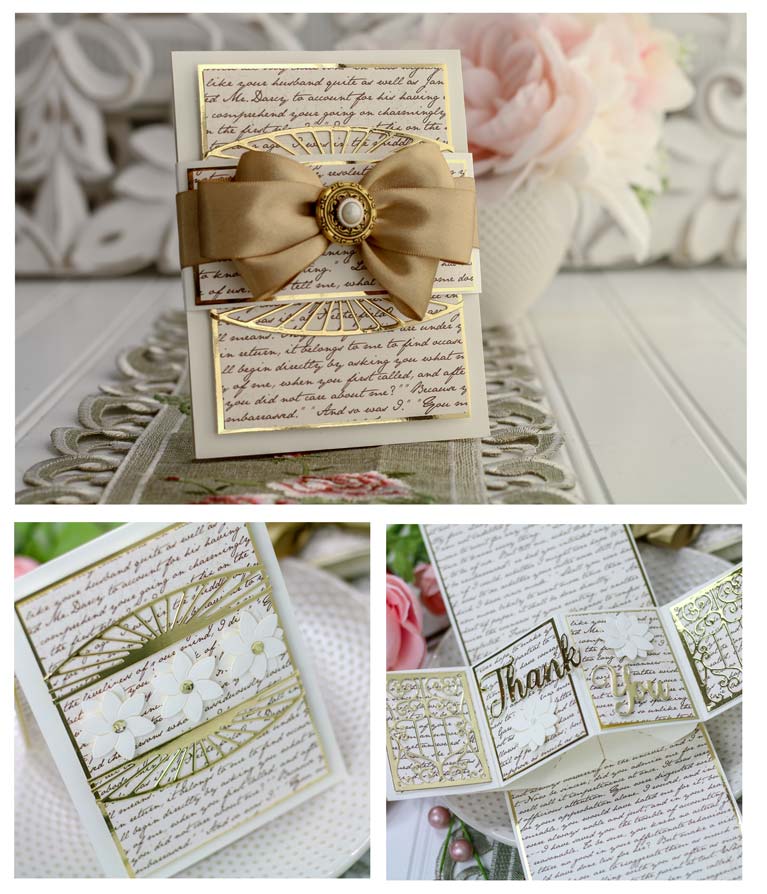
The belly band lifts off this one to reveal a surprise!! The sentiment is on the inside but could just as easily go where the belly band could hide it. I wanted this card to be just like opening up a present ?. Card size is 4-1/4″ wide x 5-1/2″ tall.
I Owe You So Much Card

To me, for this card, the sentiment says it all!! This will eventually go out to a friend that has helped me so much in the last month. To her I just can’t say thank you enough – that’s why it’s stamped four times, lol!! This card uses the interactive element but turned sideways for a landscape card. Card size is 4-3/4″ Wide x 6″ Tall.
And here is the inside. I love the real estate that is available for sentiments in this format of card. But, truth be known, all the delicate little parts an pieces here work spectacularly with everything in your stash for everyday cards.
Be sure to visit the April 2019 Blog Hop for even more inspiration from the Creative Team!
That’s my share for you with the April 2019 Die of the Month – thank you for letting me walk though my though process and what I wanted to create! Pop over to the Spellbinders Blog to have a look at many more pictures of the Elegant Swivel and Sashay Die Set.


Stamps: Spellbinders StP-005 Clear Stamps
Paper: Neenah Classic Crest – Natural White – Cover – 80lb smooth, Die Cuts with a View, Bazzill, Papertrey Ink
Ink: Versafine Onyx Black and Clear Detail Embossing Powder
Accessories: Amazing Paper Grace April 2019 Die of the Month.
So last month I asked you to leave a comment telling me how many years you’ve been cardmaking. I was blown away!! I have a friend that says people last an average of 6 years with a hobby before moving on and I told her that I begged to differ :-) I’ve been making cards since the mid 1990’s and I see I’m in very good company here because many of you have been at it for that long as well. I say it’s a way of life. If you have it in your heart to create with your hands I find that it’s something that you do in all corners of your life. In fact, I’ve been making with my hands since childhood. One of my favorite hobbies is sewing and I’ve spent my whole life doing it – sometimes with little things, sometimes with big. How about you – what other hobby has been a cornerstone of your life?


Hi Becca,
Love and look forward to the new Monthly die. Know I will not be disappointed. I was kinda shocked to see the pop up card you did for this blog. I have not had a chance to watch the video so am anxious to see how you did yours!
Happy spring to you and glad to hear you have some help in your “real” life. If I lived closer, I’d help as well!!
Hugs
Ann
I like your mechanism for the pop up better than what I have (after watching the video).
Hugs again.
OH BECCA! You have hit the right note with this die this month! I’ve been wanting an Interactive Die JUST LIKE THIS for SO LONG! I’ve put off getting it… LOL AND NOW, YOU have brought it to me! I LOVE that this is also good for A2 Size cards—they mail easier, & that is mostly how I send my cards to recipients! LOVE the intricate pieces you’ve put in this too! LOVE! LOVE, your samples! Can’t wait to see what your design team does with this too!
Yes, I have been creating since I was a kid too. I like to sew– some large, some small, like you. In whatever I make, I like mostly to make things for my home & for others. AND I like to knit, embroider, sketch & paint too. Card Making is the favorite of it all right now. Each summer my knitting needles call, but this year, I plan to do more painting & sketching. AND getting back to the basics! ;)Of course, I will continue to make cards throughout the summer as always with a daughter away at Grad School! ;)
Beautiful Card and I love the POPUP ! Reminded me I have die somewhere….BUT WHERE…THANK YOU BECCA FOR ALL YOU DESIGN ! I love your designs !
Oh Becca,
The Die collection for April is absolutely my all time favorite, Today! I cannot wait to purchase and use. Bless you for always showing us the beauty from your heart and then the way to make ours happy. Everyone I have ever sent a “Becca” card to has said they will keeo them forever. Your legacy will live forever. God bless. Sara
Oh my goodness Becca. I never thought I could make something as fancy as a pop up card, but your design and video make it look easy! I am thrilled with this new set!! Thank you! My grandmother started me at an early age with embroidery and I have done cross stitch in the past. I also learned basic tatting, but haven’t had time for a few years. My current hobbies are training and competing in a dog sport called agility. I have been taking classes for 12 years now and have retired 3 of my dogs. Now Walter has just started his agility career! I discovered paper crafting a few years ago and that quickly became my crafting passion!! I am praying that you will be able to return home soon. I live in Oregon, but wished I could be closer to help. Spring does bring such a wonderful message of hope and renewal! Take care.
I love this months dies!! I always enjoy your monthly dies but this set really hit my spot. I think it is my favorite since the November set last year, not that all of your dies aren’t wonderful. You really have been blessed with Amazing Grace in your designing ability.
Your card is beautiful as always. Can you let me know what the number or name of the die that makes the inside pop out into the 4 panels? Thanks!
Hi Jackie, that isn’t a separate die, the mechanism is part of the Die of the Month Set. I have a link in my post and if you pop over to the link you will see each die that is part of the set.
Thanks!
Another beautiful die set and the cards are amazing. You continue to make the most beautiful dies and cards never disappointed.
Oh boy, Oh boy, Oh boy! I love, love, love this month’s collection of dies. Interactive cards are one of my current obsessions and I’ve made twist mechanisms that are far more labor intensive – these dies simplify the process a bunch. I think cards like this truly make the card a gift – you open it up and “SURPRISE!”, such a delight. No doubt about it, this collection will be a staple in my toolbox. Can’t wait!
I think you are so right. Many hobbies of our youth become lifelong passions. One thing I love about card making is that I’ve incorporated other hobbies into it: calligraphy, origami, rubber stamping, mizuhiki cord knotting, Pergamano (dry vellum embossing), etc). My other hobby is music and it’s taken different expressions through the years: violinist, guitarist, choral singer, singer/songwriter and song leader. Singing is so important that it just doesn’t feel like I’m breathing fully unless I’m singing. In the same way, I feel a kind of distress if I’m not taking time to make cards plus they hold a central place in the communities I’m a part of.
Love & blessings, Sandy
Fabulously creative!!! All the examples are so intriguing! Love it!!
Another winner, Becca. This is a wonderful set! Thank you for the inspiration – and for continuing to create designs that we love to use ourselves. You are amazing!!!
Love, love, love this month’s die. I really like interactive cards so this is right up my alley. I also love your intricate style, so this will get used often. Thank you for sharing your talent with all of us.
Good morning Becca, your die of the month is stunning, as are the cards you have made with them.
Haven’t viewed your video yet but must as I can’t work out in my mind the folding mechanism inside. I must have missed reading your blog last time, so didn’t see you ask your friends how long have they been making cards. I’m up to about 18years now not including all the cross stitch cards that I used to make before that. Other crafts have been cross stitch, candlewicking, silk ribbon, knitting photography, are the main ones but am totally hooked on cards these days. Bless you Becca and hope the warmth of spring blossom for you. We are about to go into winter which is a great time to stay inside and create. With love, Jan
My gosh these are just lovely. The cards are grand and who wouldn’t love to get one of these?
Oh my goodness, these are stunning! Just when I thought I’d seen all of your beautiful work your now show us to bring it to the inside of our cards!
I’m so excited to get mine in the mail!!! The best thing I ever did was join your die of the month club I can not wait. I have made this card before but it take so much time this will help me to crest many more thank you so much!!!
Good morning Becca, just fabulousxxx!!!
Have a good one!!!
Loopy Lyndaxxx
Becca, You have the most elegant cards I have ever seen. Just lovely. Your videos are the best out there. Just straight forward with what information you need . Just love them. I had asked a while back but was wondering if you will be getting to making a video on how to use the Wedding Collection die you have called Bow Helpers and Closures. I have looked and looked for a video to help me understand how to use them but haven’t been able to find one. Thank you so much for all you do to inspire and teach. God bless…Denice with a “c”
Oh la la, these projects are absolutely stunning! Becca you are truly an inspiration, I thoroughly am inspired when I see and read your posts, thank you.
I LOVE, LOVE the beauty and cleaverness of this die set. You are one amazingly talented lady!!!! And there are is more to come this month with another set of dies to come. Goody this is like Christmas – Thanks Becca?
OMG is all that i have to say
Another amazing die set and beautiful cards! I also sew and cross stitch
[…] you haven’t seen the Twist and Pop type cards I created, check out my post ——> HERE. When I design these dies, I pack the features in so that you can use them in your every day […]