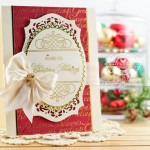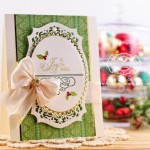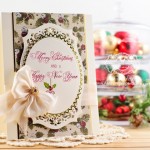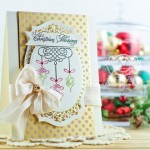
Hi there friends. Today is Day One of June releases for JustRite Papercraft and we’ve been playing around with some stunning goodies. (In fact, I have new dies that are releasing this week along with stamps – just hang around with me this week and you’ll get a look see). Today I’m sharing a card and envelope ensemble using Rose Bouquet Vintage Labels Seven. These sweet roses were cut out using SVG Rose Bouquet Digital Cut File and then colored using Spectrum Noir Markers.
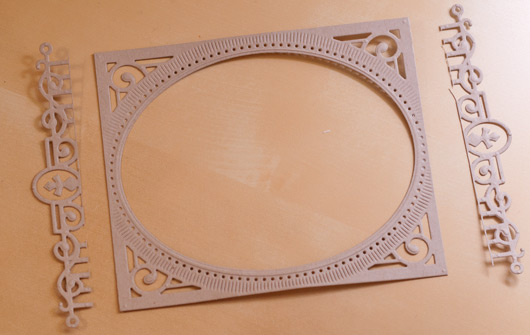
To assemble the card I cut using Spellbinders A2 Bracket Borders One along each edge then made a back piece with a hinge so that I could attach front and back. Next I layered Spellbinders Grand Decorative Labels One (edged with a gold krylon pen) followed by Spellbinders Grand Labels One Spellbinders Classic Squares SM. My sentiment is stamped on Spellbinders Back to Basics Tags.
I created my envelope using the We’R Memories Envelope Board and before gluing the envelope together I embellished each side of the flap using Spellbinders A2 Bracket Border One. I also used it at the bottom of the envelope. To close off the holes but leave the lacy pattern, I backed the die cut holes in the envelope with the same print used in the card.
CRAFT SUPPLIES I USED |
Rubber Stamps: JustRite Papercraft – Rose Bouquet Vintage Labels Seven, SVG Rose Bouquet Digital Cut File
Craft Paper: Coredinations, Neenah Classic Crest – Natural White 80 lb, My Minds Eye
Ink: Versafine Onyx Black, Brushed Corduroy Distress Ink
Accessories: Spellbinders A2 Bracket Borders One, Spellbinders Postage Stamps, Spellbinders Classic Squares SM, Spellbinders Grand Labels One, Spellbinders Grand Decorative Labels One , Spellbinders Back to Basics Tags, The Paper Studio Pearls, May Arts Silk Ribbon, Spectrum Noir Markers, Krylon Gold Pen , Grand Calibur Die Cut Machine, We’R Memories – Envelope Board |
The JustRite Designers had a chance to play with these delightful sets – be sure to stop by and see what they dreamed up.
Hiya friends! Hopefully the second time will be a charm in getting a winner for the Clear Case Blog Candy. Stay tuned to the end of my post. In the meantime a cheery ‘Hello Friend’ card using all older dies except this precious new window, Spellbinders Shuttered Window. It’s my favorite kind of card because I can take a new die and mesh it with the classic Spellbinders core shapes you already have in your stash :-) Did I mention I love windows? I guess you know by now even though I use a lot of large sentiments, I have a thing for tiny tags. Quick tip: Create a card using all the sweet stuff you pile on the front – great dies, flowers, cute buttons – then when you need a card simply put a one, two or three word sentiment on with a little tag – you’ll never be caught empty handed!
Here’s how I made it – step by step:
Start with a card base using Spellbinders Enchanted Labels Twenty Eight and simply cut off the bottom to give it a different look – you can see my tutorial on How To Make Hinged Card Bases. Next layer up add Spellbinders Labels Twenty Eight and cut the bottom off using Spellbinders A2 Bracket Border One – adhere using double foam tape. Cut design paper with Spellbinders Labels Twenty Eight then cut off top and bottom using clean edge bracket piece from A2 Bracket Border One set – adhere using foam tape. Next layer up add Spellbinders Window Four (I covered the back of my window so my design paper would not show through), adhere using foam tape. Next layer up add Spellbinders Shuttered Window. Add bow, flowers, button, pearls and hang sentiment tag from bow using Spellbinders Back to Basics Tags.
Also, ever wonder how I send my cards? This was a question that made it into the Question Parking Lot on my last post. I decided to answer the question by posting pictures to show you how in the Question Parking Lot – here’s a link to get back to that post — Butterfly Card – How to Mail without Crushing :-)
CRAFT SUPPLIES I USED |
Rubber Stamps: Wordsworth Stamps – Friends Collection
Craft Paper: Neenah Classic Crest – Natural White – Smooth 80lb, Crafty Secrets Digital Paper
Ink: Versafine Onyx Black
Accessories: Spellbinders Enchanted Labels Twenty Eight, Spellbinders Labels Twenty Eight, Spellbinders A2 Bracket Border One, Spellbinders Back to Basics Tags, Spellbinders Shuttered Window, Spellbinders Window Four, The Paper Studio Pearls, May Arts Silk Ribbon, Prima Roses, Button, Grand Calibur Die Cut Machine |
Drum roll . . . now for the winner. Remember the winner needs to claim their prize within 48 hours by reaching out to me through my contact page with their address. If you are in the US I’ll pass the information along to TapeOnLine and the cases will be sent to you directly, otherwise if you are international, I’ll forward a goodie box to you. Thanks as always for stopping by and remember if you have any questions about the card, please leave them in the Question Parking Lot on this post. This is an easy way for me to answer questions about this post or techniques used :-)
See you soon friends!!
Question Parking Lot:
Well friends, I still have 20 clear cases to give away – the winner did not come forward to claim their prize. If you’re not familiar with these lovely cases, here’s the post where you can check them out: My Clear Case Storage. Leave a comment on this post, using Random.org I’ll pick and post a winner on Tuesday, May 27th. I’ll repeat the rules at the bottom of my post. In the meantime I have a card to share that simply made me smile when I worked on it. The pieces and parts of this card have been laying on my counter for about a week and every day I’d glitter something or wet something to move me along to the end. This week has been quite a phone week so I snipped the butterflies out of one full die cut sheet while I was chatting. Today while I was waiting for my computer to copy some files, I finished it up. I’ve had this idea to float these sweet butterflies using Spellbinders Butterflies since it came out. I love it when something turns out like you hope it will.
The entire card is made of watercolor paper. For the die cut layer I simply used a wet paint brush and swished color from a diluted re-inker across in pink, purple and blue. After dry, I ran through die cutter. I made another panel slightly bigger than the die cut layer. I did the same wash but this time I used only pink and once dried, I stamped a print across. This panel fits right behind my butterflies die cut. Then I die cut one more layer of butterflies out of paper I washed with pink. I sprayed adhesive on and covered with glitter. As you can see, the butterflies are connected together – I simply snipped in between each butterfly to release it. After folding each Butterfly in half, I hot glued them right over the outlines of butterflies on my die cut sheet then put a smidgen of hot glue on the back of two pearls I popped into the middle of each butterfly.
The last thing I did was attached a bow that was hand dyed using the same re-inker I used for the pink washes. Oh, and the cutest little tag ever came from Spellbinders Back to Basic Tags. I stamped a little saying on it from Wordworth Stamps. So tiny and so cute!!
So again, I’d love to see these cases go to a winner! Here are the rerun of the rules:
What You Can Win:
In order to win, leave a comment on this post before Tuesday, May 27th at noon CST. You are allowed to leave one comment per day. The name will be be picked by comment number through random.org and I’ll post the name of the winner on Tuesday May 27th (please check back) and the winner has to claim their prize with 48 hours by responding with their address through my contact tab at the top right hand of the blog. I’ll forward the address on to TapeOnline for shipping directly to the winner. The clear cases are offered only for domestic US Shipping because for international guests, the shipping exceeds the cost of the cases HOWEVER, if you are one of my sweet international guests, I’ll offer an alternate prize of stamps and paper that I’ll take care of shipping. Hopefully the second time will be the charm!!
Question Parking Lot:
Let me know if you have any questions about the card!
1. Julie Blake, comment #32 asked where to get the ribbon I used for the card above. Julie it is white silk ribbon that is 1.25″ in width and I dunked it in a small cup with several drops of Ranger Industries Victorian Velvet Re-inker. May Arts has a list of retailers HERE.
2. Kathleen Kelley, comment #249 and Marge, comment #312 and asked respectively, (a) How do you get them in the mail? Most of my cards are mailed and would be squashed? and (b) One question, if you were mailing this card how could you prevent the butterflies from going flat? Thanks for the question ladies, this is the top asked question on my blog and I thought it best to show you . I used to buy the kraft bubble mailers but found them to be quite pricey, so I get these Cardboard DVD Mailers for quite a bit less. There’s ample room for bow and my butterflies won’t get smushed :-)
|
oH MY GOODNESS, I just might be the first today to respond to this lovely card. Just love the envelope and so enjoy making my envelopes with this neat product. Have a great day, Becca.
Hugs,
Mstgane
Ann
Love hte card and the envelope is fab – must try this
Another spectacular card. I really like the frame that you created using the Bracket Borders One. I have used that to make an edge but have never thought to use it as a frame. Something new that I will have to try. Thank you so much for all of your clever and beautiful ideas.
WAUW another stunning creation Becca. Soo beautiful as always hun I just love it. You are such a genius, when it comes to design these awesome cards, and this is no exception, that´s for sure.
Hello Becca
Lovely to see you have used the Spectrum Noir Pencils!
I have them and only just getting to grips with the blending….. so taking tips from you!
Lovely images Becca
Take care
Love Marg
Beautiful card, your cards are always so well put together, I’d love to know how you make all your perfect bows. Love your cards, Thank you for sharing.
I saw the link on your page for bow making, thank you and good bless you
Becca,
What a gorgeous set. Love the roses. Please, please, please, do a video tutorial on this set. Would love to see how to…
Fabulous card! And, I love the sentiment: Choose Hope!
Hi Becca,
Beautiful card, love the Roses and use of dies.
Love & Hugs
Jacquie J xxx
This is lovely Becca! The image is gorgeous & what you’ve done with it is gorgeous too! :)
Dear Dear Becca,
Please add a video onto YouTube showing how you used the A2 bracket border to create the lovely square. You are so talented and I am always amazed at your creativity. Blessings!!!
Another fabulous creation Becca! How clever to make a frame using the Borders One set…this card is definitely over 6 inches. I will have to put on my thinking cap when I attempt it! Thanks for sharing.
Joanne from Canada
Hi Becca, WOOHOO! I tried this with the brackets and it WORKED!!!!! These dies may just have a new lease of life…. thanks to you. Love your ideas. Thanks again for sharing.
Margaret (Scotland)
Such an inspiring sentiment and a beautiful effect with the lace look. I love the matching envelope for the card too. The envelope board has been used a great deal in my home!
Hugs
Anne (UK) x
This is breathtakingly beautiful. The frame amazes me how you made it with the bracket border. Your ingenuity never ceases, Becca. Please do a tutorial on how you did the frame. Please, please, please.
Such a beautiful card! But then, I have never seen one that wasn’t just gorgeous. Thanks for sharing with us.
Hi Becca. I love it, the roses are so pretty and the bracket border is great. Decorating the envelope makes such a difference too doesn’t it : ) Take care.
Stunning card Becca!!!!
Good evening Becca,
This is absolutely gorgeous and the envelope is inspired. I always decorate my envelopes with stamps, distress inkpads, brayer, etc. but have never thought of using dies. Guess what I’m going to do as soon as I’ve posted this!!! (lol) Hope you have a great day and regards to all bloggers xx.
Absolutely gorgeous!!!! Keep doing what you do – you have amazing talent.
Absolutely stunning! The red really pops.
Well i am loving todays card Becca beautifil style and colors
Take Care
God Bless
Elaine H X
The square frame must be more than six inches. I tried doing it using the bracket border with my Big Shot, but it didn’t work for me. I guess it can only be done with the Grand Calibur, which I don’t have. I hope you’ll do a tutorial, Becca. Thanks and great blessings ahead of you.
Evaning Becca WOWthis absolutley stunning I adore it. Now Ive seen what you have done with these dies im going to get mine out and have sgo at this one. I just love it. Take care Becca xx
Debs xx
This is stunning! Wow!
Breathtaking!
GORGEOUS! I love the Roses and your envelope is divine! TFS!
Just so beautiful. I love the envelope.
Gorgeous card! You are so Amazing!
This is simply stunning Becca! Your cards always are though!
Becca,
This card is just spectacular!! I love everything about it including the colors, layout and design. You are so clever and what I aspire to be.
Thank you for sharing your lovely work.
Vicki Robe
You have outdone yourself again, Becca. Beautiful.
ELEGANT & Beautiful! Love the matching envelope!
OooooOO Becca! I love how you made a square with the borders die. Fabulous – and soooo creative!! I must try this. The roses are just gorgeous – this is just such a pretty card. Full of inspiration! Thank you so very much for sharing it with us!
Becca,
I am from Tyler, Tx which is known for its roses and rose parades. This rose stamp has really caught my attention. The color of the rose makes that rose just pop out.
I would also like to add that I have been looking at your cards for the last four hours and it is 3:40 in the morning. They are all so fascinating to me and the sentiments are inspiring even at this hour. Your love for what you do is very evident in your work. Thanks
Becca, another stunning card, I never thought to use the A2 bracket borders in a square or as part of an envelope! You are so clever, thank you so much for sharing.
Crafty hugs
Brenda
Becca Just STUNNING Keep up with your AMAZING work
Thanks for sharing
Love Marion x
Wow!!!!
A real beauty!
Hi Becca, What a fabulous combination of dies, they ‘marry’ perfectly together, I love how you have used the bracket border, and the envelope looks gorgeous.
Lots of love from Patricia xx
Becca, that envelope is stunning! I ‘m not sure which I love more…card or envelope! LOL Stunning work on both!
that is just too cool how you used the borders for the framing and the envie, just beautiful coloring of the flowers, Gorgeous card!
Beautiful as always. A tutorial on how you put everything together would be nice and greatly appreciated.