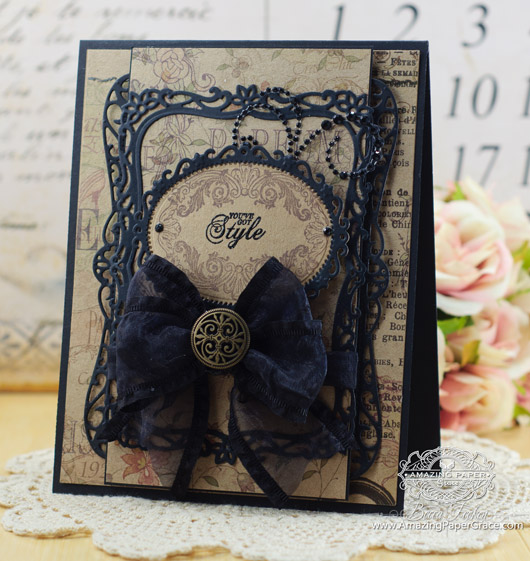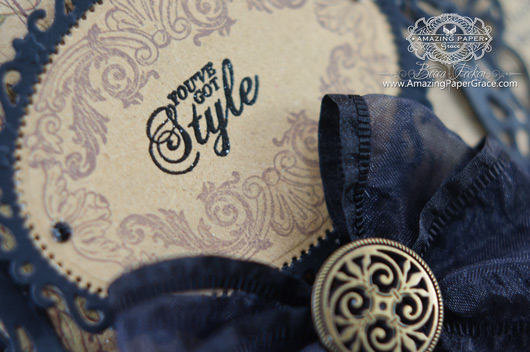 
Good morning sweet friends, I thought I’d share a quick card and post with you as I get ready for holiday events. Normally I reach for lighter colors but I love using kraft and added in a pop of black. The November releases for JustRite Papercraft include men and womens wear, shoes and habadashery. I plucked a nice frame and small saying from the Fashion Vintage Labels Six set to say You’ve Got Style. I layered it up using Spellbinders Timeless Rectangles, Spellbinders Decorative Labels Eight and Spellbinders Floral Ovals – I’ll just bet you have a couple of these in your stash :-)
 
I’m keeping it short today as I know you probably have pies in the oven and loved ones walking through the door. Anytime is an occasion for sharing whether you are in the US or abroad but in keeping with the holiday season, I wish you the best as we give thanks for all the blessings in our lives!
Here’s your Step By Step Recap of die cuts and layers, from the bottom up: Start out with a Card Base 7-1/2? tall by 5-1/2? wide (or see how to make that size with the Hinge Technique HERE) , design paper matting layer cut to 6-3/4″ x 5-1/4″, foam tape, die cut layers using Timeless Rectangles (cut apart to use as a border), foam tape, matting layer from black cut to 6-3/4″ x 3-3/4″, design paper layer cut to 6-3/4″ x 3-5/8″, die cut layer using Decorative Labels Eight, foam tape, die cut layer using kraft paper and duplicate layer in black with middle of oval removed. As always, cut everything first then stack. Position ribbon, bling and bow on correct layer, admire, then glue!
Thanks so much for stopping by, I’ll see you soon!!
 
 
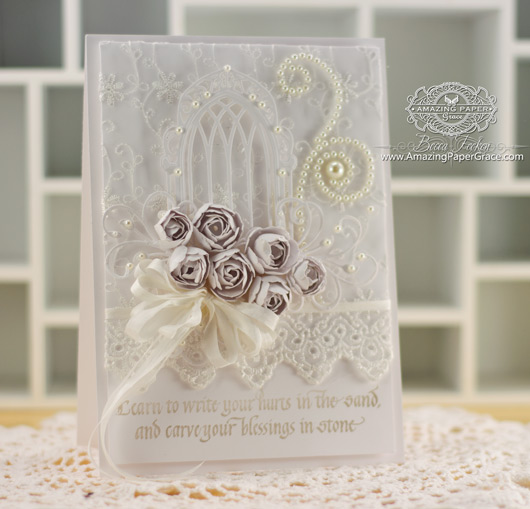
Happy weekend friends, today I have a card to share using a sentiment I love from Quietfire Design. The sentiment is called “Learn to Write Your Hurts in the Sand”; pulled proudly from my stash when I realized I’ve never used it before. It does me as well stamping it and turning the meaning over in my mind as it does sending it out to someone who welcomes the message — does that happen to you when you stamp.? I think a huge part of why we stamp is empathy – we know how we feel when we get a meaningful card and the sentiment resonates with us – at least that’s how I operate :-) In the scheme of things this is an easier card than most – instead of my normal layers, I covered my focal panel with a piece of sheer fabric that is edged with lace. Beyond that I added Spellbinders Window Three, flowers made from Spellbinders Rose Creations and wonderful tendrils from Spellbinders Sprigs (love!!)
 
Here’s your Step By Step Recap of die cuts and layers, from the bottom up: Start out with a Card Base 7-1/2″ tall by 5-1/2″ wide (or see how to make that size with the Hinge Technique HERE) , foam tape, white matting panel cut to 7-1/8″ x 5″, cover with lace fabric and sentiment stamped on the bottom, foam tape, die cut layer using Windows Three, 7 flowers created with Rose Creations and Sprigs. As always, stack, position ribbon, pearls, flowers and bow on correct layer, admire, then glue!
Thanks so much for stopping by today. Hope you’re have a sweet and wonderful day!
 
 
Hi there friends, today I’m showing something that started out as a card and ended up as something else. Lol, you’ll be interested to know that this was something I put together in way less time than it normally takes me to make an original card. I’ve been dying to use Spellbinders Celtic Knot with all that luscious texture. Once I embossed it on gold Art Foil Board and buffed it to the degree I liked, I decided the texture was way too pretty to cover up this time (maybe next time). So, out with a small wooden purse purchased at Michaels for a couple of dollars, my favorite gold Krylon Short Cuts Paint and ScorTape Sheet Adhesive. I spray painted the box and it was dry and ready to use in less than 15 minutes. I traced the purse on to my embossed panel and ScorTape Sheet Adhesive then cut them out. I applied the ScorTape to the painted purse then laid the embossing on top of the adhesive and pressed it down good with my fingertips to anchor it. I finished it off with a fob made using Spellbinders Fleur De Lis Bronze and Spellbinders Squares One mixed media bezels by Susan Lenart Kazmer. Both bezels are spray painted with the same paint (takes about 3 minutes before they are ready to handle) and one is filled with a pearl while the other was filled with hot glue before spray painting and then embellished with a pearl.
Edited to add: Purse stands 6″ tall including handle and is roughly 6-1/2″ wide.
 
All that, in a little over an hour…
Oh, please don’t forget that time is running out on a fabulous sale by JustRite Papercrafts! You have until November 24th at midnight to get 25% off everything in the store. Don’t miss out!! Here are the details:
 
We are very excited to announce that our log in issue with our new website has been fixed. Thank you to everyone who helped us trouble shoot the issue. In celebration we have a Grand Opening Coupon Code for you to use in the store – simply type RESET (all caps) in the coupon code box at check out and you will receive 25% off your entire purchase. If this is your first time shopping in our new website – you will need to reset your password. You may use your password from our old website or you can create a new password. Have fun shopping!
Have a great weekend sweet friends!!
 
|


I love this! So elegant and although it’s dark colors, it’s very lovely!
Gorgeous. I love the black and kraft together and all the lovely layered die cuts. Becca, you definitely have style!
I love all cards. So beautiful. And I also like the Kraft paper.
I do have a question: how do you sort and find “your stash”?
I see something on your card I like then when I am shopping I
can’t remember if I have that Spellbinder. I don’t have one of
those I Phones or SmartPhones that some of my friends use
to keep track of their “stash” Thanks again.
Another lovely creation – if only I had half the style you have!
Blue is my favorite color so naturally i adore this card.
The navy and kraft are just beautiful together Becca!
Love these colors! WoW!
What a snazzy card! It’s just terrific in every sense. TFS.
Wishing my American neighbours a Happy Thanksgiving from me in Montreal. In Canada we “officially” gave thanks back in October. Guess when you get right down to it, every day is a pretty good day to count our blessings. Enjoy!
Lovely, dramatic card! Love seeing older favorite dies circulating back into play. Beautiful!!
Another stunner here today Becca. It is absolutely gorgeous work hun, and I so love this one. Really beautiful work as usual.
You are right about having some in our stash! I have almost 3 Art Bin boxes full so not too many I don’t have ~ however, when I see one u use that I don’t have,, just have to go and order it. LOL
Love the kraft with the midnight blue ~ wonderful combination. TFS.
Becca, I hope you have a wonderful Thanksgiving with your family! I look so forward to getting your email blog every day you send one!
Hugs
Mstgane
Ann
Absolutely Gorgeous!!!! This is Perfect for my Five Daughters.
Thank You soooo much for taking the time to not only create it – but
posting it for us at this time
Praying for you and your health, please be careful
God Bless,
Joyce Anderson….still Struggling with the Gilded Gate Card—oy!
Hello Becca!
I really love this combination of Black and Kraft absolutely beautiful!
It will be a while before I am the owner of these stamps… though……. I do have the Dies, so I can prepare for when the Christmas season is over, and all the presents have been bought!
Until then I will keep your designs in mind as they are inspiring Becca!
Take care
LoveMarg
What an inspiration you are. I had lost my Mojo for a while and youhave just freshened up everything in my craft room. Bless you. Off to the craft room to creat. Love Lorraine (FDU= From Down Under)
Oh Becca! This is so chic! Love the elegant colour combination.
Hugs
Anne (UK) x
So debonair my Deara, very catching! And yes I have those dies, lol. You have a wonderful Thanksgiving and enjoy all the good food…we will all have to diet until Christmas!
Love this card, Becca! I love anything vintage, but the colours are stunning! I think I have to get the stamps! I had ordered from JustRite in September but May have to again, soon?! Thanks for your inspiring creations always!
That is so gorgeous!
Stunning! Love the color combo! Becca your cards are always so wonderful to look at, just like a piece of Art.
Hi Becca
Wow what a beautiful card ,i will be having a go of this one later today ,thank you for sharing , have a wonderful Thanksgiving and may God Bless you and yours and keep you all in good health .
Elaine H X
I like the black Becca. Outside your box but it worked beautifully.
Beautiful, such a lovely elegant look to it with the black and the gems! Have a Happy Thanksgiving!
I love this card, it is so pretty. I love how you used the rectangle paper between the dies, different but is so pretty. I have all 3 of these dies, so I see a copy of your card coming up for someone special. thanks
Such a beautiful card as always, you really are amazing and have such inspirational ideas, thank you so much.
I have just heard on the news here in the UK that storms are forecast for the USA tomorrow, please stay safe. Do have a wonderful Thanksgiving.
With love
Margaret
Gorgeous……
This is amazing!
The dark color adds a rich and elegant feel to this card. Great choice!