 Hi there, as promised I’m back with the tutorial that shows a different way to make bows with the Peg Bow Maker. It’s really a nuance of other versions I’ve shown you but is something I figured out from frustration. The way this is put together the loops come out separated so that you don’t have to fuss with the bow so much. Yes, I fuss, and fuss and sometimes fuss more!! I put together a card yesterday that shows a six loop bow and the one on my card today is a two loop bow. I’m equally at ease tying bows by hand but I love having the extra hand using the pegs.
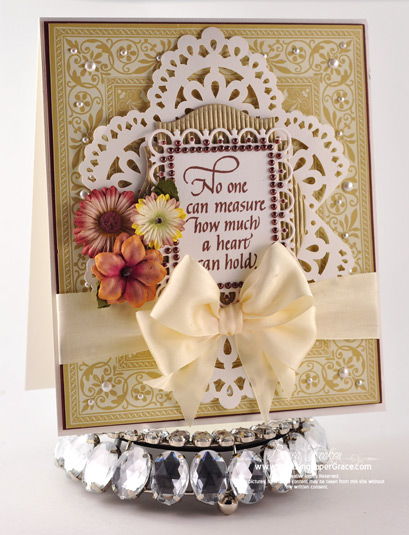
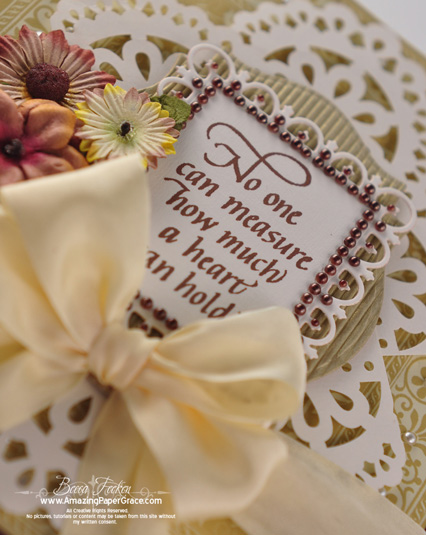
So I’ll tell you a bit about the sample. I used another wonderful sentiment from Quietfire Design called No One Can Measure. The base layer is a decorative card stock with pre-applied pearls by the Paper Studio (HL) that I cut down into fourths and pieced together to make a background. The lacey paper is a piece of Anna Griffin (found at Michaels) and these were leftovers from another card – not a smidgen went to waste. On top of that I layered Spellbinders Labels Eighteen cut from corrugated gold paper from K & Co. (found at AC Moore) then topped with Spellbinders Fleur de lis Rectangles. I think I did a happy dance when I applied the Want2Scrap Nestabling right on top of that Fleur de lis Rectangle – they’re so easy to get on and it looks like you applied each pearl individually!! (If you click over to see what I used, I used the second tier of pearls out of the four tiers you get with the set).
The last thing I did was add a couple of flowers and tie on my Figure Eight Loops Bow!
ETA: After a year online, video has been retired. I spent a year perfecting the bows and making the techniques consistent and remade all the videos into a collection I’m really proud of. This bow is made much differently now and can be found on the DVD that accompanies the professional looking version of the bow maker – HERE.
SUPPLIES I USEDStamps: Quietfire Design – No One Can Measure
Paper: Anna Griffin, The Paper Studio, K & Co, Bazzill, Strathmore Acrylic
Ink: Colorbox Chalk Ink – Chestnut Roan
Accessories: Prima Flowers, Want2Scrap Pearls – Fleur de lis Rectangles (Mocha Pearl), Ribbon, Spellbinders Labels Eighteen, Spellbinders Fleur de lis Rectangles
Bless you all! See you soon!!


Hi Becca ~ as always, your card is just beautiful! And the colors!!
Thank you, Blessings.
Beautiful!
BECCA JUST ANOTHER FANTASIC BOW . ONE AFTER ANOTHER.
\JUST DON’T KNOW HOW YOU DO IT. GOD SURE BLESSED YOU
WHEN YOU WERE BORN. JUST KEEP IT UP.
CYNTHIAZ
Oh what a beautiful card Becca!! A great tutorial and you always make them so easy. Many thanks.
Love Sheila xx
Thanks for another bow tutorial.
I would like to ask how you get the spellbinder layers so nice. I will use the 2 dyes next in size and the larger size is still so much larger than what I would really like to have it on my card. I have cut the image down to the embossed impression to get the size I am looking for. Is there a set that goes in between?
Thanks again for your wonderful designs and sharing your knowledge. You do have a gift.
As always, a fantastic tutorial. You really do inspire my card making with your brillant technicques…thank you.
Super easy tutorial and what a beautiful bows!
Becca, you have the most wonderful tutorials. I just love your creations. Thanks so much for sharing.
Thanks for the fantastic tutorial. You are so clever.
WHAT A GORGEOUS CARD BECCA!!!!! :) VERY FEMININE!!!!!!!!!!! AND your tutorial is SUPER!!!! Thanks for showing us a better way to do a peg bow!!!!!! :) YOU’RE SUPER!!!!!!!!!!!!!!!!!!!!! :)
I am loving my peg bow maker! I thought I was pretty good at bows by hand, but I got a lovely comment from a fellow crafter last night! I was showing her my new fold and tuck technique (new to me), but it was the bow on the card that she noticed! Thanks so much!
This is a beautiful card and your tutorial was great. I love my peg bow maker!
This can be done on a bow easy too. You have to scrunch the ribbon up more to get it all on the legs but it works great!
Rebecca, I always had a hard time even doing a double wrap on a Bow Easy. Probably me and my uncoordinated-ness :-) This way is, way less frustrating for me!
This is a great part 2. I was having the same problem you described with my peg bow if I tried for a double bow. Thank you for your help.
What a beautiful sentiment and card, Becca. And thanks for the newest tutorial for the BPBS. I have a ME day tomorrow and I am going to Michael’s to get some yummy new ribbon to use with my BPBS. As always, thanks for the inspiration.
Beautiful card, Becca. Thank you for another very useful tutorial. I’ve got to get busy and make me a peg bow thing-y!
Hi Becca, I love watching all the wonderful things you teach, you are amazing at what you know and we don’t! Your new peg bow tutorial is not viewed in its entirity. We lose you when you go to tie the bow. So we either have to figure it out ourselves or perhaps you can redo things so we can see it all. Thanks so much and may God shine his light continually in your heart each day as you continue to heal
Beautiful card and once again, thank U 4 the wonderful tutorial
ColleenB.
Lovely! (as usual!)
Gorgeous card and thank you for the tutorial!
Love them!!!
Becca, This card is just beautiful, the colors and all the embellishments are just perfect together. I want you to know that I’ve noticed all the extra details you’ve included about the exact items used on your cards yesterday/today and with the links provided. That means so much to me that you thought to take the extra time to do that for all of us.. This latest Peg Bow tutorial is also great and appreciated. I sincerely THANK-YOU for everything you are showing and teaching me! God’s light is shining forth through you and your blog.. Blessings & Hugs
You inspire me sooooo much. Your bows are beautiful, IGOTTA have one of those thingies!!
Becca, thank you so much for being so generous and gracious. Your work is so lovely…to look at and it is so kind of you to show us how you do it!
Your card is just stunning, as always :)..Wonderful tutorial on the bow, thanks Becca.
I love my little pegboard. I am so gratefull that you share. I will go and try this new way out. Marilyn
I just love my little pegboard. Thank you for sharing… I will go try out the new bows :) Marilyn
Hi Becca.
Thank you for this great tutorial! I was always having trouble to get the loops seperate from eachother but now i know how to create the perfect bow. :)
Such a beautiful card, and what an awesome bow too. I just love all your different gorgeous bows. They always looks sooo perfect and sooo lovely and just makes all your cards pop out everytime.
And thanks sooo much for always sharing all your great ideas to help all of us here too. You´re truely amazing. And thanks so much for that.
Beautiful card Becca, I love the sentiment and your bow is just so pretty. Thanks for the video showing us how you make some of your bows. As always Becca, TFS!!! :-D
[…] used the newest technique, Figure Eight Loops on my Peg Bow Maker for the little bow and the Ruffled Flower Tutorial to create a little eyelet […]
Thank you for sharing your knowledge and incite with us always.
Great video! Thanks for sharing.
Again a totally beautiful sentiment , your card is gougeous
Hugs Susie Sugar xx
Hey Becca, you sure make some lovely Bows. And I love your cards too! TFS
Hugs, Jessica
Becca!!! Great idea! I have got to try it
thanks for sharing another great tip.
Such sumptuous colours and love that sentiment!
Hugs
Anne (UK) x
Thanks for sharing your talented ideas. Love your work.
I really love this card. I was wondering where you got that card stock. Leave it to you to cut and piece and make such a beautiful creation. And that sentiment is awesome. I’ve already gone to their website and found several stamps I can’t live without (?). Thanks so much for making all your beautiful creations and sharing them with us.
You make everything look soooo easy as always.
LOL Eileen
Beautiful card Becca. Love the colors. You make everything look so easy.
Thanks so much for all your great idea’s you are such a blessing to all of us! God Bless!
[…] Rectangles mounted on top of Spellbinders Labels Eighteen. On top of my Peg Bow, tied using the Figure Eight Loops technique, I mounted a little butterfly from the Spellbinders Fanciful Flight […]
[…] simply Google Hug Snug) that I dyed with Victorian Velvet Distress Ink reinker and tied with the Figure Eight Loops technique on my Peg Bow […]
[…] for the center. I added some lace and sheer ribbon tied with my Peg Bow Maker as shown in this Figure Eight Loops Bow Tutorial. The card base for this card is 5.5″ x 7″ – my favorite size card and I […]