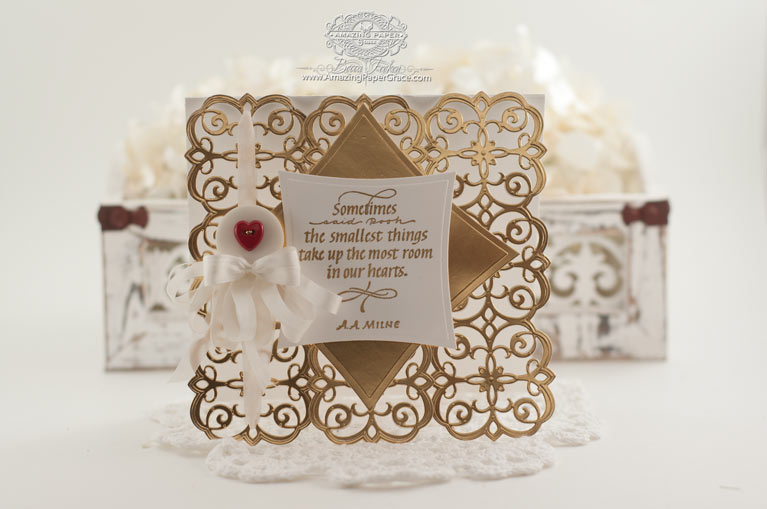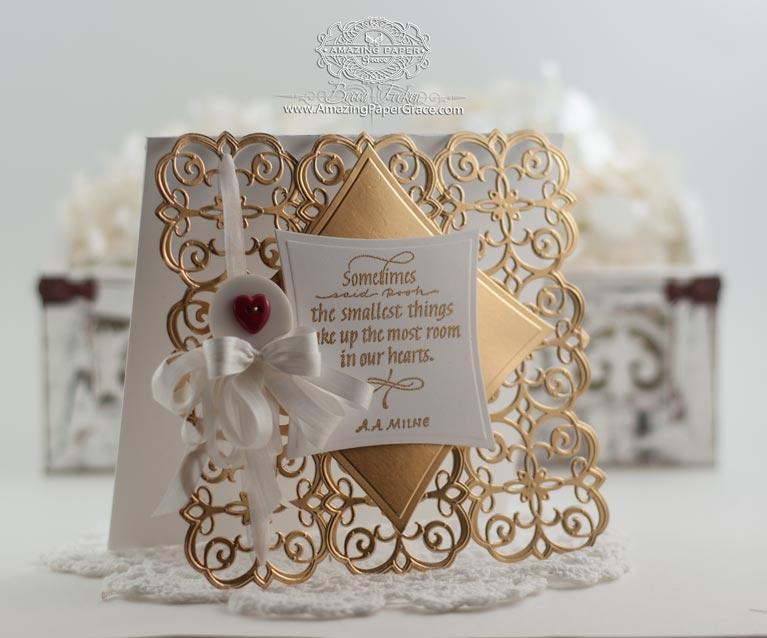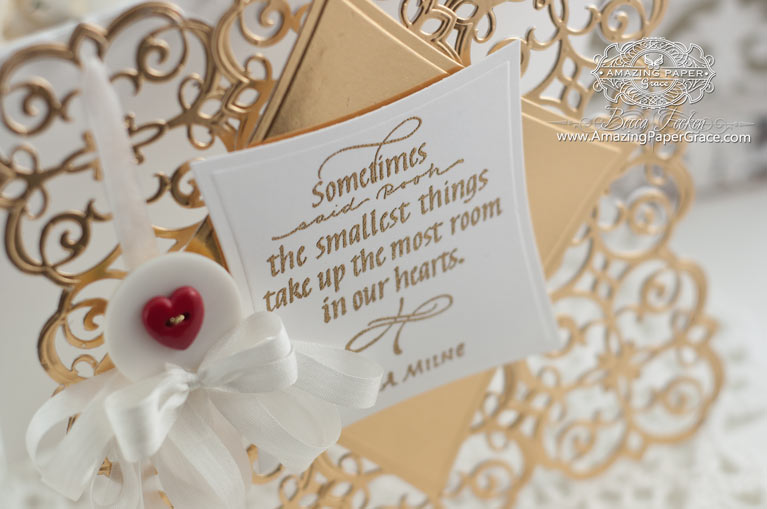
Sweet friends, Happy Monday to you!! I hope you all are faring well. I’m popping in to share a filigree card that is my kind of Valentines card. Lots of folks give one big card for their number one sweetie and I say that for Valentines Day you can have lots of sweeties – I feel that way about my kids, close friends and people who sweetly offer kindness. I love this sentiment from Quietfire Design – Sometimes Said Pooh and I thought it perfect for my Valentines Card because even the very smallest things take the most room in our hearts. Over the weekend as I collected colors and such for this card, I can’t tell you how much joy I felt in making it. I used a couple more of my favorites – Spellbinders Mary Border Strip and Spellbinders Curved Square.


I normally say that cards are easy peasy but I’ll be honest to say that this one is achievable with patience. It’s made using the same technique I’ve previously done in a tutorial here on the blog called How To Make an Encased Border, only this time it’s on a larger scale. The base of the front is made by cutting the inlaid portion of Spellbinders Mary Border Strip three times into a front panel that is 5-1/2″ x 7-1/2″ – scored 1 inch down from the top. (I pinpointed how to place the three borders after doing the center border then pencil marks to give me an idea how to line up the two outside borders). To the flap/hinge, you add a panel big enough to be the back side of your card. You can see what the front of the card base looks like below.

The beauty of this card is that three whole cut borders are simply glued on top of the base I described above. These 3 pristine cut borders cover up the base as well as any markings I’ve made. How are they glued? Well, at CHA I zipped over to the Scrapbook Adhesives booth and begged them to let me try their sheets of adhesive. I have to tell you this is a win!! This card needed full coverage and the sheets of adhesive at Scrapbook Adhesives performed beautifully. I simply added the adhesive sheet (here are the 4 x 6 Adhesive Sheets and here are the 6 x 12 Adhesive Sheets) to the backside of my gold poster board prior to cutting and once cut, I pulled the liner off and voila, I had a big die cut sticker.

Now, I was easily able to line up matching all the corresponding holes on my front card base and it gives the illusion that I cut the background in one large piece, out of gold. I finished up the card by adding two panels cut with Spellbinders Curved Square. Finished Card Size: 6″x 6″
Edited to add: Oops, forgot to add that after these behind the scenes pictures were taken, I decided I did not want any white to visible on the front panel – there are a couple of places in between dies that I went back and trimmed the white out between inlay 1 and 2 then between inlay 2 and 3.

Rubber Stamps: Quietfire Design – Sometimes Said Pooh
Craft Paper: Neenah Classic Crest Solar White – 110lb smooth, Gold Poster Board Hobby Lobby
Ink: Versamark and Ranger Gold Detail Embossing Powder
Accessories: Spellbinders Mary Border Strip, Spellbinders Curved Square, Adhesive Sheets, May Arts Silk Ribbon, Buttons from my stash
 Thanks so much for stopping by! Tomorrow I’ll share the project I taught at CHA using dies from my new collection available in March 2016. Hope to see you!!


Wow! What a fantastic idea. I don’t have this exact die but might have one that would work. Thanks so much for giving us exact how-tos. Can’t wait to try this.
Love the intricacy of the borders strips and the use of three together. Gorgeous card. Another winner!
Wow, wow, wow…this is absolutely gorgeous, Becca!!!
GORGEOUS CARD! Becca you have done it again created a remarkable beautiful gorgeous card. Looks so elegant-I will need to see if I can find this die cut locally. Keeping my fingers crossed. Thank you and have a great day.
Wonderful card for a Valentine. Yes it is often the small things that take up a huge protion of our heart.
Simply stunning. I think I will need to allow myself a free afternoon to sit and work on something like this – or attempt to!! I don’t have the Mary border but something similar. It really is elegant and rich! Hugs Christine xx
I have seen these adhesive sheets being used but none in any stores yet. You are so creative. Love the god and open front frame of this card. Not sure however I am.ready to pray for a snow day to spend the day being creative. ….
Beautiful! I love that this card could be used for many occasions!
Gorgeous card, I love Winnie the Pooh sentiment, thank you again, I look forward to see what you create with your own dies…
WAUW you´ve just done it again here Becca. This is so gorgeous and sooo beautiful in every detail. It screams of elegance and love all over it, and the sentiment is once again hitting right in my heart, soooo beautiful.
Absolutely beautiful as usual. I have these dies and now the challenge will be to see if I can accomplish this design. Thanks for sharing.
Hi Becca what a beautiful card. I am lucky as I have this die (bought it after seeing one of your previous cards) so I think I will be having a go at this card. Thank you for the inspiration.
Wendyx
This is such an unbelievably beautiful card. Thank you for the detailed instructions. This one I really want to make. Thank you.
Oh that would make a beautiful valentines card. I have a different striplet so must give it a try.
Oh Becca! You are so clever! I would never have thought to that! Thank you so much for showing us how you did that. I’m definitely going to give this a try!
Be still my beating heart!!! Absolutely fabulous, Becca!
Hugs
Anne (UK) x
This is absolutely gorgeous, Becca! It takes my breathe away!
Hi Becca
I am so excited to see your beautiful ,beautiful card , i have this die but have never used it in this way, thank you so much for the Tutorial , i will give it my all this coming weekend.
Take care
God Bless
Elaine H X
Hi Becca, Beautiful card and without your instructions I would not have figured out the process. Your technique gives the card stability in spite of the delicate cut outs. So looking forward to tomorrow’s card based on your original die design. But all of your cards are good. Barbara
Hmmm…not sure if I’m following you on how you did this or not, but it’s just beautiful! LOVE this die, it’s one I actually have (I don’t have a LOT of dies) so…I could actually do something like this, if I could figure it out. LOL I do LOVE all your gold! I so have to get me a minc machine…just can’t afford it right now, but hopefully I can before the year is gone. :-)) Beautiful card as always!
Hi Deb, I love what Becca does also but I can’t afford a minc machine at the moment either. I has used gold poster board from hobby lobby. It’s not as nice I’m sure as a minc machine but it’s not too bad until I can afford the other. The board comes in like 81/2 x 11.
Linda
You are AMAZING; you know that??? That is such a great idea!!
Do you know when the ‘Swirling Grace’ die will be available to purchase?
Thanks!
Hi Becca,
I love this idea, very clever. Its also a versatile card! Not sure if I can make it but will definitly give it a go.
Have a great Monday ~ Noelene x
Hi Becca! I recently discovered you, and WOW, you are fabulous! Your cards are pure art. I look forward to learning a lot from you. I need to start collecting your beautiful dies. Thank you. From your new fan!
Absolutely stunning! What more can I say?!
Doreen R from Bournemouth UK
I really love this filigree card. Thank you so much for including instructions. Hope you are having a truly lovely day!
Absolutely stunning card!
Hi Becca Great way to use border dies the way you have done this
gives it more body and makes it stable to display.
Gorgeous card as always!
Thank you for your instructions will have a go ( when I have a few HOURS to spare lol )
Congrats to Jeannine you lucky lady PamXXX
Oh my goodness gracious! I love this card, indeed I do! Lots of patience for this one…and it shows. It is just gorgeous! Thanks for sharing this…somsweeeeet!
Joni
You certainly think outside of the box when it comes to dies, awesome idea! Beautiful card Becca! Thanks for the wonderful inspiration!
Hi Becca. I absolutely love this, it’s so beautiful. Thanks for sharing and the extra photos of how it’s made. (May try and have a go myself at something similar) Hugs xxx
Sooooooooooo pretty….thanks for always thinking of us and sharing!!!
Beautiful card. lOVE THIS BORDERDIE.
Oh My! Another card today. Yippee – doodle!!! This card is lovely. I had to go back and review your “Encased Border” technique. Intriguing. Thank you for doing all the “figuring-out” for us.
Love it and will try it using a different boarder. Thank you for another beautiful card. Aiveen.
Hi Becca,
Thank you so much for sharing your expertise, along with the beautiful card. I can only hope to achieve a portion, of the end results you are capable of, but that is more than I could do without your help. So, hugs to you, for your kindness.
Beautiful! What a perfect Valentine! Thank you for sharing this beautiful card and your technique for creating it.
Another intricate beauty ! Have to try this one, too…Thanks for sharing ! Hugs from Aruba …
Simply elegant. Love the little red heart and the sentiment. Pooh will always be special.
Good morning Becca, you knock my socks off!!! Thanks for sharing you sweet angel!!!
Have a good one!!!
Loopy Lynda xxx
Beautiful card today. I truly appreciate the instructions as to the construction of this beautiful card. I would have never figured this one out. I will look for the adhesive sheets you used. Can’t wait to see your new creations with your new dies. I have pre-ordered it already!
Love, love this card! That’s a great tip to use your die that way. I’ll have to look through my dies to see if I have one to use in the same way. Thanks for sharing your beautiful card!
Absolutely love this card!
Wonderful way to use this beautiful die. Always great ideas, Becca! Thank you.
Beautiful and elegant filigree. Lovely!
This is exquisite Becca! Just stunning!
This card is so Becca! Love it as always.
Stunning card. Love your use of lace and your ribbons. You always know exactly where to place things for the most impact. Beccalicious!
Oooops! This comment was meant for the card posted on 1/14/2016.
So sorry!! I meant 1/24/2016. Guess I need to go to bed.(;~)
Before I go, I most show my appreciation for the card posted above. It, too, is beautiful and is another teaching moment. Much love. TFS!
Hi Becca, A fabulous tutorial and a most beautiful card, I’m loving the red ‘heart’ button, so cute !!
I’m looking forward to tomorrow and what you taught at CHA.
Lots of love from Patricia xx
Wow stunning card, I love it! It looks really hard lining that up but well worth it if you have the patience, may have to attempt this one very slowly!! lol
Good morning Becca,
This airforce blue coloured card is so pretty and shows up every detail that the beautiful intricate dies have. I love how you have accented it with the pearls as they give it a much more sophisticated look that rhinestones don’t have. The lace that you add along with your stunning bows just add that jeu ne sa qui that always makes your cards something so out of this world for me. Thank you Becca for another stunning work of art.
love and crafty hugs
Norah (Glenochil Village, Scotland)
Good morning Becca,
Sorry flower that last comment was meant for the other card, doh i am stupid.
This gold Mary’s border die card is one that i am going to try with dies that i have at home as this is such a beautiful card but there again i saw the video a while back of your doing just the border along the bottom of the card base and it was so pretty and gave and entirely new look, a more luxurious feel to the card. I like how you always seem to have the perfect sentiment on them to the point i wonder if you can get hold of these sentiments back across here in the UK. Take today’s sentiment, there has never been a truer word spoken than that i think. Thank you flower for a stunning creation and for sharing with us your ideas and how you acheived them.
love and crafty hugs
Norah (Glenochil Village, Scotland)
Wow! This is such an elegant beauty. Certainly a lot of aptience involved.
Wow – this is just amazing!!!
This is just amazing!
So beautiful!
Despite your great explanation, I had problems to figure out how you really made this – I blame my English ;))
This is right up my alley. Thank you so much Becca, for your insightful gift of dies that can be used as an ensemble for Weddings, etc. Right now I am trying to put together just such an ensemble for my Grandson’s wedding and can’t wait to use your dies. Looking forward to the …rest of the story! Hugs, Sara
OHGosh this card is stunning. Gold is so rich and warm. And the sentiment – gotta love Pooh! Going to break out my Mary die and give this a try – wish me luck & patience. Thanks for the introduction of the full adhesive sheets – gonna look for those! Thank you again for your inspiration and sharing of your wonderful talent!
Stunning card
Dear Becca, what a pretty pretty card. Thank you for the great tutorial on this card. I watched your video and I think you did great for being outside your comfort zone. Your a wonderful beautiful talented woman. Be proud of what you have done and accomplished.
A truly elegant card, Becca! I love the beautiful border die you used to create this card. Such a lovely card!
Hi Becca,
Sorry not been around my PC has died so at the moment I have grabbed a laptop at work to message this to let you know I shall be off for a while but will check everything when my PC is working again.
Gorgeous card, loving the die used.
Love & hugs
Jacquie J xxx
This card has me speechless….all I can say is:
W O W